Advanced Preparation
On each sheet 9”x12” watercolor paper, cut the paper into three sections long ways. Each student will need three of these for their petals.
Pre-cut 9”x12” watercolor paper into half sheets. Each student will need a half sheet to draw out their centers for their flowers.
Use lids in different sizes as templates for circles or pre-cut circles to save time. Students will need 3 different sizes of circles to trace out on their half sheet of watercolor paper.
Print out a copy of the Color Wheel as a visual reference when speaking to the students about the different colors in this lesson.
Plan the lesson before and after a recess/specialist so that the paper can dry while the students are out.
Alternatively, flower templates can be pre-printed on sulphite paper for students to paint: Flower centers and petals.
Tips & Tricks
- Demonstrate each step before students do it.
- When having students do the wet-in-wet technique, make sure to remind them not to overly saturate their paper. This will have all the colors all mix into one color. The main objective is to see the 2 primary colors used and have them be able to see the secondary colors that are created with the colors are mixed.
- Remind students when mixing colors that the darker hues require less paint, mostly yellow with a touch of red or blue. Red & blue may look brown unless watered down.
- Have students mix their secondary colors first, while these are drying, demonstrate and have them make the primary color washes on each circle.
- Keep paper towels at hand to blot puddles and mistakes. Never rub wet paper with a paper towel, only blot.
- Either blow dry or air dry (if coming back for a second visit) paper before gluing.
- When having students glue down their centers and petals, encourage them to keep in mind the distance between petals and to glue down accordingly. I often ask students to arrange everything on their cardstock first and when they like their composition, they can begin gluing down.
Discussion Points
- Explain how to ‘read’ a color wheel.Point out the primary colors and the secondary colors and how mixing the primary colors, we can make Secondary Colors.
- Show the complimentary colors, explain that they are across from each other on the color wheel.
- Discuss with the students the objective of wet-in-wet watercolor technique and as they are doing this portion of the project, point out the unpredictability of the paint as is swirls around with the other color and mixes creating new colors.
- During the lesson. Keep repeating the combinations (who made green? How?) and talk about different shades of green orange and purple to validate their individual mixtures which may not all look the same.
Reflection Point (Assessment of Learning Objectives)
Ask a student to name their 3 primary colors and ask another to name 3 secondary colors created in this project.
Can students see the 2 primary colors in their painted sections and were they successful in creating areas where those 2 colors mixes to make a secondary color?
Check to see if students followed the directions to match each colored circle center to the respective complementary secondary color.
Instructions for Lesson
Prior to the start of the lesson, place the watercolor paper stripes, watercolor paints, pencil, brush, paper towels and water containers on desks. I recommend that each student has their own container of water, since the water gets dirty very quickly.
Petals
- Have each student put their name on the back of each piece of paper.
- Demonstrate drawing a petal. Draw several different petal shapes on the long pieces of water color paper.
- Take the three long pieces of water color paper and have students draw their petals lightly with pencil.
- Demonstrate how much water to fill their brush with, drag the brush bristles along the edge of the water cup to drain extra water and cover the entire piece of paper with water.
- Students wet one piece using their brushes making sure the entire area is wet, not puddled. Remind students we are only going to work with one piece at a time.
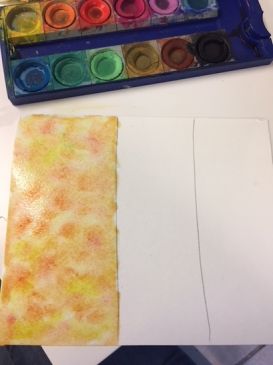
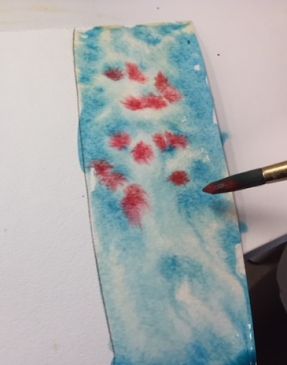
- Demonstrate swirling their wet brushes into their yellow paint and dabbing the tips of their brushes in the wet areas.
- Have students swirl their wet brushes into their Yellow watercolor paint and dab the tips of their brushes in the wet area of the paper making dots of yellow all over the area. This process is known as wet-in-wet since we are using wet paint to paint into a wet area. This will make a tied dyed effect. Have them clean their brushes and now swirl their brushes into their red paint and begin to add their red paint onto the wet area of the paper taking time to dab in the color around the yellow. They will fill out the entire remaining area so no white is showing. Remind students to work quickly since we don’t want the water on paper to dry. Students should now start to see that the red and yellow are beginning to mix in areas making an orange color. This would be a good time to explain to them that they have just mixed a secondary color (orange) using 2 primary colors (red and yellow).
- Set that strip aside and move to the next one, allowing the first one to dry a bit. They will now move onto their next area repeating steps 4-5 using yellow and blue, and then blue and red. Always add the lighter color first so they have more control over the mix.
- Set these strips aside to dry and hand out the paper for the centers (circles).
Centers – Hand out the watercolor paper (circles) and circle templates.
- Have each student put their name on the back of each piece of paper/circle.
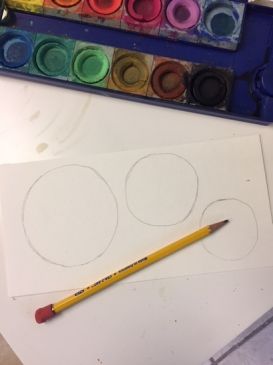
- Demonstrate drawing a circle using a template and cutting it out (or cut out the circles in advance to save time)
- On the half piece of the watercolor paper, each student will trace in 3 different size circles using stencils in various sizes.
- Cut out the circles.
- Demonstrate how much water to fill their brush with and how much color to put on the brush.
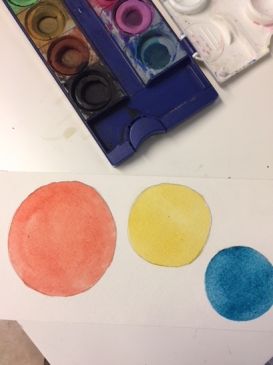
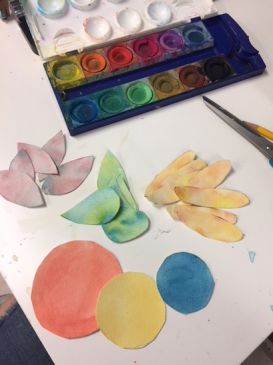
- Students will now dip their paint brush into their water and swirl their brushes into one of their primary colors in their watercolor paint palette and will paint in any one of their circles.
- Have students repeat this process for the remaining 2 circles with the other 2 primary colors making sure to rinse their brushes clean in between colors. Set these aside to air dry.
After all sections of the paper is dry resume the lesson.
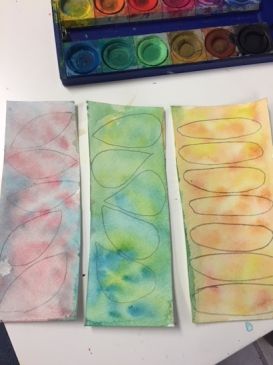
- Students will cut out their petals from the secondary color strips.
- Students could cut leaves from the left-over green strip.
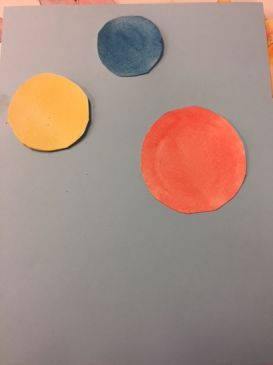
- Have students glue each of the 3 primary colored circles down on the cardstock paper making sure to leave some spaces in between each circle.
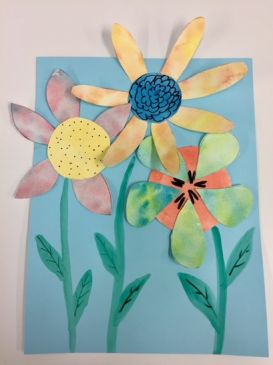
- Now, have then get their orange petals and glue them around their blue circle. This is a great time to explain that they are now gluing down their petals onto their complementary color centers. Hold up a color wheel and show the students again what complementary colors are. Petals can be glued coming off the edge of the page. This will add a fun and dynamic effect.
- When all petals are glued to their respective complementary color centers, have students draw in a stem for each flower using either markers or sharpies. They will add a line from each flower to the bottom of their paper and they can also add leaves.
- Using their various colored makers, students will now add designs or details to the center primary colored circles to make their flowers more interesting. Encourage them to add lines to the leaves on the stems as well. They now have beautiful colored flowers having mixed their primary colors to make secondary colors!
References and Attributions
Lesson written by Cameron C. Kim, inspired by Deep Space Sparkle.
Notes for Educators
21st Century Thinking Skills
Observing, making connections, visualizing, sequencing, compare/contrast, creating, innovating, reflecting, thinking flexibly, taking responsible risks.
WA State 2017 Learning Standards
(VA:Cr1.1.1) a. Engage collaboratively in exploration and imaginative play with materials.
(VA:Cr1.2.1) a. Use observation and investigation in preparation for making a work of art.
(VA:Cr2.1.1) a. Explore uses of materials and tools to create works of art or design.
(VA:Cr2.2.1) a. Demonstrate safe and proper procedures for using materials, tools, and equipment while making art.
(VA:Cr2.3.1) a. Identify and classify uses of everyday objects through drawings, diagrams, sculptures, or other visual means.
(VA:Cr3.1.1) a. Use art vocabulary to describe choices while creating art.
(VA:Re7.1.1) a. Select and describe works of art that illustrate daily life experiences of one’s self and others. This is present if students compare their work with their peers.
(VA:Re8.1.1) a. Interpret art by categorizing subject matter and identifying the characteristics of form.
Please note: These lesson plans are intended for non-profit use only. Use of these plans for commercial purposes should give attribution to the Issaquah Schools Foundation and be accompanied by a nominal donation at www.isfdn.org/donate. Thank you.
Donate Now