Color: an element of visual art; the visible range of reflected light. Color has three properties: hue, value and intensity.
Symmetrical/Formal Balance: having balance; exact appearance on opposite sides of a dividing line or plane.
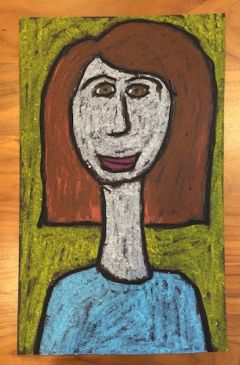
Amedeo Modigliani was a late-century European artist who never lived to see his success. His portraits are uniquely proportioned with elongated faces in very bright colors.
Research examples of Modigliani’s art (check out a book from the library or download images from the internet). Also, find images that are self-portraits and portraits. Some good choices are Vincent Van Gogh, Frida Kahlo, Pablo Picasso. Also, find examples of still life and landscape.
Obtain a color wheel.
Pre-cut the black paper to 9 x 15” size.
Introduce the lesson by discussing what a portrait is. Discuss the difference between portrait and self-portrait. Show examples of portraits and self-portraits. Talk about how photographs are portraits.
Talk about why a portrait is different from other types of art. Contrast portrait artwork with other art forms such as landscape and still life. Show examples of landscape and still life. Ask class to observe and comment on the various artworks.
Define reflective symmetry, two images that mirror each other. To demonstrate, show a butterfly. Point out that the wings of one side of the butterfly match the opposite side. Point out the line of symmetry is between the two wings, through the butterfly’s body. Talk about how a human face shows reflective symmetry. Using your own face or another image of a face to demonstrate the line of symmetry, cover up half the face and point out the line of symmetry. Point out that one side of the face mirrors the other side of the face. It is reflective or opposite the other side.
Line of symmetry is the line you can invisibly draw down the center of a piece of art to show reflective symmetry.
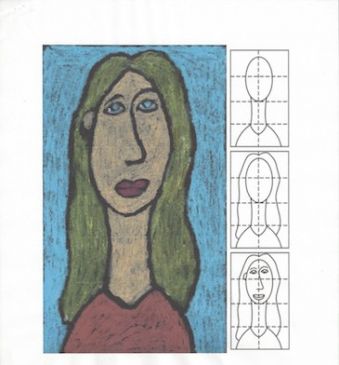
Discuss the inspiration for this lesson. Show the example of Modigliani’s portrait then ask the class what they notice. The face is stretched out or elongated. Ask the class to point out the line of symmetry down the middle of the face. Tell the class that today, we will draw a portrait in in that same stretched style. We will change the typical proportion of a face, but the face will be symmetrical. One half of the stretched face will mirror the other side.
Demonstrate the typical facial proportion by either using an artist’s portrait or draw a simple face on the board for students to see. Point out that usually the eyes are in the middle of the face, the nose is half way between the chin and eyes. The mouth is half-way between the nose and the chin.
In this lesson, students will learn about portraiture so they can draw a symmetrical face in the style of Amedeo Modigliani.
Can the student tell you about what is unique about Modigliani’s portrait ?
Can the student tell you about the differences between portrait, landscape, and still life?
Did the student create a portrait in the style of Amedeo Modigliani using oil pastels?
Lesson adapted by Robin Reents.
21st Century Thinking Skills
Observing – Using your senses to learn about something in detail.
Comparing/Contrasting – Looking for similarities and differences.
Sequencing – Arranging things in order.
WA State Learning Standards
(VA:Cr1.2.2) Creating – Investigate, plan, make. Make art or design with various materials and tools to explore personal interests, questions, and curiosity.
(VA:Cr.3.1.2) Creating – Refine and complete artistic work. Discuss and reflect with peers about choices made in creating artwork.
(VA:Pr4.1.2) Presenting- Select, analyze and interpret artistic work for presentation. Categorize artwork based on a theme or concept for an exhibit.
Arts Integration Opportunities
Math – fractions. Students can discuss fractions with regards to the proportions of the face. The face is divided into halves, quarters and eights. The eyes, nose, mouth are in the fractional portions of the face.
Math – symmetry. Students can divide geometric shapes such as circles, triangles, squares, trapezoids along the line of symmetry. Students can use rulers to design their own symmetrical, geometrical shape. Students can draw the line of symmetry in their created shape.
Science – observation and data collection. Students can look to nature to find examples of symmetrical shapes. For example, butterflies, insects, spiders and some leaves. Students can draw the example and draw the line of symmetry on the object of nature. Students can label one side of their symmetrical shape and see that the other side matches.
Please note: These lesson plans are intended for non-profit use only. Use of these plans for commercial purposes should give attribution to the Issaquah Schools Foundation and be accompanied by a nominal donation at www.isfdn.org/donate. Thank you.
Fueling Success for Every Student, Every School