Color: the visible range of reflected light. Analogous colors are next to each other on the color wheel. Eg: yellow, yellow-green and green; violet, red-violet and red.
Texture: the way a work feels when touched or the portrayal of the quality of a surface. Some words to describe texture are: rough, smooth, coarse, soft, gritty, prickly, or slick.
Pattern: the organized repetition of 1 or more elements of art.
Rhythm: created by movement, implied through the repetition of line in a non-uniform but organized way to show 2 & 3-dimensions.
Unity: the connecting of parts of a work of art, creating a feeling of peace and a sense of completeness. All parts should work together. Not enough unity is chaotic to the viewer, while too much unity is boring.
Color Wheel: a tool in which colors are arranged in a specific order in a circle; used to explain color theory and show how colors relate to one another.
Craftsmanship: neatness, control of tools.
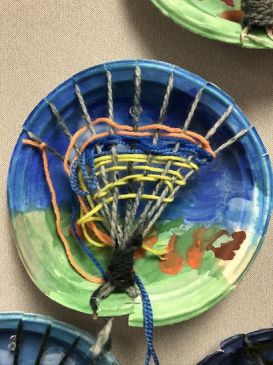
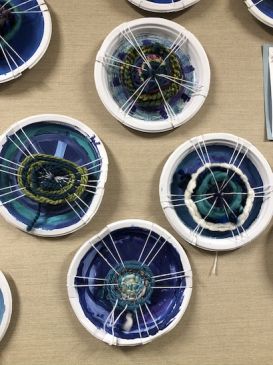
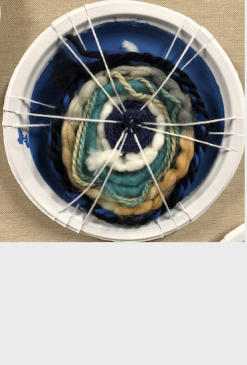
Loom: structure or frame that holds the tension in the warp threads to allow the weft threads to move through.
Warp: threads are the stationary threads that run lengthwise and are under some tension.
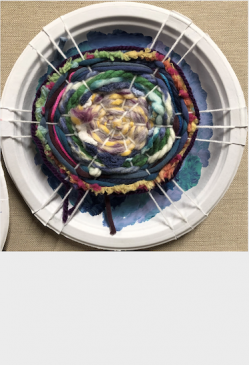
Weft: the threads that move through the warp, going over and under it to create a fabric.
• Watercolor or tempera paint*
Weaving is one of the oldest surviving crafts in the world, starting approximately 12,000 years ago, starting with interlaced branches for shelter and baskets. 20,000 - 30,000 years ago early humans developed the first string/thread by twisting (spinning) together plant (later animal hair) fibers. Making string/ thread led to the development of weaving, spinning, and sewing: all different aspects of the textile arts.
Weaving is done by hand or on machines using structures called looms. Weaving is the primary method of cloth production and requires interlocking a set of vertical threads with a set of horizontal threads in a pattern that secures the threads in place. The set of vertical threads are warp and the set of horizontal threads are weft.
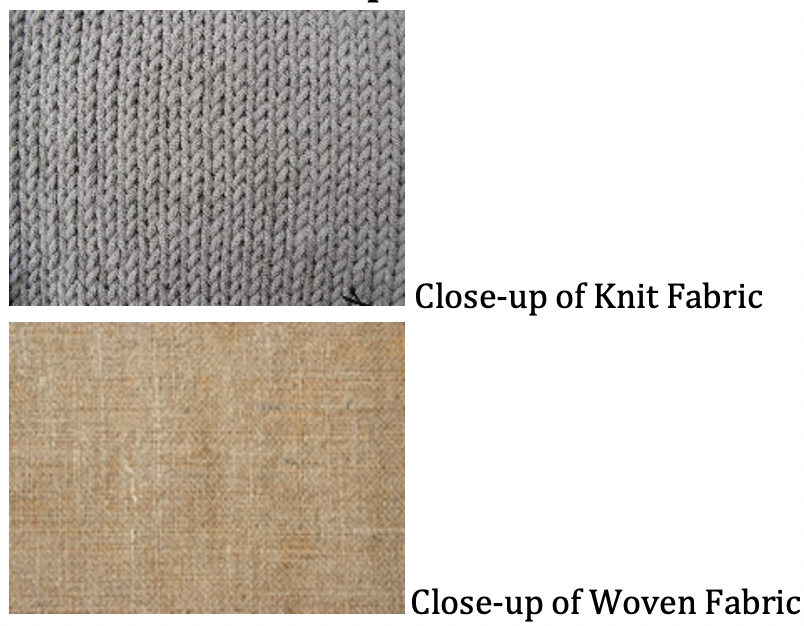
Weaving is now mainly a mechanized process, though hand weaving is still in practice. Artisans make cloth on hand looms, in home studios or small weaving businesses, keeping skills and traditions of the early weavers alive. Two of the most common types of fabric are Knit fabric, created by interlocking loops of threads and Woven fabric, created by threads which are interlaced in an over under process.
More about the use of textiles in artwork can be found on the Textiles Reference Page.
Find examples of knit and woven fabric to show
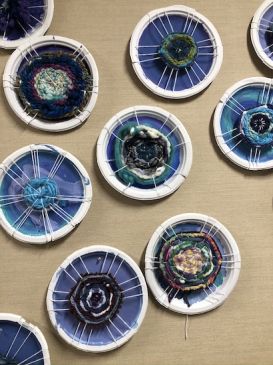
Make a loom in advance to familiarize yourself with the process and to have a finished model for the students to refer to.
Cut weft pieces no longer than 30”
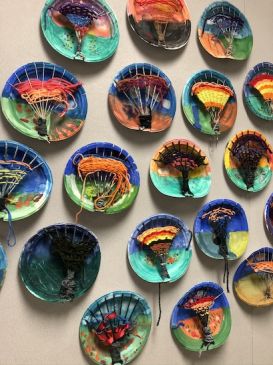
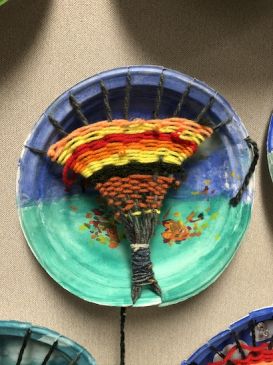
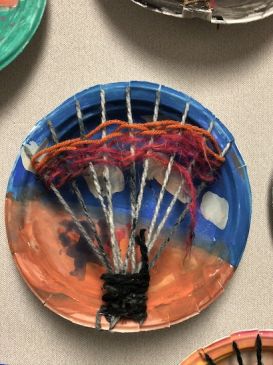
*Optional: paint the plates a base color that is analogous to the yarn you are using.
Students will:
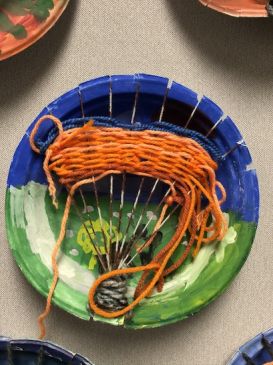
• Learn the over/ under weaving technique
• Create a weaving using analogous colored yarn
• Learn art vocabulary
• Use good craftsmanship
Post vocabulary words and the color wheel and briefly go through them. Look for analogous colors on the color wheel, write them on the board. Use these words throughout the lesson.
Prepare the looms: if time is a factor, you can start the looms for students to complete.

Lesson written by Juliette Ripley-Dunkelberger. Weaving history notes from Weave Design and India Crafts websites.
21st Century Thinking Skills
Thinking flexibly, persisting, questioning, creating, innovating, listening with empathy, taking responsible risks, observing, making connections, visualizing, sequencing, predicting, comparing/contrasting, determining main idea, finding evidence, problem solving, cause and effect, determining point of view, decision making.
WA State Learning Standards
(VA:Cr2.1.3) a. Create personally satisfying artwork, using a variety of artistic processes and materials.
(VA:Cr2.2.3) a. Demonstrate an understanding of the safe and proficient use of materials, tools, and equipment for a variety of artistic processes.
(VA:Re7.1.3) a. Speculate about processes an artist uses to create a work of art.
(VA:Re9.1.3) a. Evaluate an artwork based on given criteria.
(VA:Cn10.1.3) a. Develop a work of art based on observations of surroundings.
Please note: These lesson plans are intended for non-profit use only. Use of these plans for commercial purposes should give attribution to the Issaquah Schools Foundation and be accompanied by a nominal donation at www.isfdn.org/donate. Thank you.
Fueling Success for Every Student, Every School