Shape: an enclosed space defined by a line or by contrast to its surroundings.
Form: a 3-dimensional shape that exists in space instead of in only two dimensions like something drawn on paper. Artists use both shape and form to create sculptures. More information can be found on the Shape and Form Reference Page.
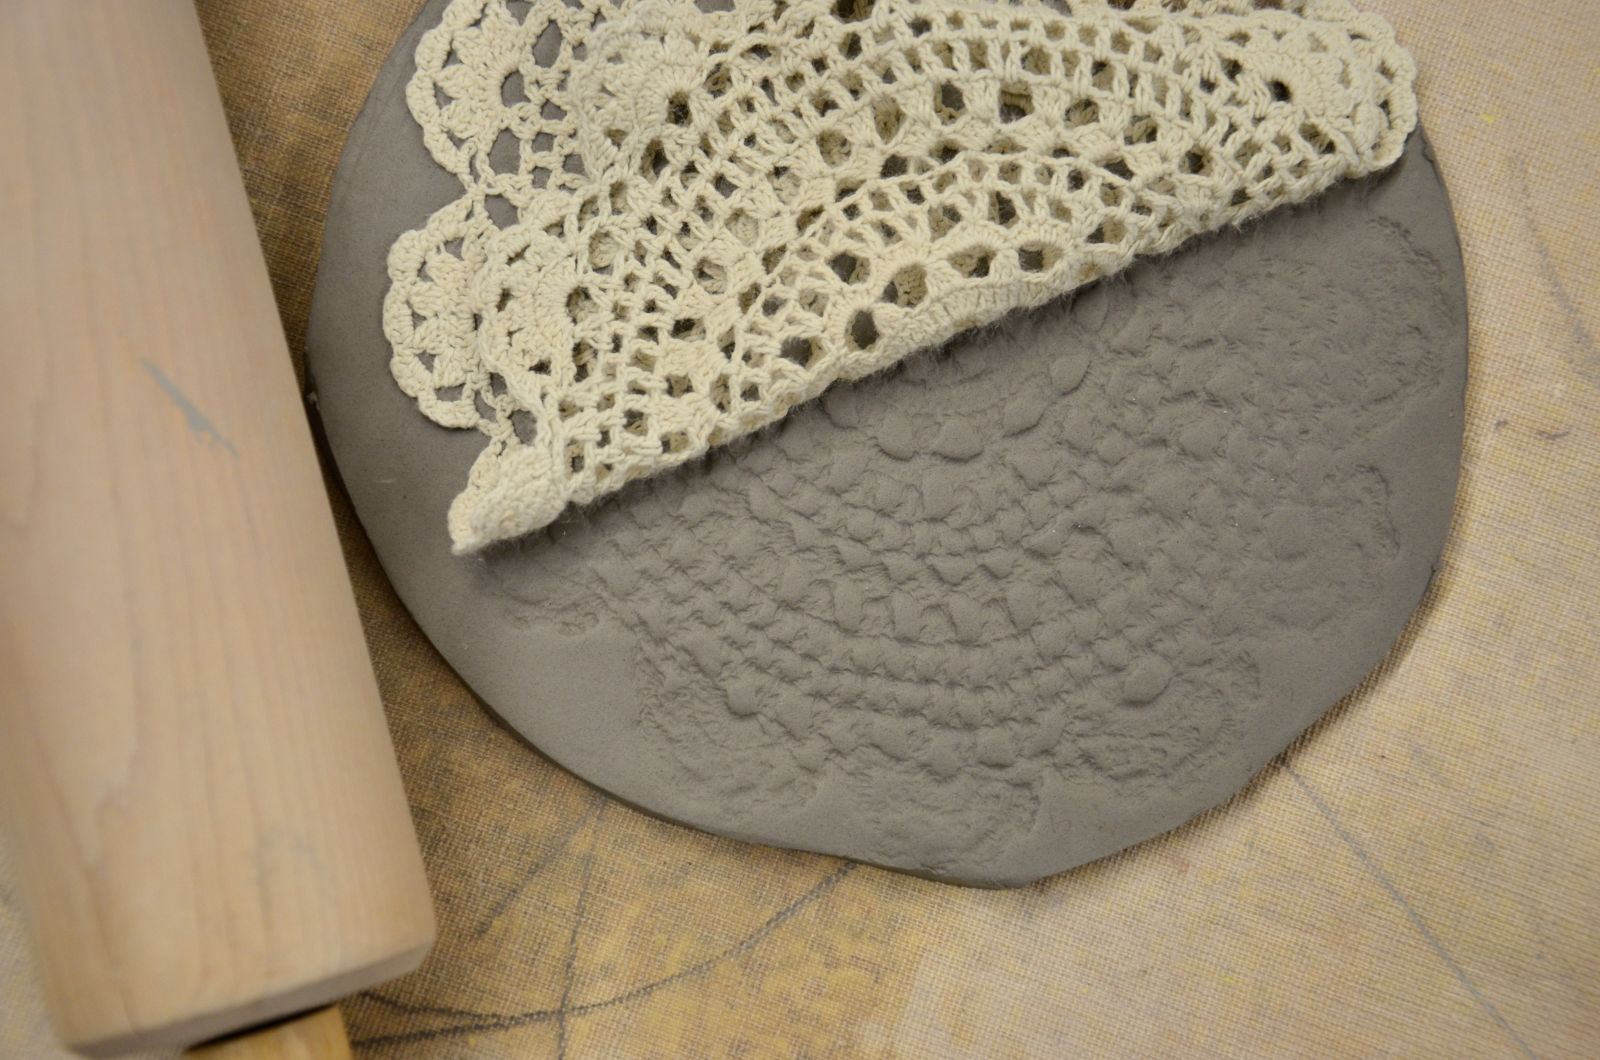
Texture: the feeling, consistency or appearance of a surface or substance.
Pattern/Repetition: repeating art elements used in a regular or cyclical way to create interest, movement and/or harmony and unity.
Symmetry: the way in which one part of something duplicates another part.
Clay: a fine-grained, firm earthy material that is plastic (sculpt-able) when wet and hardens when heated, consisting primarily of water, silica (sand) of aluminum and other minerals.
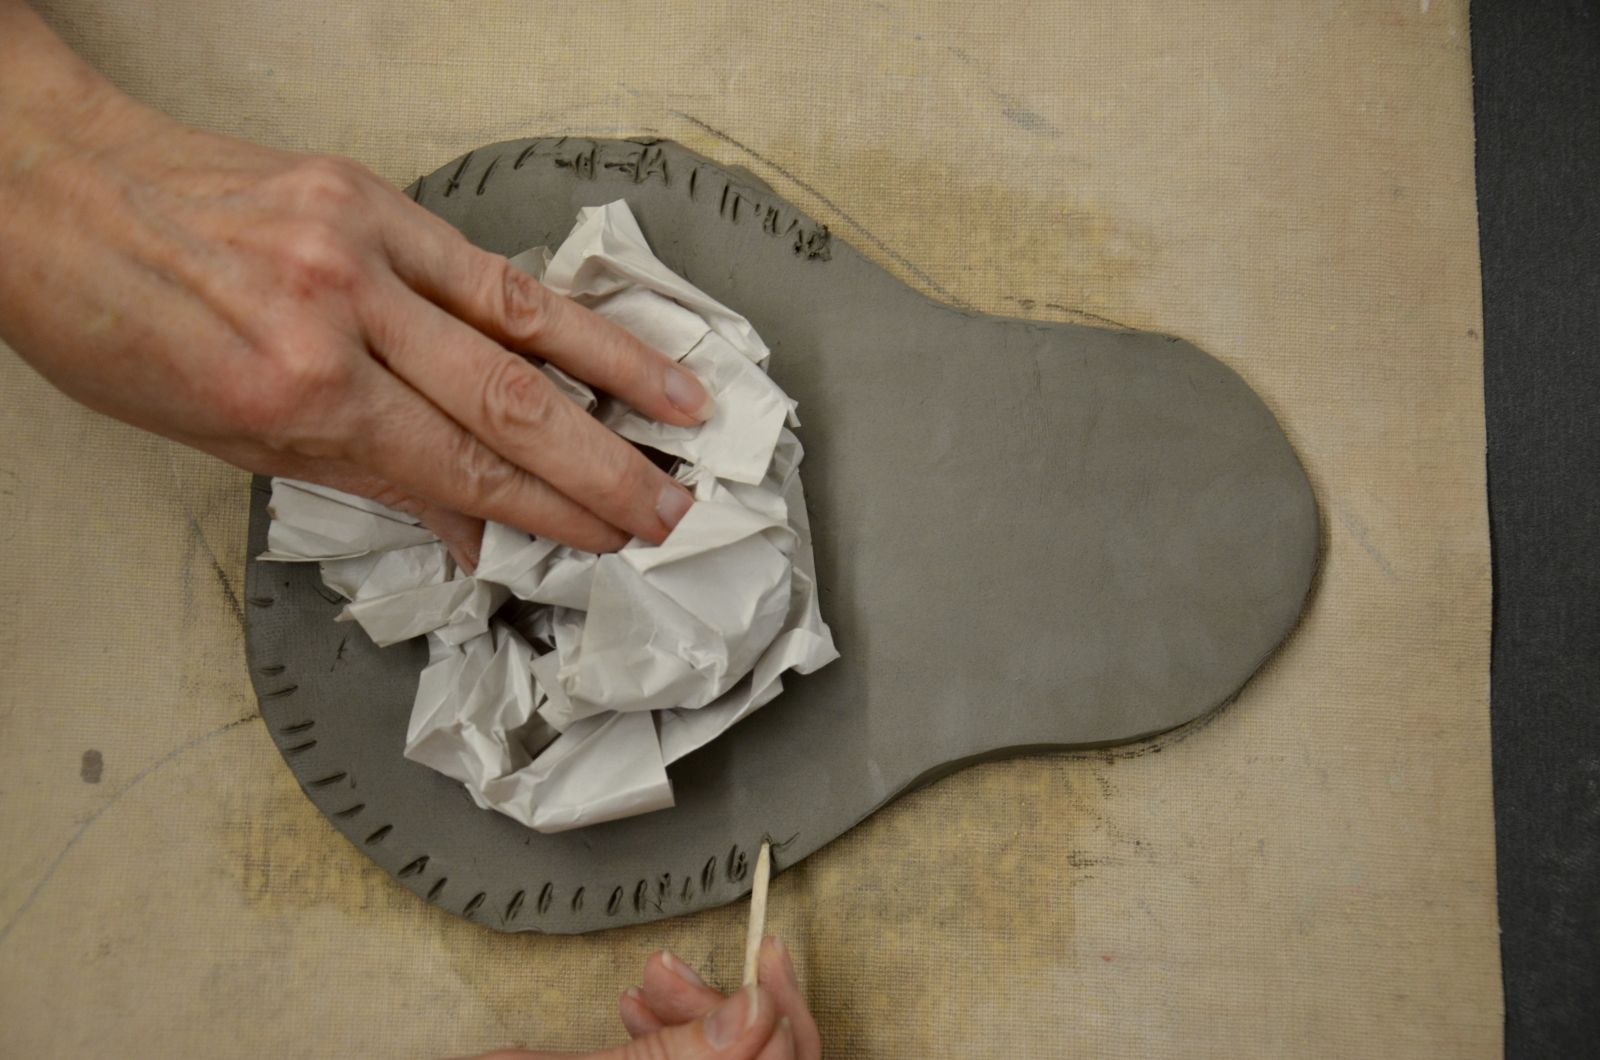
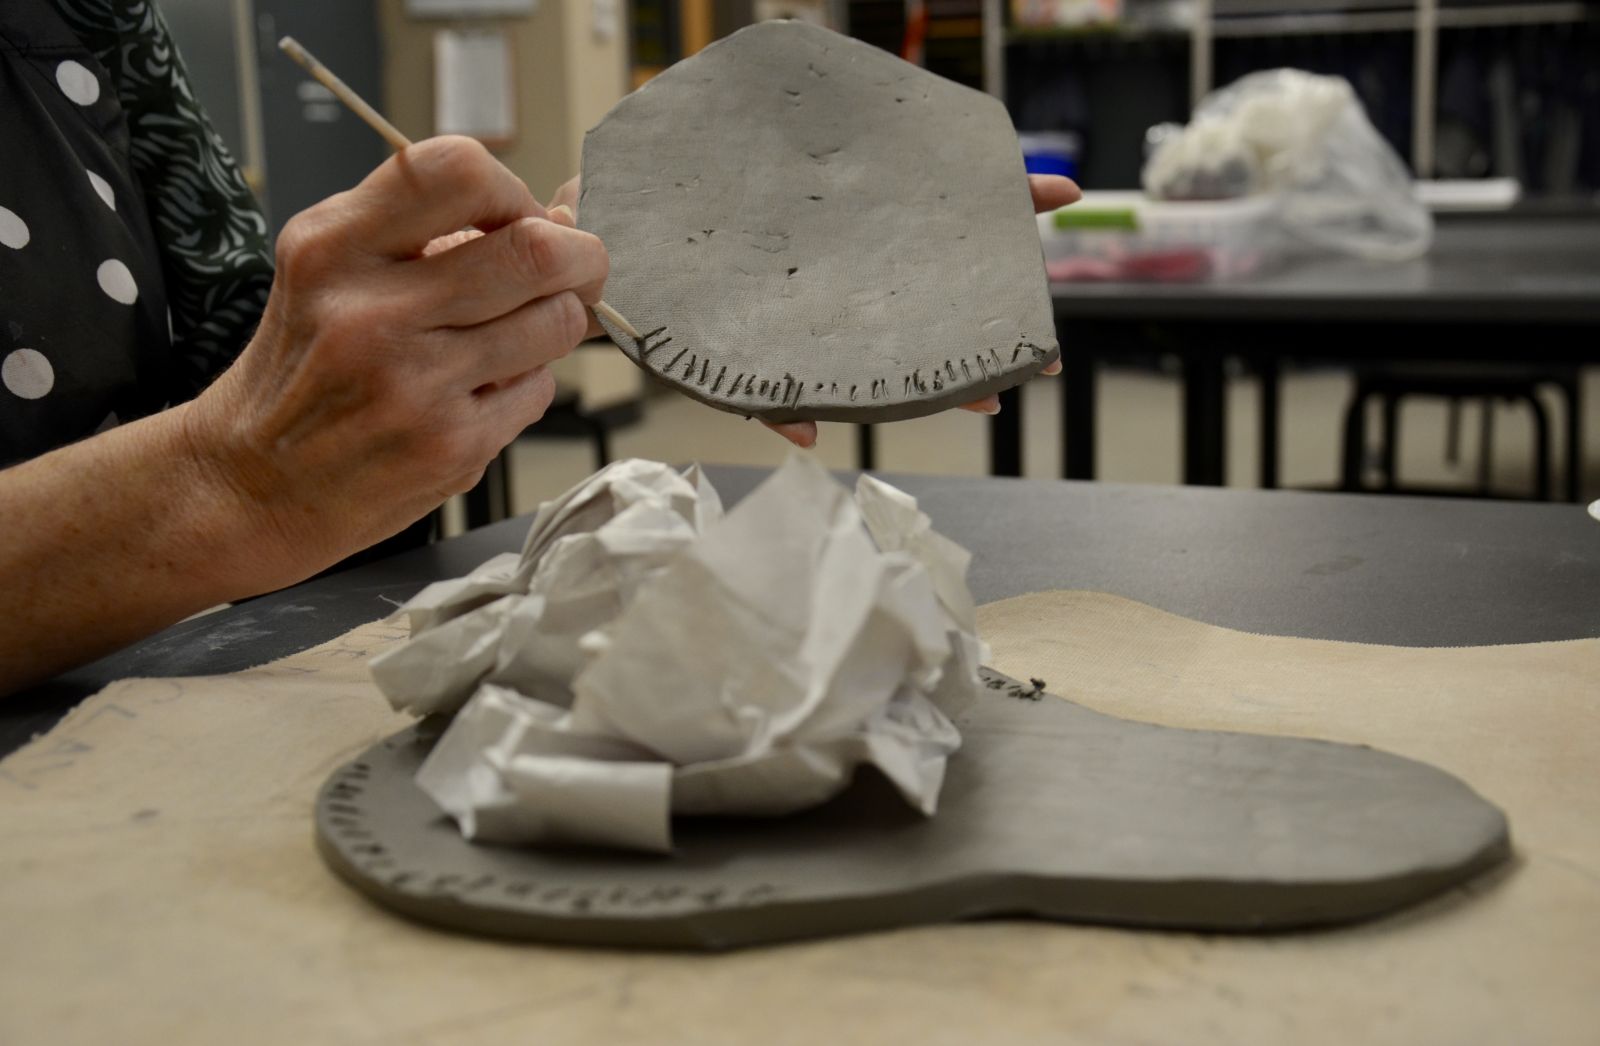
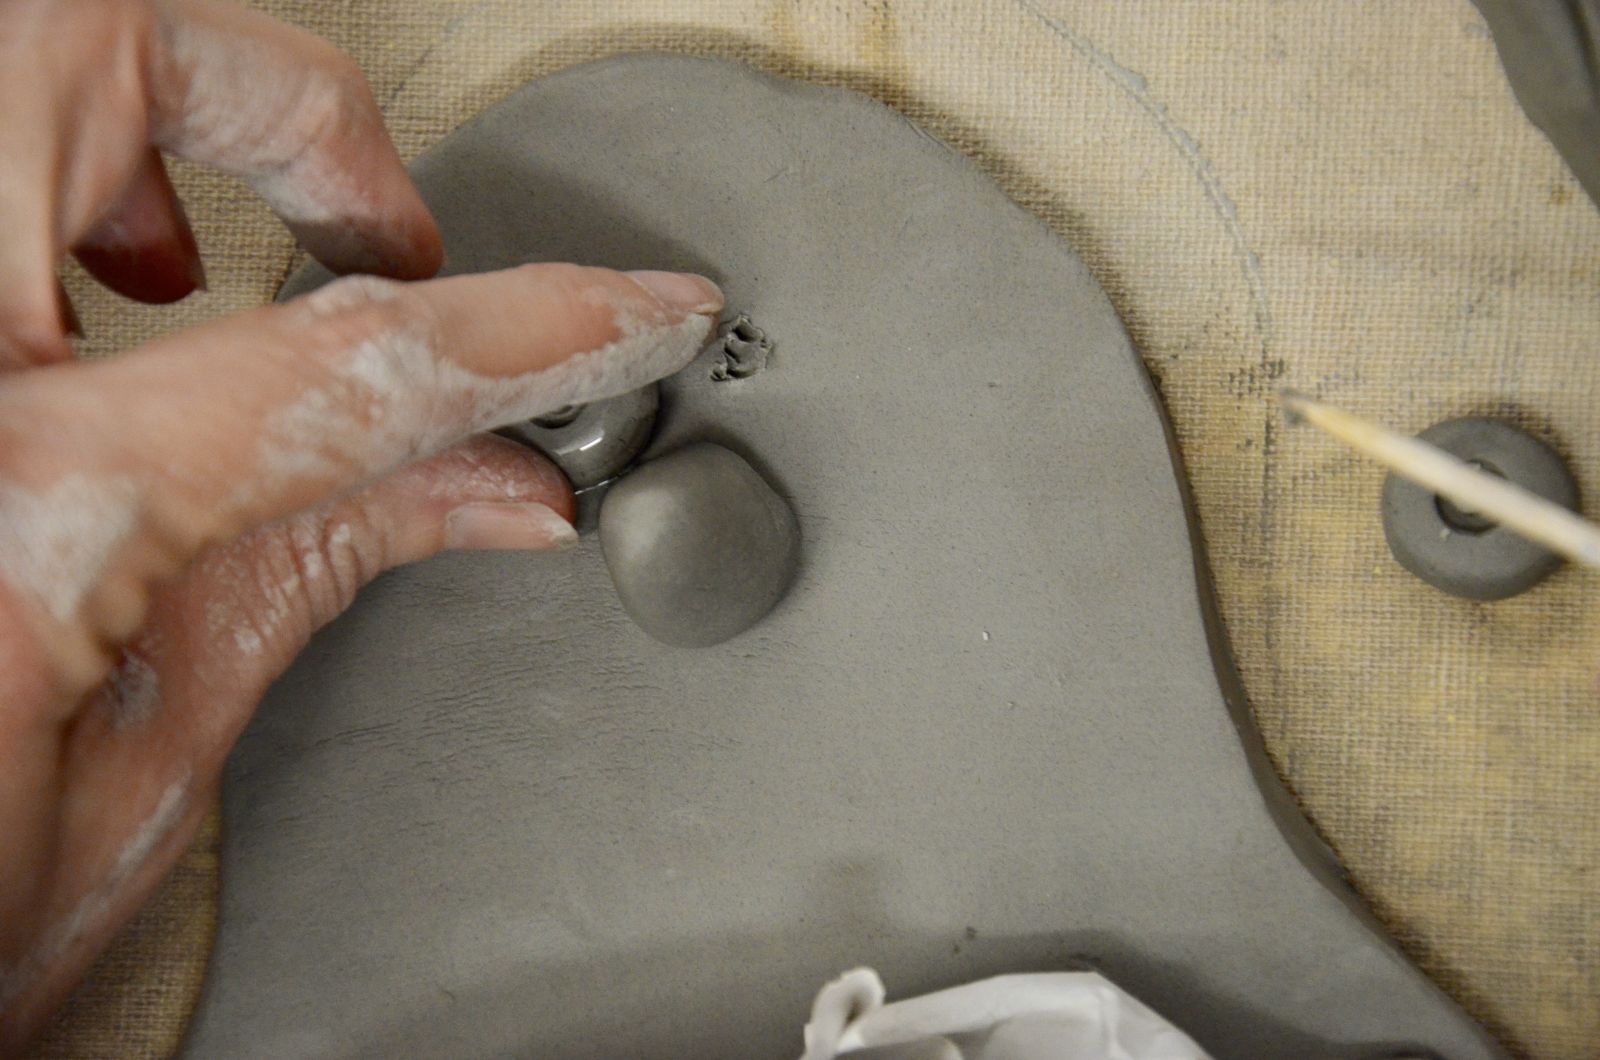
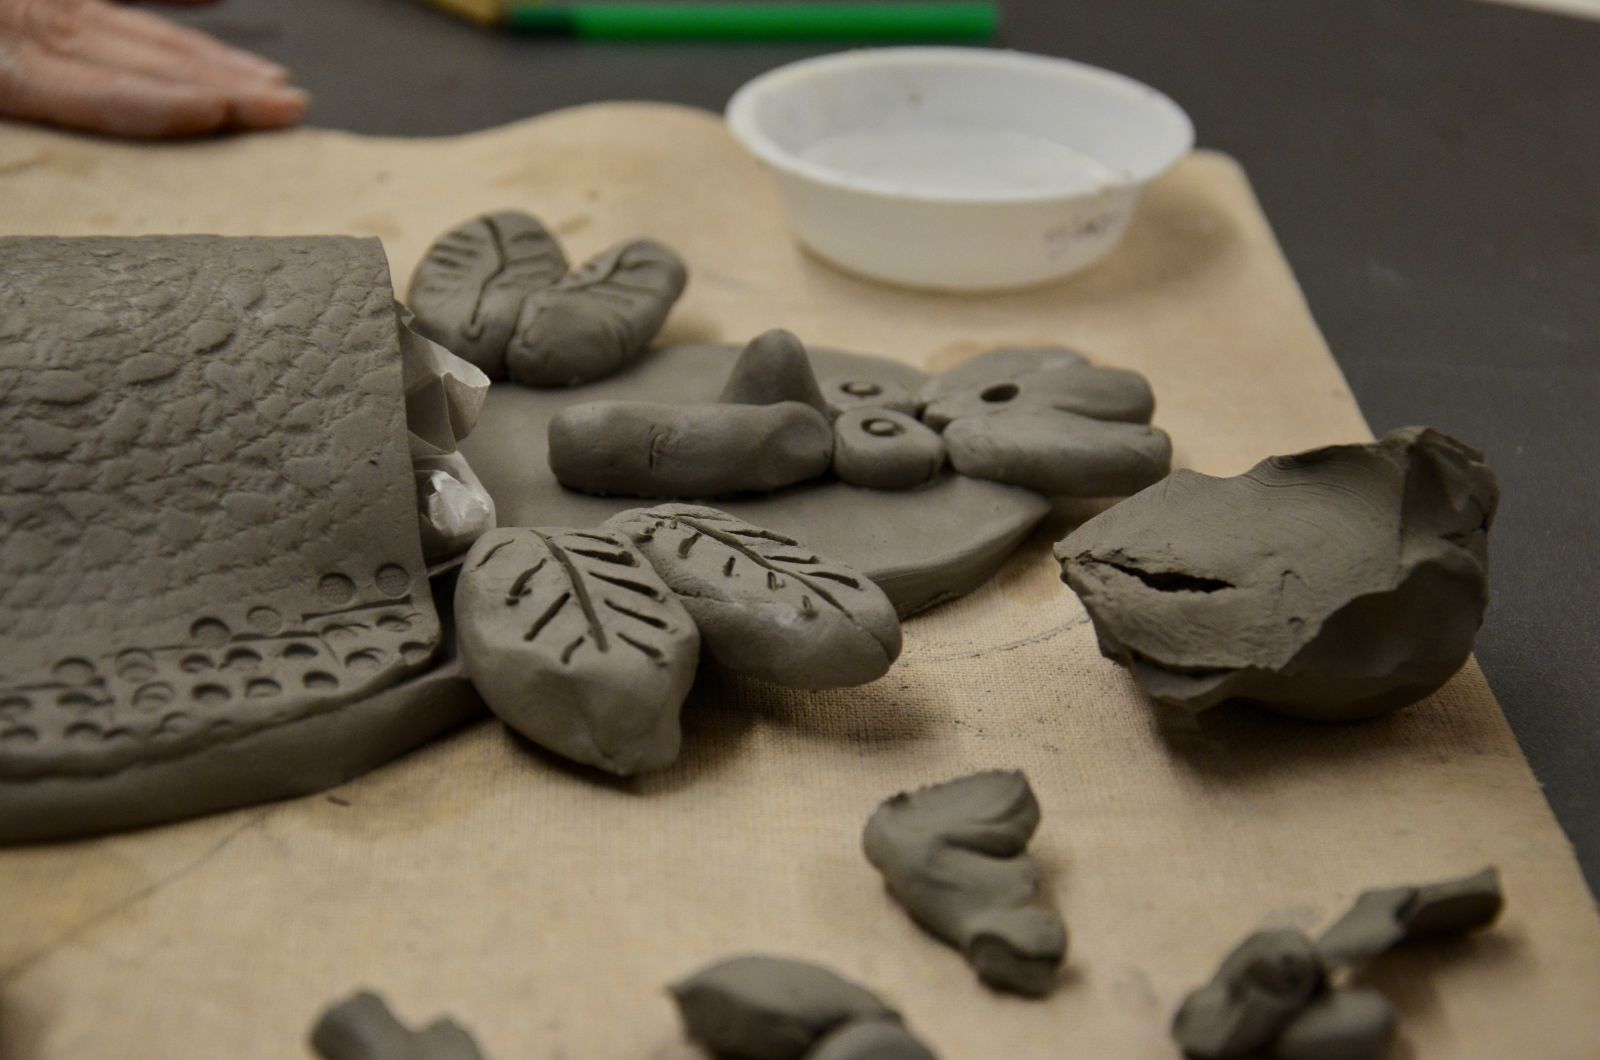
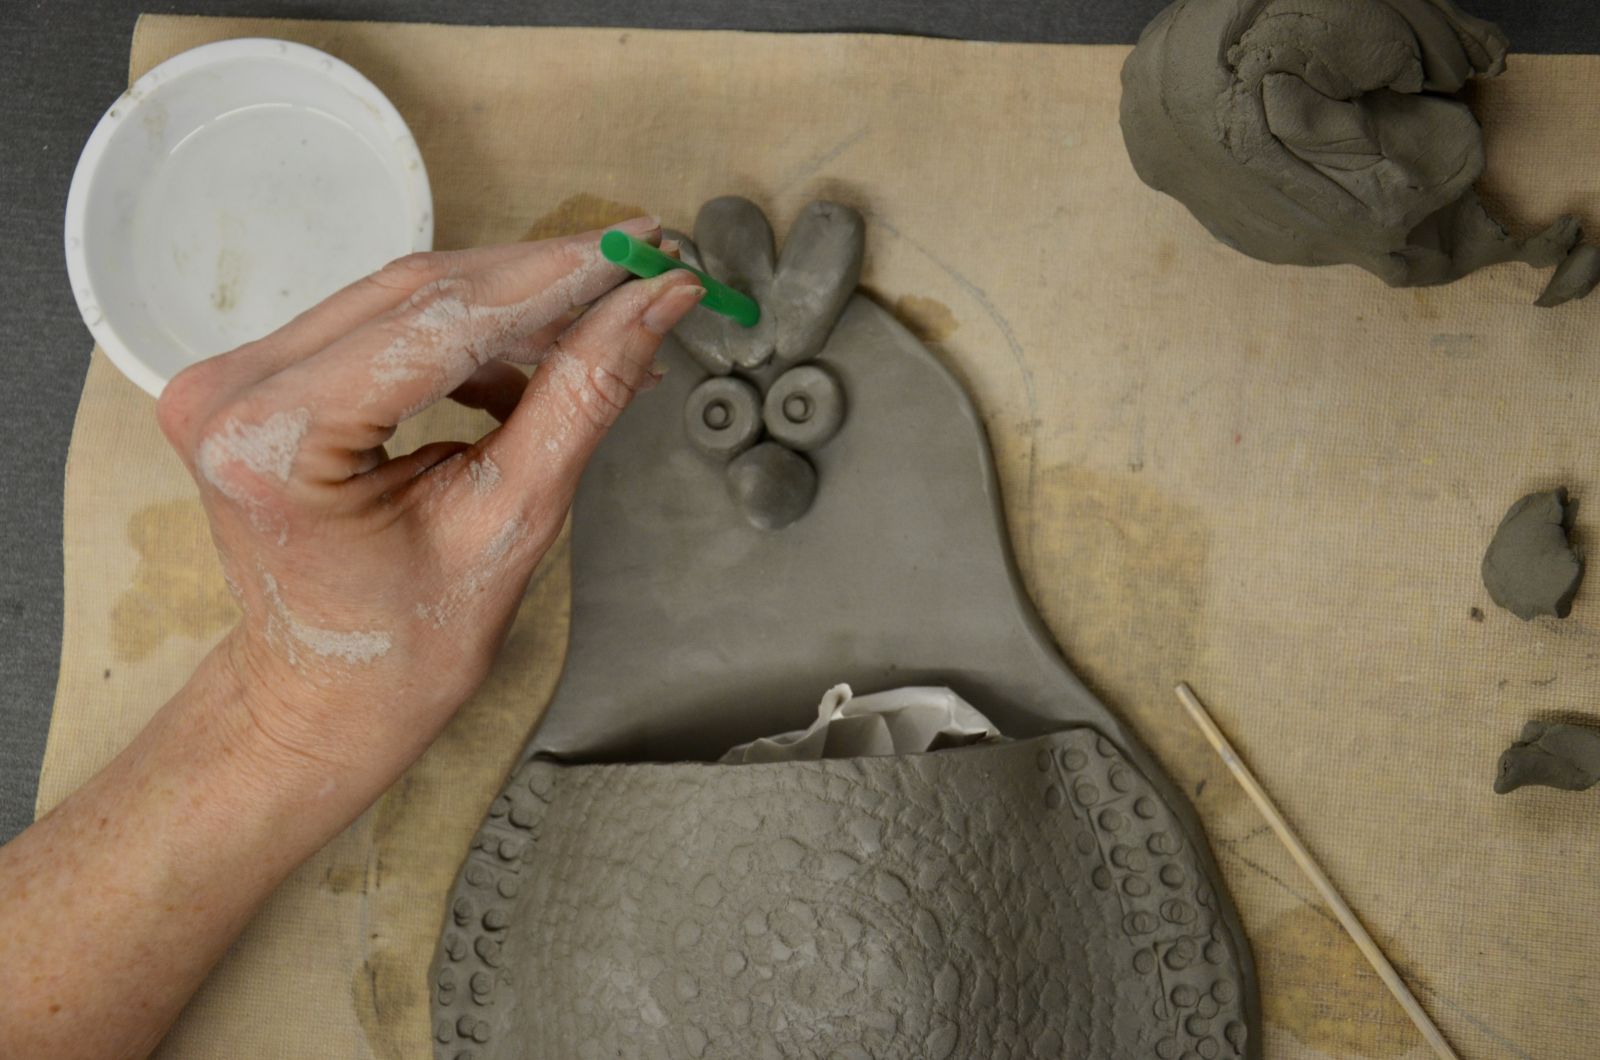
Scoring (also called Scratch, Slip and Score or Scratch and Attach): a process for attaching two pieces of clay that involves scratching the surfaces that will be in contact.
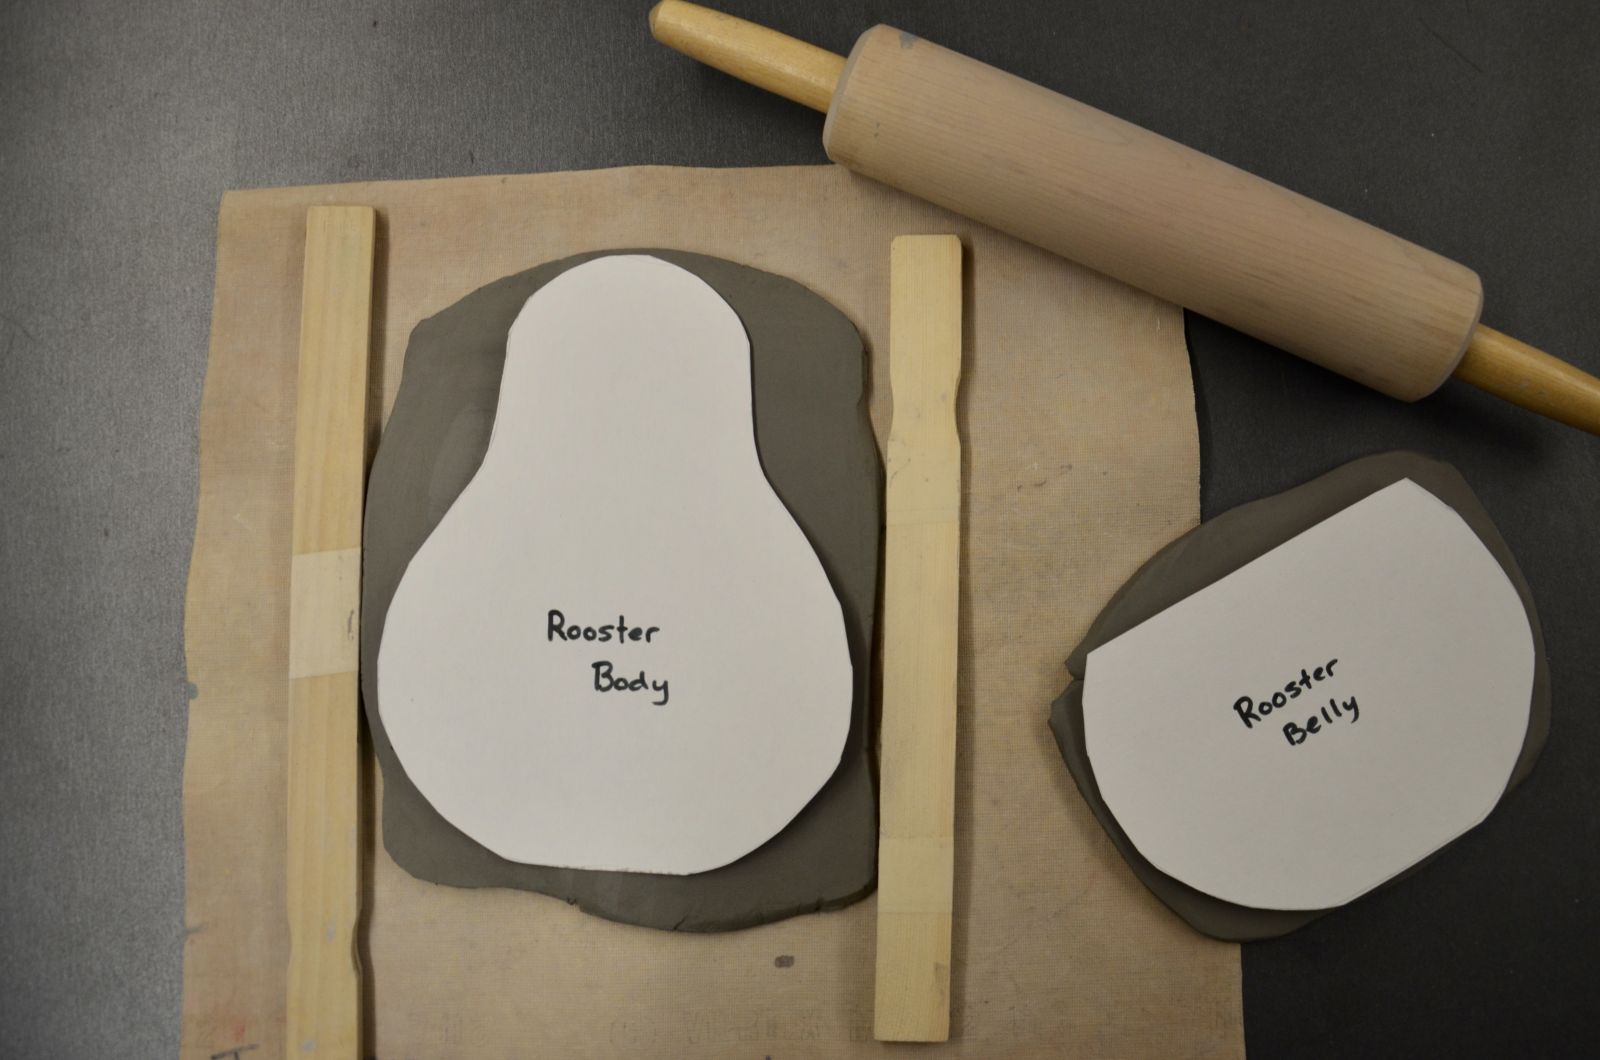
Template: a shaped piece of material used as a pattern for things such as painting or cutting out.
Made of very small particles of weathered rock, clay contains silica, water and clay minerals. Clay is plastic (sculpt-able) when wet, and stays together when dry. Clay is widely used in making bricks, tiles and pottery.
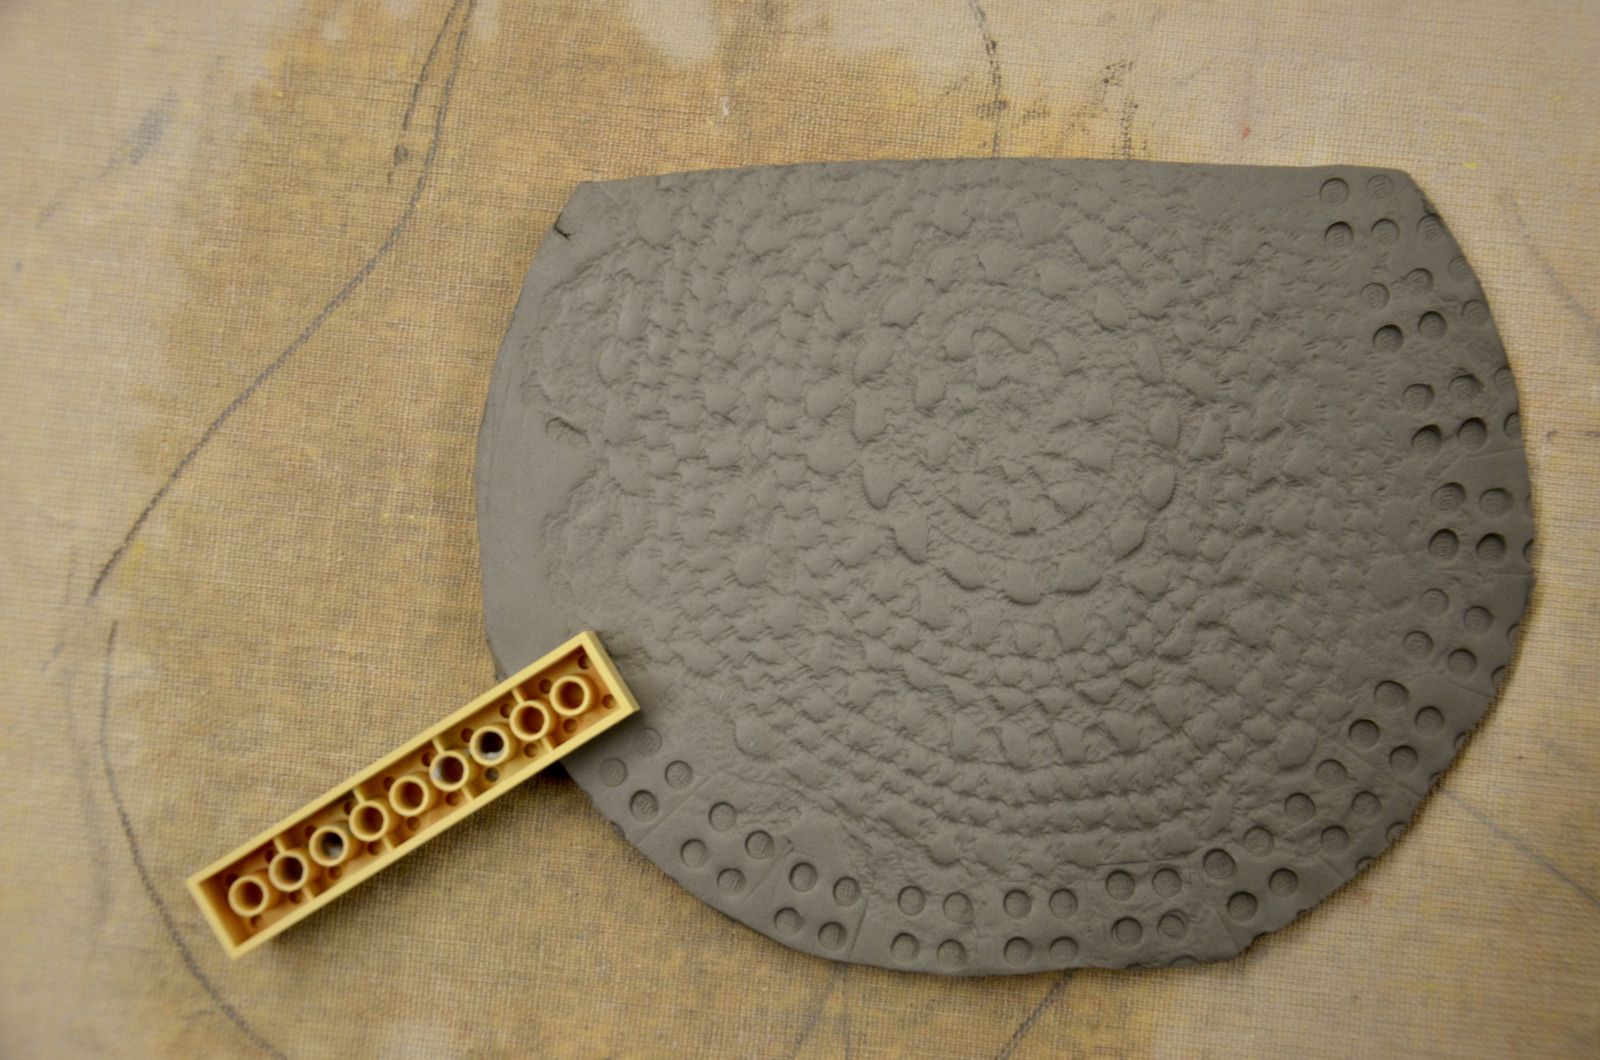
Cut paper templates
Gather all supplies
Pre-cut clay to make slabs
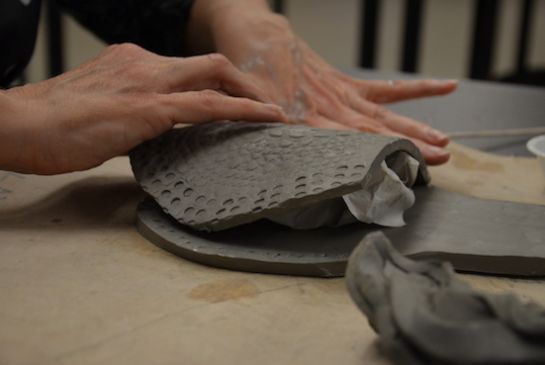
To roll even clay slabs, place the clay on a piece of canvas. Place guide sticks on either side of the clay. Using a rolling pin, roll the clay slab to the desired size, making sure to flip the clay frequently. Also, make sure that the rolling pin rolls over both the guide sticks. This ensures an even thickness.
.jpg)
Go over the Scratch and Attach process carefully with students. Show them how to scratch the surface in a crosshatch design then apply a thin layer of water, vinegar or slip to one of the sides. This acts as glue. Firmly press the two pieces together.


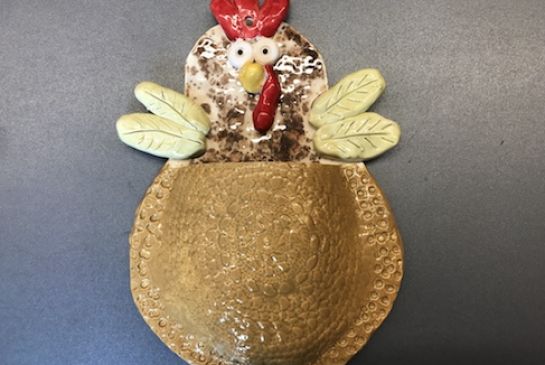
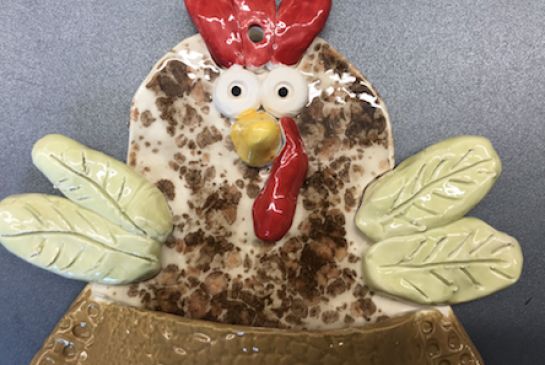
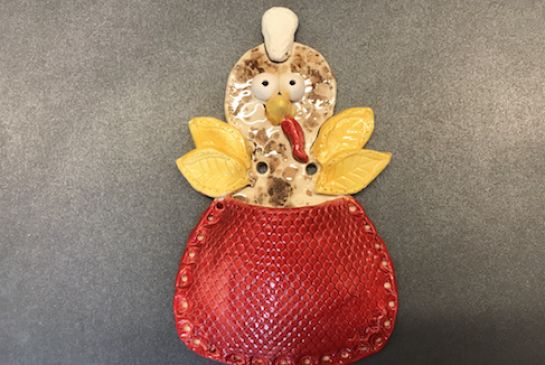
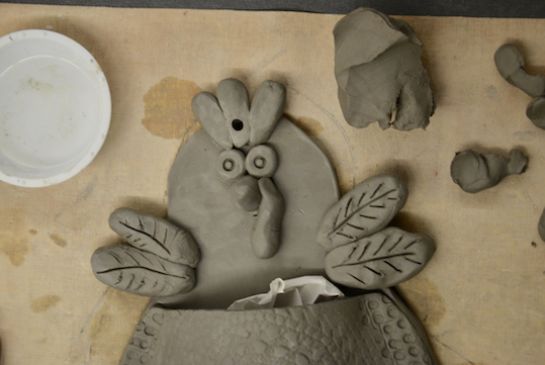
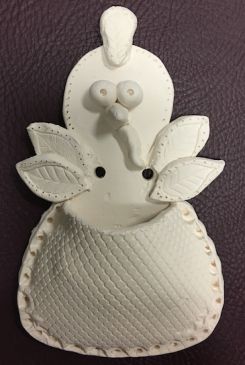
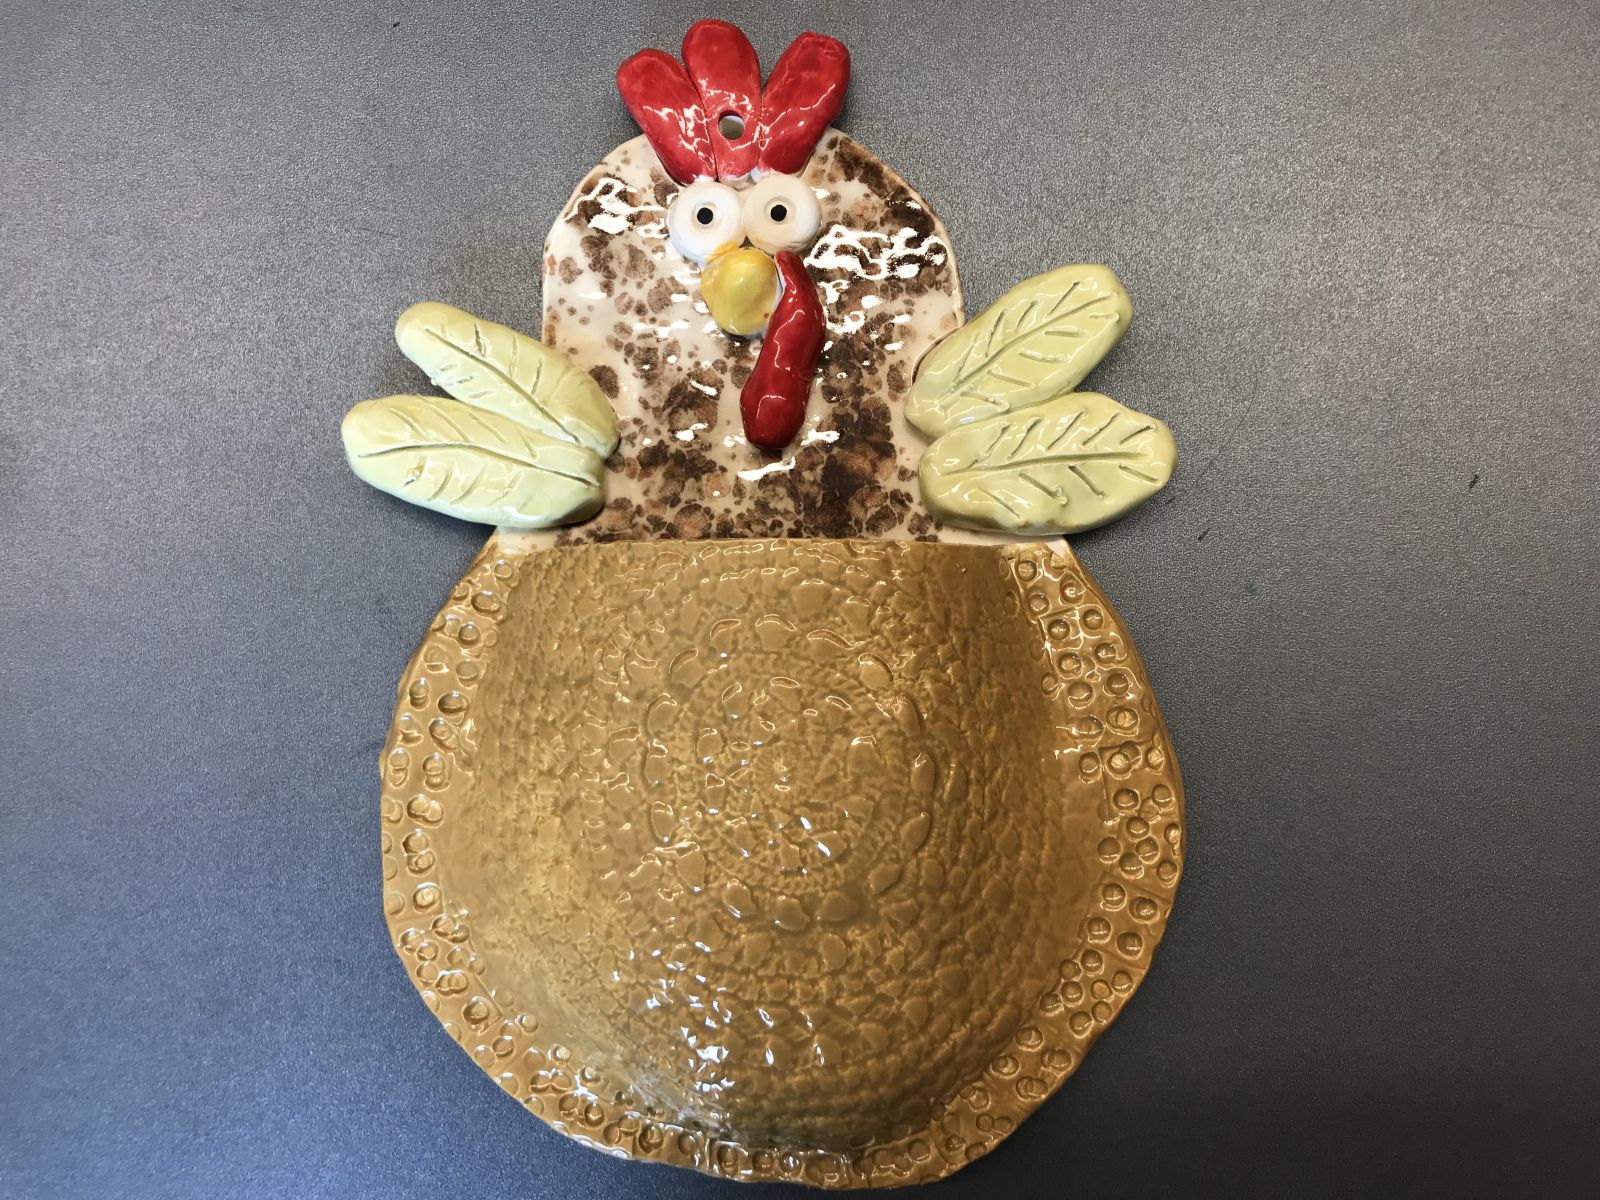
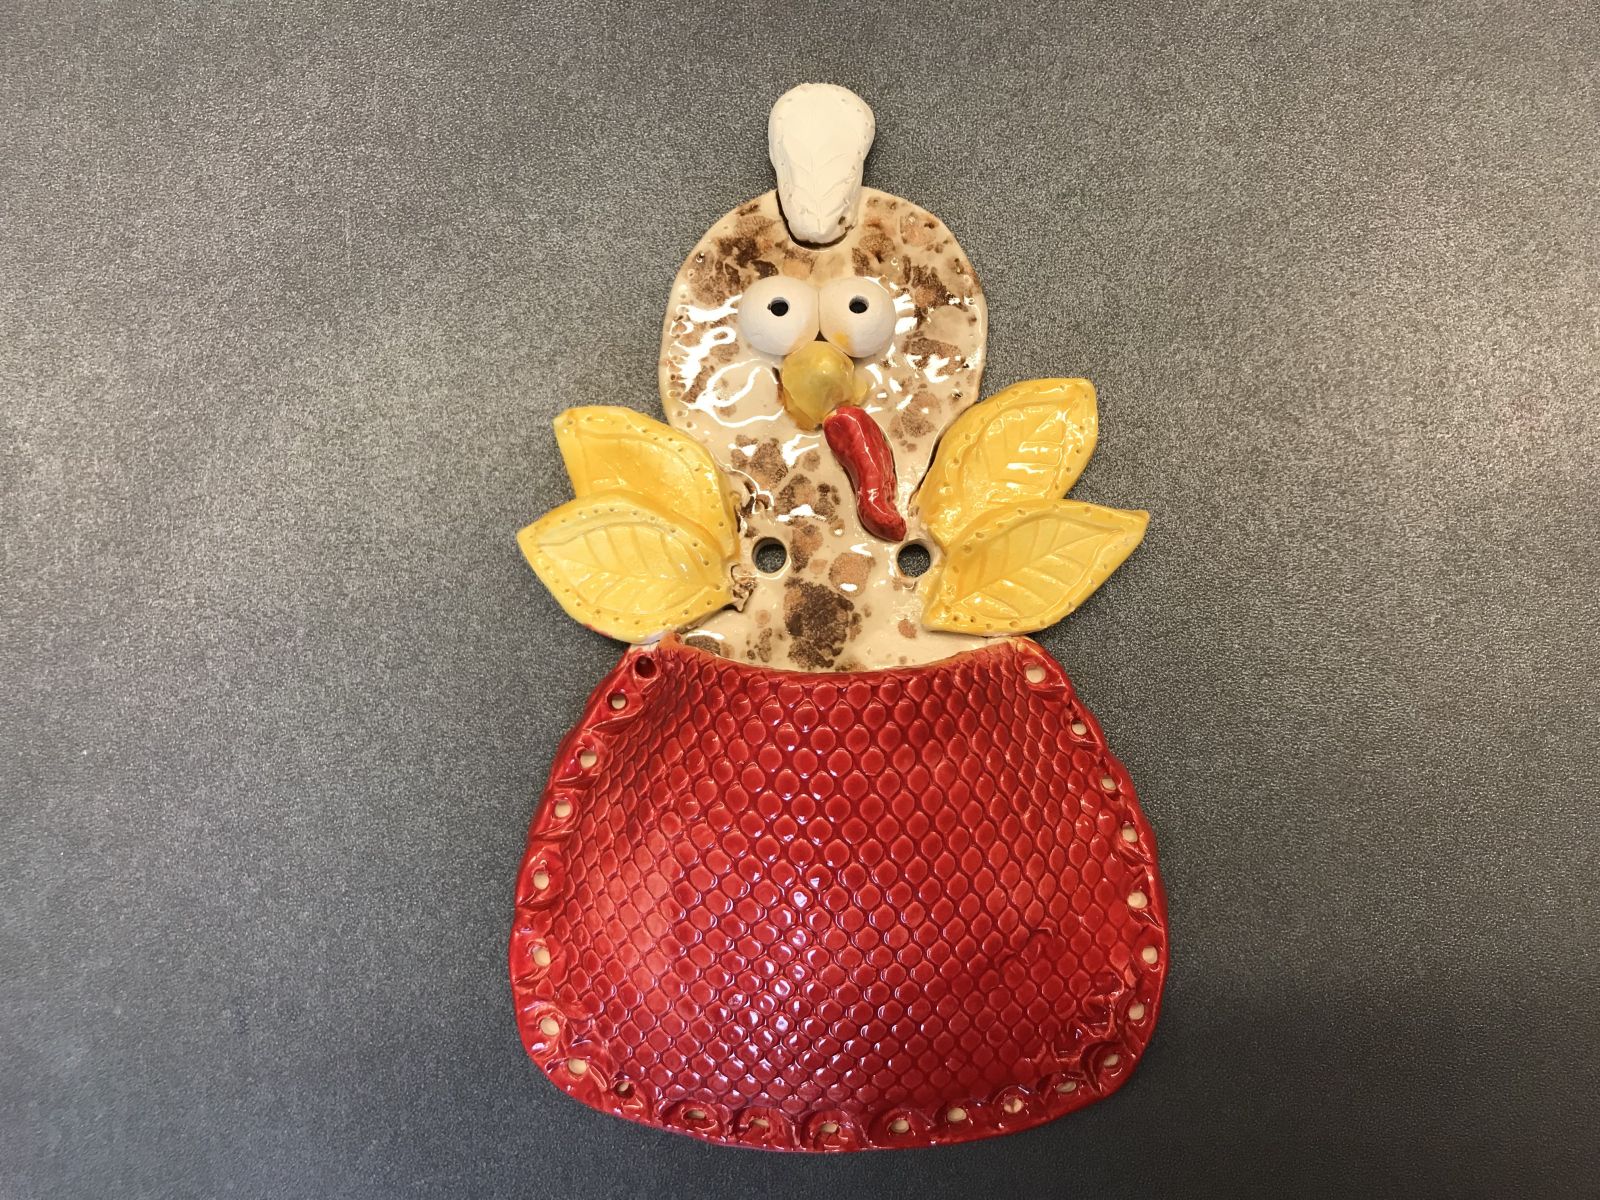
Examples of finished Rooster Wall Pockets:
Observe whether students are following instructions. Were the pieces attached correctly? How is their craftsmanship?
21st Century Thinking Skills
Thinking flexibly, persisting, creating, innovating, taking responsible risks, reflecting.
Habits of Mind
Goal setting, observing, making connections, visualizing, sequencing, problem solving, cause and effect, evaluating
WA State Learning Standards
(VA:Cr1.2.2) a. Make art or design with various materials and tools to explore personal interests, questions, and curiosity.
(VA:Cr2.1.2) a. Experiment with various materials and tools to explore personal interests in a work of art or design.
(VA:Cr2.2.2) a. Demonstrate safe procedures for using and cleaning art tools, equipment, and studio spaces.
Arts Integration Opportunities
Geology, Earth Science
Please note: These lesson plans are intended for non-profit use only. Use of these plans for commercial purposes should give attribution to the Issaquah Schools Foundation and be accompanied by a nominal donation at www.isfdn.org/donate. Thank you.
Fueling Success for Every Student, Every School