Line: a point moving in space. Line may be straight or curved. Contour lines define edges of shapes.mark with greater length that width.
Shape: A two-dimensional (height/width, flat) area enclosed by a line: geometric (symmetrical, except for circles and hearts, straight edged) or organic (with irregular, curved edges). This lesson uses organic shapes.
Rhythm: created by movement, implied through the repetition of line in a non-uniform but organized way to show 2 & 3-dimensions.
Symmetrical Balance: arranging the parts equally on both sides of the composition
Unity: the connecting of parts of a work of art, creating a feeling of peace and a sense of completeness. All parts should work together. Not enough unity is chaotic to the viewer, while too much unity is boring.
Craftsmanship: A way of working that includes following directions, demonstrates neatness and the proper use of tools.
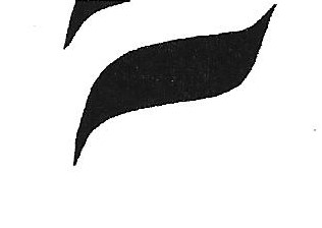
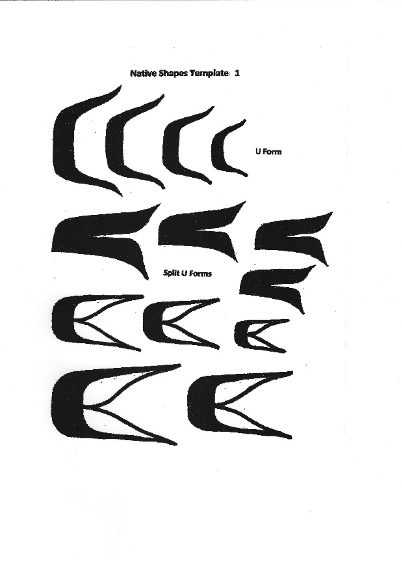
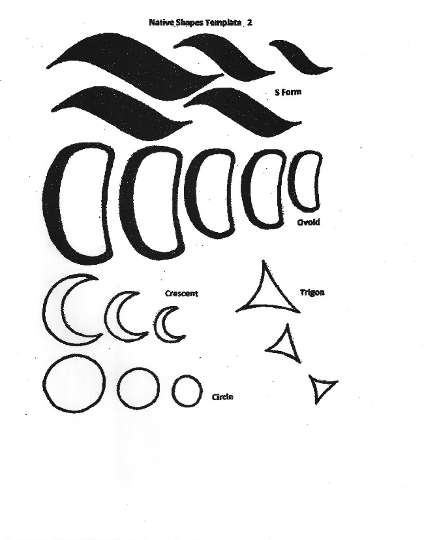
Formlines: the special organic shapes repeated in this style: ovoids, U-forms & S forms.
Tradition: the passing on of customs or beliefs from generation to generation. Learn more about Indigenous Arts HERE.
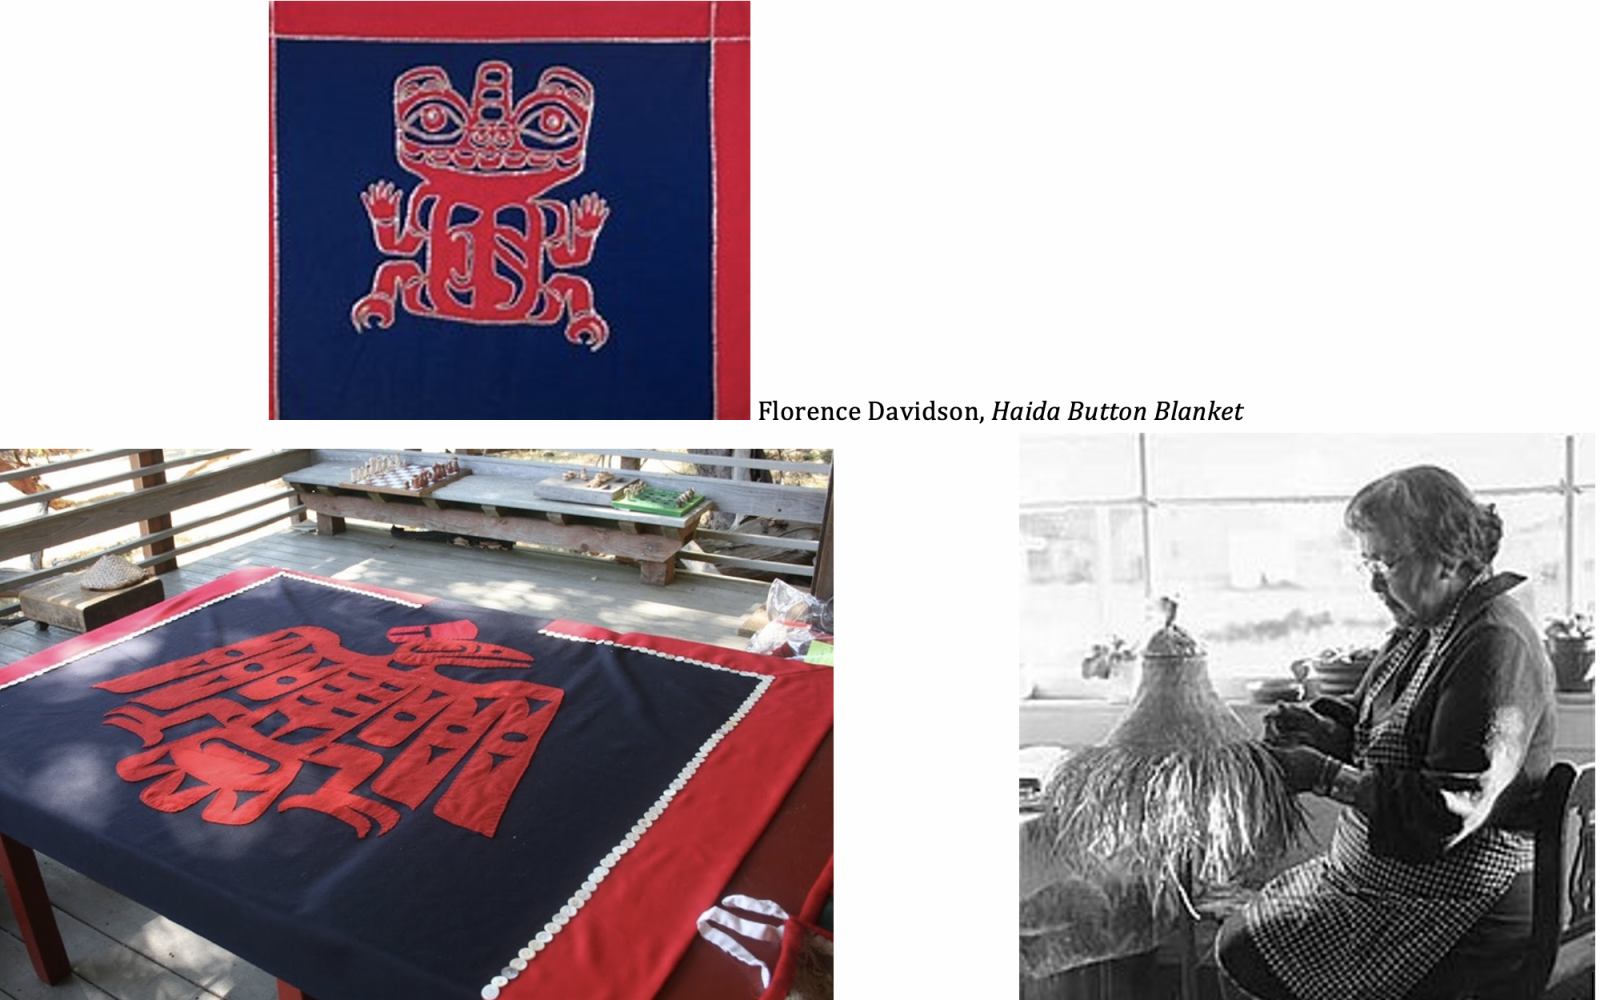
Florence Davidson (1896-1993) was a Canadian First Nations artist from the Haida nation who created traditional basketry and button-blankets. As a child she assisted her mother in sewing button blankets. Her daughter Primrose Adams, was the 2011 recipient of the Creative Lifetime Achievement Award for First Nation’s Art, for her traditional basketry.
The traditional style is highly abstracted and standardized, meaning it is always done the same way regardless of clan or art medium. It’s a form of visual identification and communication between clans. Self-expression or changing the designs isn’t allowed. Apprentices learn the rules from the masters and continue the designs. Sticking to traditions is a way of preserving the culture for the future. Of course, there are some PNW Coast native American artists who modernize the traditions anyway, so they can’t be considered traditionalists, but they can still be artists.
Traditional standards used are:
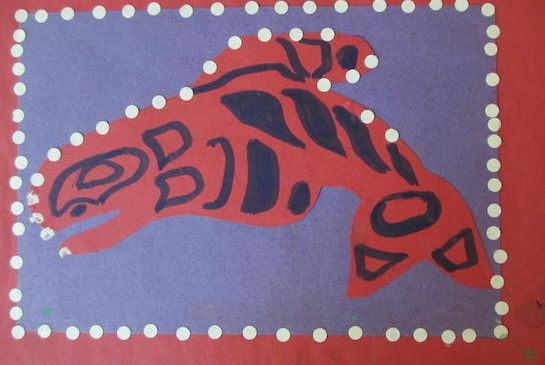
When European fishermen visiting NW waters during the mid-19th century, they often traded their blue wool blankets for food and fresh water. Rather than used for sleeping, the blankets were used as capes and gifts at ceremonial dances. They were traditionally decorated with buttons made from abalone or dentalium shells. The central crest typically portrayed a symbol (spirit animal) of the wearer’s family heritage (clan). The blankets usually have a red border and red flannel applique makes up the inner shapes.
Shapes – templates made from animal hide or tree bark were used to learn the basic shapes.
|
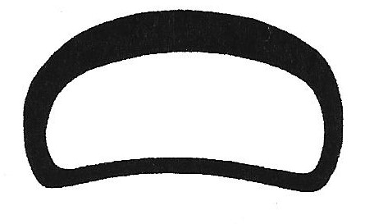
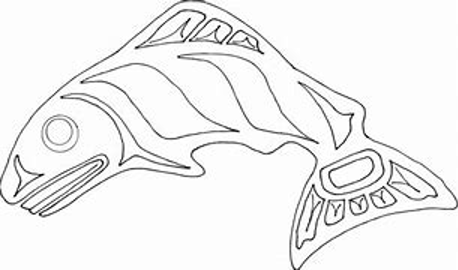
Ovoid – most dominant shape, rounded rectangle with inner tension pushing the top to form a convex. Larger ovoids used to form the head of a subject, eye sockets, major joints, wings tails or fins. Smaller ovoids used to form joints, eyes, ears, noses or contain faces. Can also be used to fill empty spaces/corners.
|
|
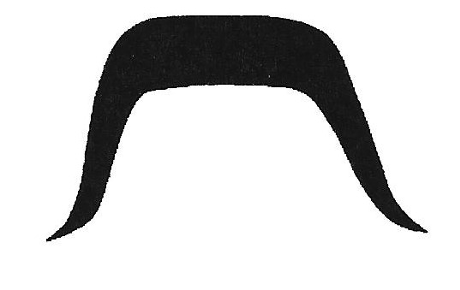
U-form – resemble thick letter U’s with ends tapering to sharp points. U-forms can vary in size but they all have the U shape. Larger U-forms are used to contour the body of the subject and as part of the form for tails of ears. Smaller U-forms are used as space fillers and even feathers of a bird. Multiple U-forms can also be stacked together to represent tails for fins.
|
|
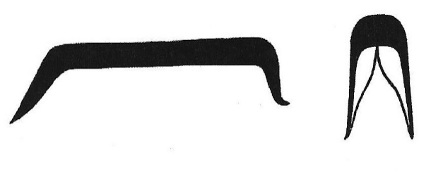
Split U-form – the U-form is split in the middle with the inner U looking more like a V that ends up with a point in the center. Split U-forms can also vary in proportion. They are used in ears, feathers and tails. Northwest artists also used split U-forms as space fillers in open spaces.
|
|
S-form – is like the letter S with tapered ends. It is used as a space filler as well as parts of arms and legs. Multiple S-forms can also form a subject’s ribcage. S-forms are used to connect different body parts of a subject.
|
Students will:
After you’ve gone through the discussion points, hand out white scrap paper.
The Button Blanket, by Nan McNutt. This book has a great template you can work from. Lesson written by Cynthia Moring. Canada's First Peoples website; Sealaska Heritage Curriculum; Northwest Coast Art wikipedia.
 Template with inner shapes
21st Century Thinking Skills
Thinking flexibly, persisting, questioning, creating, innovating, listening with empathy, taking responsible risks, observing, making connections, visualizing, sequencing, predicting, comparing/contrasting, determining main idea, finding evidence, problem solving, cause and effect, determining point of view, decision making.
WA State Learning Standards
(VA:Cr1.2.3) a. Apply knowledge of available resources, tools, and technologies to investigate personal ideas through the artmaking process.
(VA:Cr2.1.3) a. Create personally satisfying artwork, using a variety of artistic processes and materials.
(VA:Cr2.2.3) a. Demonstrate an understanding of the safe and proficient use of materials, tools, and equipment for a variety of artistic processes.
(VA:Cr3.1.3) a. Elaborate visual information by adding details in an artwork to enhance emerging meaning.
(VA:Pr6.1.3) a. Identify and explain how and where different cultures record and illustrate stories and history of life through art.
(VA:Re7.1.3) a. Speculate about processes an artist uses to create a work of art.
(VA:Re8.1.3) a. Interpret art by analyzing use of media to create subject matter, characteristics of form, and mood.
(VA:Re9.1.3) a. Evaluate an artwork based on given criteria.
(VA:Cn11.1.3) a. Recognize that responses to art change depending on knowledge of the time and place in which it was made.
Arts Integration Opportunities:
Social Studies: Examine cultural Pacific NW Coastal tribes.
Read Aloud: The Button Blanket, by Nan McNutt. The story of a Kwakiutl girl making her first ceremonial button blanket introduces activities that provide information about the crafts and ways of life of Indians living along the Northwest Coast of the United States and Canada.
Please note: These lesson plans are intended for non-profit use only. Use of these plans for commercial purposes should give attribution to the Issaquah Schools Foundation and be accompanied by a nominal donation at www.isfdn.org/donate. Thank you.
Fueling Success for Every Student, Every School