Advanced Preparation
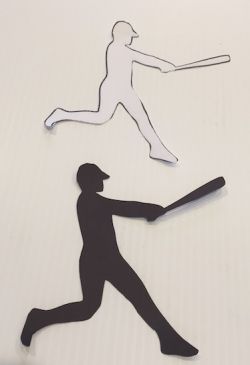
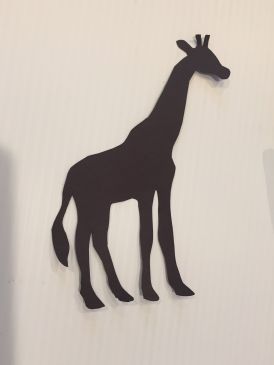
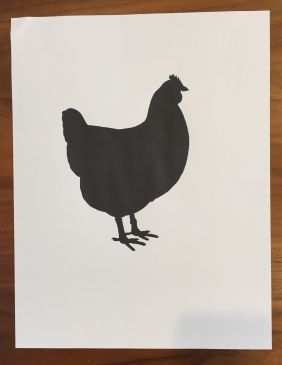
Pre-print out silhouette images (in black). Offer a variety of options. Consider the class and their particular interests. Consider what subjects they have been studying. Popular themes are soccer, football, music, dance, art, cats, dogs, whales, etc. Or consider having the students bring in images. The image will need to fit on an 8 x 11 piece of paper. The image can be anything they like.
If you have black paper available for the lesson, the students can create their own image on the black paper, then cut it out.
Tips & Tricks
- Print silhouettes on a thicker copy paper. Or print the image on regular copy paper and have the students trace their image on black construction paper. The thicker paper silhouette is easier to glue on the background.
- Make sure students trace their image in very, very light pencil. The dark pencil outline may show through the white paint.
- After the lesson, wash the brushes well. Acrylic paint dries like plastic. The bushes can be ruined if not washed completely with soapy water.
- The paint does not come out of clothes if the paint dries. Consider having the kids wear paint shirts, aprons, or just let them know that the paint will dry on their clothes. If they do get paint on their clothes have them wash it promptly with water. It will come out if you do this right away.
- Apply the paint thinly. Acrylic paint dries fairly quickly. This will allow you to complete the lesson in one session. Consider bringing in a hair dryer to speed up the dying.
- An alternative to acrylic paint is tempera paint.
- Use deep, vibrant colors for the base color. Avoid pastel colors.
- Start with a silver dollar size blob of white paint and a quarter size blob of color paint. Give each student their own paper plate with the white paint and color paint of their choice.
- The finish painted paper will buckle a little. To smooth out, after the artwork has dried completely, place it under heavy books, then mount on black paper.
Discussion Points
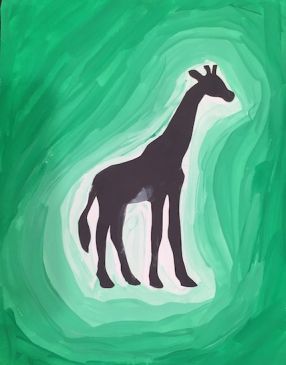
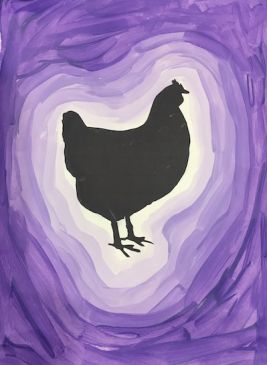
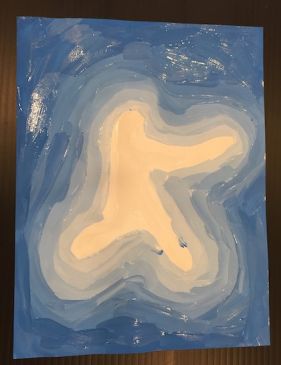
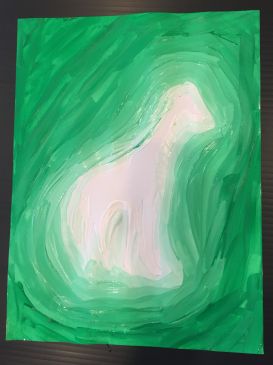
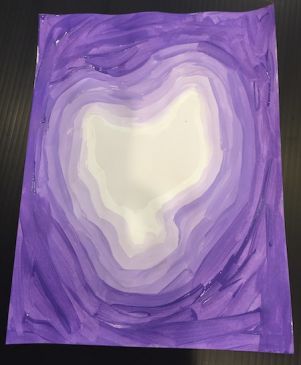
Discuss and define the vocabulary words listed above. Define monochromatic which means using one color. In this lesson the students will use one color mixed white to create different values of the color. Adding more white paint makes the color lighter. The pure color is with no white. Describe how one can use the same mixing process to create a shade, or a darker tone by adding a little or a lot of black. Artists use the technique of mixing white and black to color to add different richness, dimension, and vibrancy to their painting.
Reflection Point (Assessment of Learning Objectives)
Ask the class or individual students the following questions:
- Can the students tell me about tints and shades?
- Did the student create a background with paint that uses the color mixing technique of tint?
- Did the student create a silhouette painting?
Instructions for Lesson
-
Set up: Have the students choose a color they will be working in. Explain that they will only have one color and then white in their art piece.
- Students choose a printed silhouette or make their own on black paper. Cut it out. Emphasize the importance of clean cutting. It will make a difference in their final art piece.
- In pencil, trace the perimeter of the silhouette on the white paper. Trace the pencil line as light as possible.
- Using the white acrylic paint, paint over the pencil outline. The thickness should be about the thickness of a brush. A ¼ inch width.
- Add a very, small drop of color to the white paint. Use the popsicle stick and/or the brush to mix the paint. Outline the perimeter of the shape again with the new color tone. First is the white, then the next layer, moving to the outward edge, has the tinted color.
- Add another very, small drop of the pure color to the white paint mixture. Mix. Outline the perimeter of the shape with the new color tone.
- Continue to add color and paint the perimeter of the shape. Moving systematically to the outward edge. The tint will get darker in color. Keep outlining the shape, progressively light to darker, to the edge of the paper. The shape will become a. rough outline of the original image. This is fine.
- The final step is using the “pure” color to outline the shape. Do not add white for the last color. Make sure the entire paper is filled in.
- Allow the paint 5 minutes to dry. Or use the hairdryer.
- Students can take a five minute break….you can choose a book to read with them or something else. This is a good time to clean up the paint supplies. Have the students soak their brushes in water.
- After the paint is dry, glue the silhouette to the paper within the white paint lines.
- Mount the art on a piece of black construction paper.
References and Attributions
Lesson written by Heather McClure-Coleman; edited by Robin Reents.
Notes for Educators
21st Century Thinking Skills
Decision Making. Choosing from alternatives.
Observing. Using your senses to learn about something in detail.
Predicting. Determining what will happen next.
Washington State Learning Standards
(VA:Cr1.1.4) – Brainstorm multiple approaches to a creative art or design problem.
(VA.Cr2.1.4)– Organize and develop artistic ideas and work. Explore and invent art-making techniques and approaches.
Arts Integration Opportunities
This piece of art could be a front cover for a short story students write.
The silhouette could be chosen based on something relevant to their current studies. For example, space, planets, social studies, a character in a piece of literature they are reading.
Please note: These lesson plans are intended for non-profit use only. Use of these plans for commercial purposes should give attribution to the Issaquah Schools Foundation and be accompanied by a nominal donation at www.isfdn.org/donate. Thank you.
Donate Now