Forms: 3-dimensional shapes.
Line: mark with greater length that width.
Shape: closed line, geometric or organic.
Pattern: uniform repetition of the elements: in this lesson shape & color.
Symmetry: both sides of a composition are the same, as in a mirror-image.
Unity: all elements fit together.
Stylistic Conventions: the ‘rules’ dictated by the style, on use of color, shape and form.
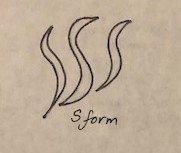
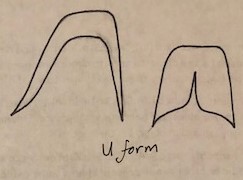
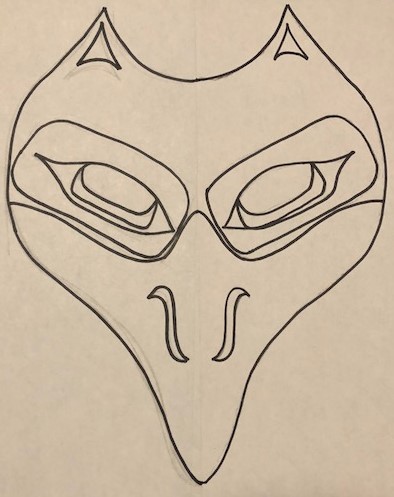
Formlines: the special shapes repeated in this style: ovoids, U-forms & S forms.
Totems: symbolize characters in mythology or convey the experiences of ancestors.
The NW coastal tribes, Tlingit & Haida, use animal emblems as crests to identify different families’ characteristics. They paint or carve the image out of cedar to label blankets, boats, houses, & poles that marked their address. Strict rules (stylistic conventions) dictate how each animal is drawn, using ovoid shapes, u-form & s-form lines. The color black is the most important, used on main lines, red is secondary in importance. White or natural wood is used as a background color. Animals represent families.
The Beaver: artistic ability, builder, resourcefulness, determination.
The Bear: strength, solitude, motherhood, teaching, friendliness.
The Raven: creation and knowledge, bringer of the light.
Using a wire cutter tool, cut cubes of clay the size of a navel orange, enough for each student. Wrap in plastic until time to use.
Put clay tools (cutters, mats, rolling pins and straws) in the middle of each table group, or at a couple of central locations.
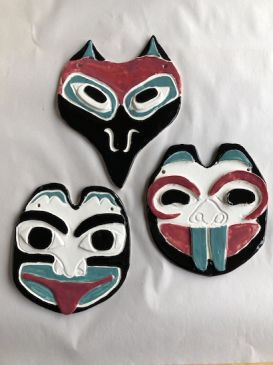
At each seat or using an overhead projector, display photos of NW Coast animal faces of the beaver, bear and raven. These should be authentic style using ovoids and u-form lines, with black, red and white or wood.
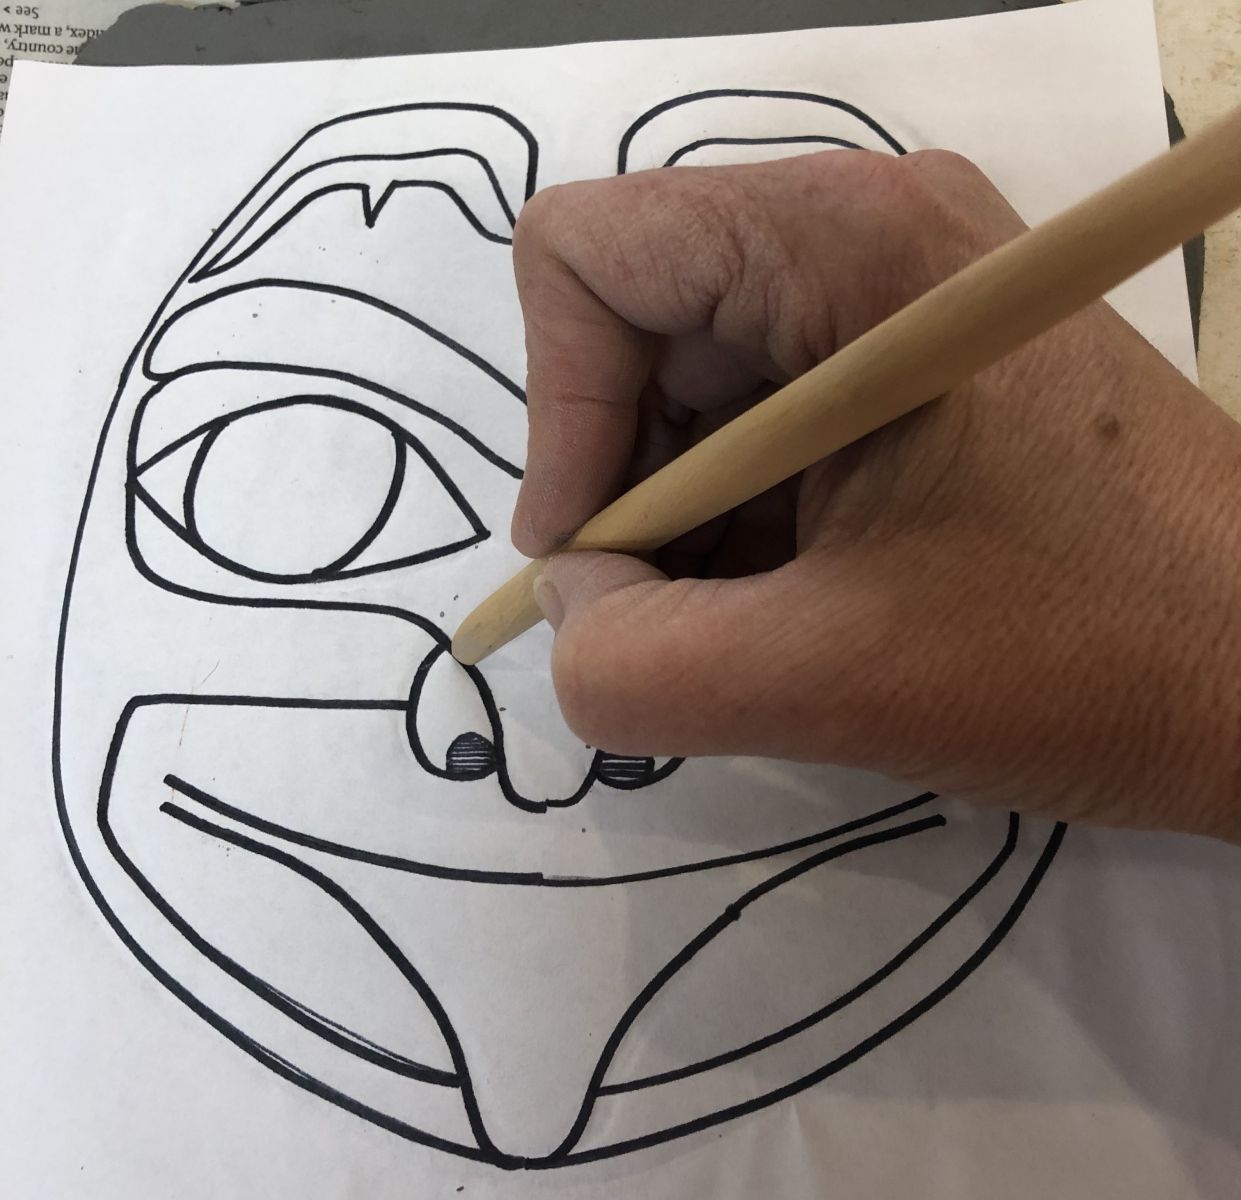
Make clear plastic templates of totem animals (10 per animal)
1) Print out each animal template the size you want your students' animals to be.
2) Lay plastic over the image.
3) Using a black and red Sharpie, trace the image onto the plastic using the appropriate colors on the image.
4) These templates can be laid onto the clay slabs and traced with a dull pencil or blunt end of a skewer.
Our land has been populated for centuries by native tribes that evolved their own art, recognizable with its unique style. When all artists are expected to copy an agreed upon style, they are sticking to the stylistic conventions, or ‘rules’, of that style. The NW Coast tribes used certain animals as their identifying totems. Ancestors related to the same good qualities that the animals were known for.
Explain the qualities as listed above. Encourage students to think about which one fits their family the best.
Using color reproductions of Coastal art, point out the repeated ovoid shape & the U-form lines. Point out the grooves in the wood, and/or painted lines to make outlines and details.
Point out the repetitive use of red, black and white. Green was used for emphasis on small areas in some art.
Students will reflect on totem characteristics to choose 1 of the 3 totem animals described and depict it in a clay plaque.
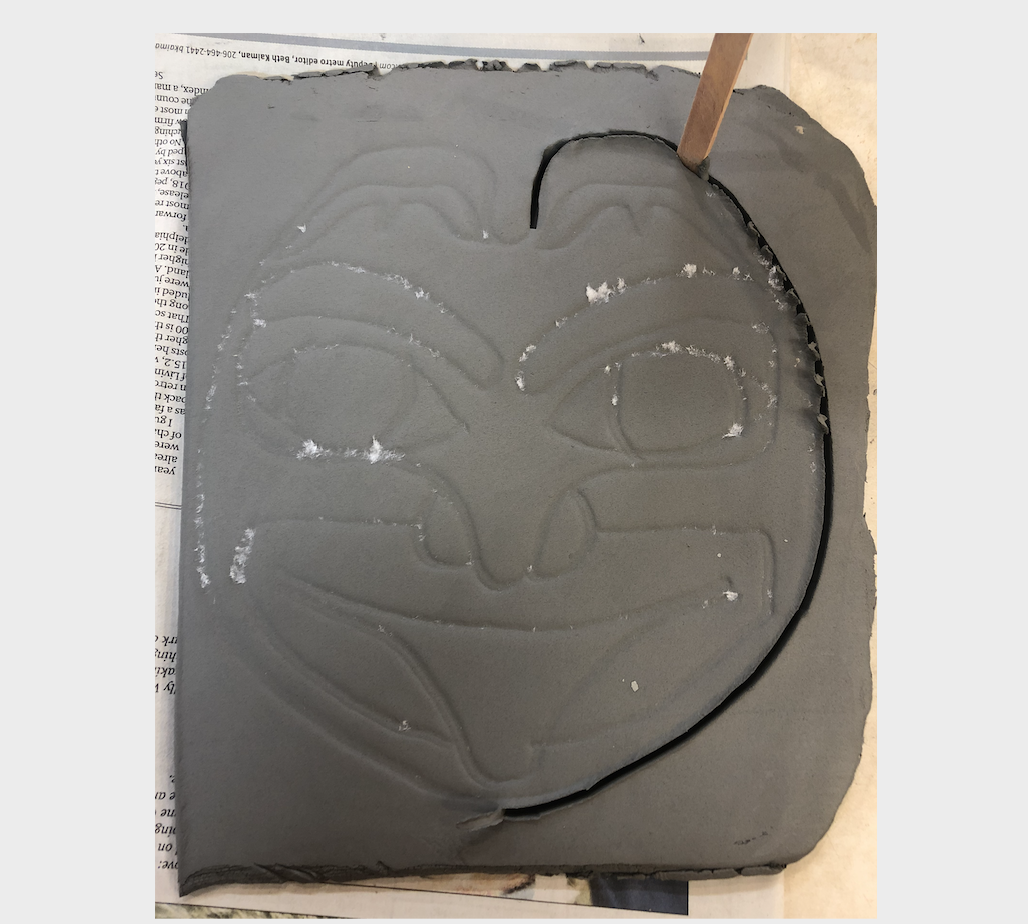
Students will use clay tools correctly to form a slab, trimmed to desired shape, with details modeled and attached or modeled with a tool, to resemble their chosen template.
Students will apply conventional colors.
Students will practice good craftsmanship.
Give students a background on this art style, using colored examples of traditional totem designs used on longhouses, Chilkat blankets, totem poles, canoes, etc. Another option is to read “Storm Boy,” by Paul Owen Lewis. with its thorough depiction of the Killer Whale totem. Demonstrate each step and then give students time to complete each step on their own, with guidance.
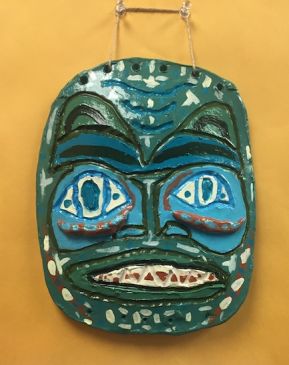
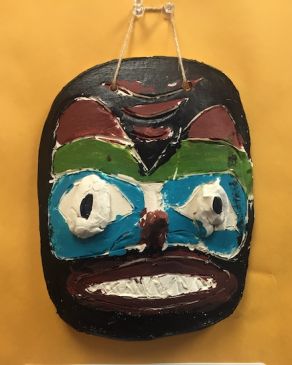
Day 1: Building the Masks
.JPG)
.JPG)
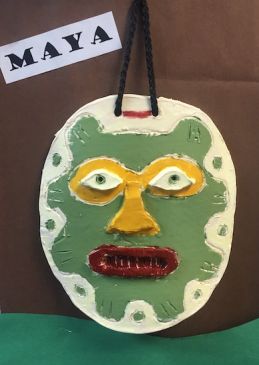
Day 2: Glazing the Masks (can be done in small groups or as a full class)

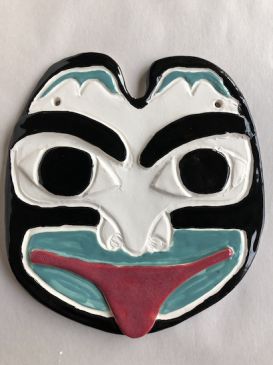
Bear - Always has a hanging tongue; Ovoids used in eyes, mouth; U-forms in ears; S-lines are other curved lines.

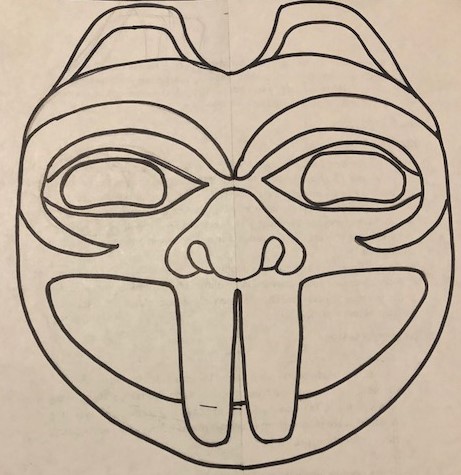
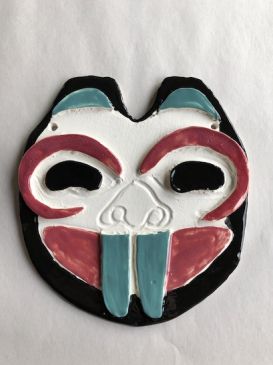
Beaver - Always has big teeth; Ovoids in eyes, mouth, S-lines are the other curved ones; Teeth not always drawn.
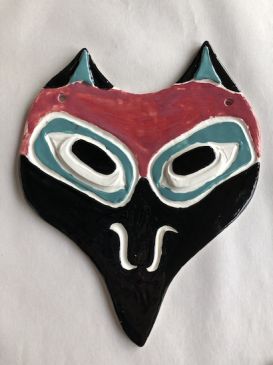
Raven - Always has a pronounced sharp beak; often holding the sun; this design is from a totem; Ovoids used in eyes, s-lines in the brow, and other lines.
Lesson written by Cynthia Moring, edits and artwork by Juliette Ripley-Dunkelberger.
The Raven's Call blog; Art Class Curator blog; Canada's First Peoples website; Sealaska Heritage Curriculum; Northwest Coast Art wikipedia; Animal Totems downloadable PDFs.
21st Century Thinking Skills
Goal setting, observing, making connections, visualizing, sequencing, classifying, determining main idea, fact and opinion. determining point of view, decision making, synthesizing.
Washington State Performance Standards
(VA:Cr2.1.5) a. Experiment and develop skills in multiple art-making techniques and approaches through practice. This happens when skills previously learned in clay hand-building & painting are combined.
(VA:Cr2.2.5) a. Demonstrate quality craftsmanship through care for and use of materials, tools, and equipment. This happens when students use appropriate tools to do a precise job.
(VA:Cr2.3.5) a. Identify, describe, and visually document places and/or objects of personal significance. This happens when the significance of each totem animal is considered as a personal choice.
(VA:Cr3.1.5) a. Create artist statements using art vocabulary to describe personal choices in art-making. This applies only if the students talk or write about their choice of animal totem and/or the process used. (See Arts Integration below)
(VA:Re7.2.5) a. Identify and analyze cultural associations suggested by visual imagery. This happens when students learn which animals are associated with which character traits. (VA:Re9.1.5) a. Recognize differences in criteria used to evaluate works of art depending on styles, genres, and media as well as historical and cultural contexts. This happens when students learn the ‘rules’ of making this style of art.
Arts Integration Opportunities
Writing: Students can write about their totem animal’s significance within the tribe’s culture, & why the student chose that totem animal.
Reading/Dance: “Storm Boy” by Paul Owen Lewis. Teach each other the family totem’s special dance as in the book.
Social Studies: Learn about the other totem animals’ characteristics & examine totem poles.
Please note: These lesson plans are intended for non-profit use only. Use of these plans for commercial purposes should give attribution to the Issaquah Schools Foundation and be accompanied by a nominal donation at www.isfdn.org/donate. Thank you.
Fueling Success for Every Student, Every School