Line: a mark on a surface. Lines can be created by a pen, pencil, brush or stick , etc. on a variety of surfaces. Line is an element of art.
Eric Carle, the children’s book author, is the inspiration for this lesson. His book illustrations are created from painted paper.
This lesson has five parts: 1. Read a book (or show portions of the book to save time). 2. Make lines with oil pastels on paper. 3. Make thick lines covering oil pastel lines with paint. 4. Create more lines using texture tools. 5. Reflection and assessment.
Check out the book, Follow the Line by Laura Ljugkvist and a few Eric Carle books.
Line tables with newsprint for easy clean-up.
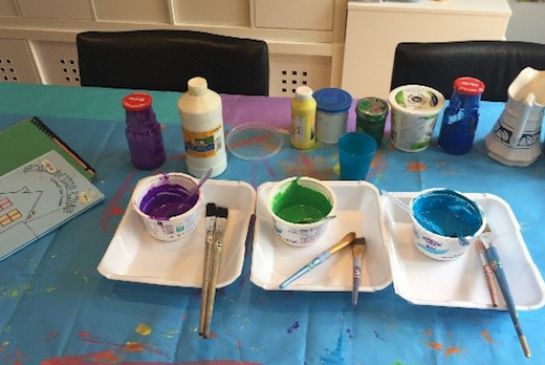
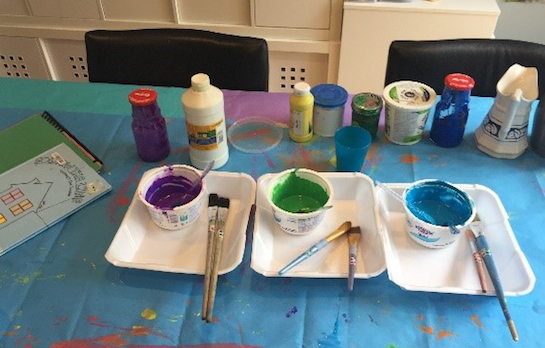
Prepare the tempera paint in plastic yogurt containers. Water down the paint slightly, allowing it to appear translucent. Also feel free to tint the paint. Tinting the paint will make the colors more vibrant. For example, adding a little yellow to green makes the green more vibrant.
Put two thick brushes into each container of color then place four colors on each table. Separate the colors by warm and cool tones so each table has only warm or cool colors. The kids will get a chance to change tables. Warm colors are red, yellow, and orange. Cool colors are blue, green and purple. If the cool and warm colors get mixed up the painted paper doesn’t turn out very well.
Prepare water clean-up jars for soaking the paint brushes after the lessons.
Have drying racks in the classroom for the children to easily dry their painted paper.
The important part of this lesson is that kids understand what a line is. Lines can tell a story. Lines can have a feeling. For example, some lines make us feel happy and some angry. Lines can be sharp or curved. Lines can swirl. Lines do not connect. When lines connect the line becomes a different element of art called a shape. Consider printing this page of line examples for students to review, or hand out a blank line worksheet for them to practice.
Students will be able to make the following I can statements:
I can draw a variety of lines.
I can use a variety of mediums and tools to make lines.
I can reload my brush with double-dipping skills.
I can make lines across my paper and up and down my paper.
1. Start by reading all (or portions of) the book, Follow the Line through the House. Point out the line and the different ways the line is moving through the house.
2. Define a line. A line can be wiggly, zig-zagged, curved, or angled. There are thick lines and thin lines. There are two important things about lines: First, lines can tell a story and show feeling. (On the board, you can demonstrate lines that are happy lines such as swirls, and lines that are frustrated like strong zig-zag lines.) The second important thing about a line is that it does not connect to the other side of the line. The line can get close to the end, but if you connect the start of your line to the finish of your line, you will make something different, something really cool. But it is called a shape, not a line.
3. Demonstrate making different types of lines on a white board or paper. Show them how to make a swirl. Show them how to make a thick line using the side of the marker.
4. Optional Kinesthetic activity: Have the kids stand up and show lines using their body. You can demonstrate and they can follow: diagonal shape (use your arms stretching across your body), a circle shape, a wiggle line shape, a horizontal shape, a vertical shape.
5. Have the kids make imaginary lines with their finger in the air. Have them make a straight line, a zig-zag line, a curvy line and a swirl (start the swirl in the middle and work outward).
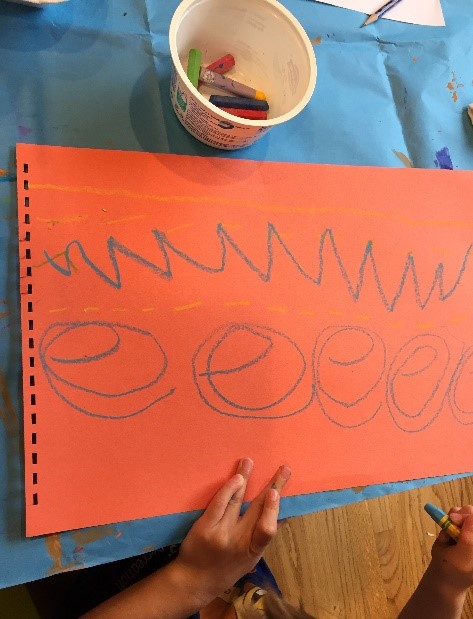
6. Demonstrate the lesson. Orient the paper in the landscape direction. Use the oil pastels to make a variety of lines from one side to the other. Start on the left, move to the right. Show a variety of lines: wavy, zig-zag, dashes, diagonal, arch, swirl, etc. Also show that you can use the side of a small, broken oil pastel to make a thick line going across the paper.
7. Pass the paper and oil pastels to each table. Have the kids make lines across their paper with the oil pastel. Encourage them to make 2-5 or more different types of lines. They can use the same color or different color oil pastels for their lines.
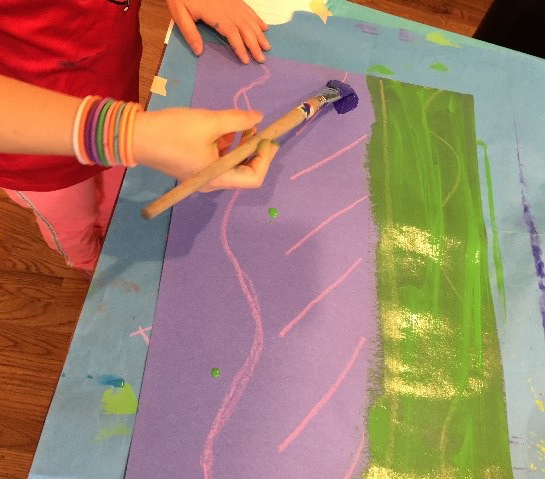
8. Demonstrate the paint part of the lesson AND the texture part of the lesson. Have the kids put their materials down and listen to you. Paint thick lines across the paper with 3 or 4 different stripes of paint. Demonstrate how to paint thick lines over the oil pastels. Teach the kids that when their brush dries out you need to dip your brush in the paint. This is called “reloading.” Also teach the kids to paint with the tip of the brush. Demonstrate filling up the entire paper with the painted lines. The entire paper is full of 3, 4 or 5 paint lines. No white paper should be showing.
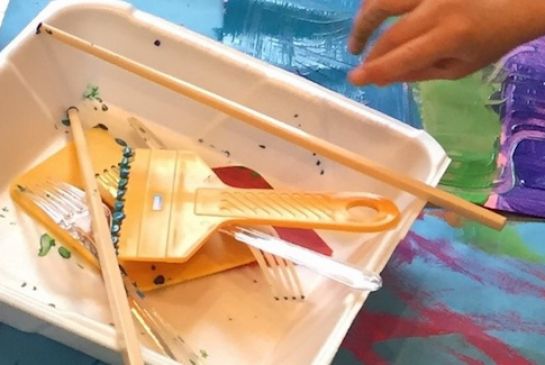
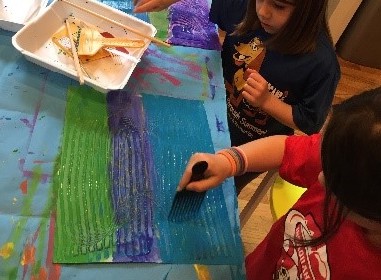
9. Demonstrate how to use the texture tools making lines from the top of the paper to the bottom. Demonstrate dragging the texture tools, making swirls with the chopsticks, make dash lines, etc.
10. Now it is the kids’ turn. Hand out paint to the tables. Have kids paint lines across the paper. Make sure the paint is dived by color and table. Some tables will have warm colors other tables will have cool colors. Remind kids that they will probably have a chance to make a cool and warm paper.
11. After the paper is completely painted with colored lines, kids will use the texture tools to make more lines. Encourage them to make their lines in different direction and remind them to make a variety of lines.

12. When they are done, have them take their paper with two hands to a drying rack and go to a different colored table. Start the whole process over with the oil pastels.
13. Clean up. Have the kids put all their paper on the drying rack. Have kids put their brushes in the prepared large water containers. Have kids clear the paint tubs at their table. Have kids wash their hands and come to the rug to sit and reflect.
14. Reflection/assessment/closure. Ask the kids what they know about lines. Ask them what happens when lines connect: lines become shapes. Ask two kids to come up and show a favorite line. Have them draw it on a white board or in the air. Ask a child to draw a wiggle line. Ask a different child to draw a zig-zag.
21st Century Thinking Skills
Observing, making connections, visualizing, sequencing, classifying, summarizing, finding evidence, cause and effect, analyzing, evaluating.
Habits of Mind
Thinking flexibly, creating, innovating, taking responsible risks, reflecting.
WA State 2017 Learning Standards
(VA:Cr1.1.K) a. Engage in exploration and imaginative play with materials.
(VA:Cr1.2.K) a. Engage collaboratively in creative art-making in response to an artistic problem.
(VA:Cr2.1.K) a. Through experimentation, build skills in various media and approaches to art-making.
Arts Integration Opportunities
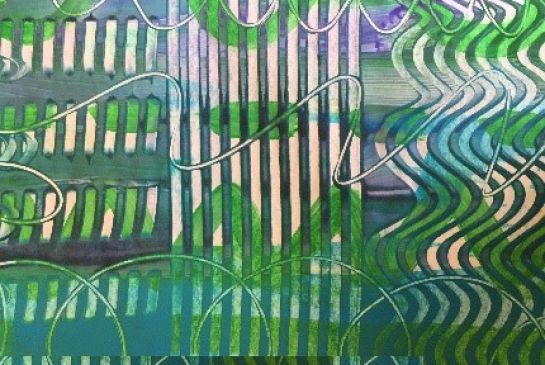
This is the type of paper that author, Eric Carle (The Hungry Caterpillar) uses for his illustrations. Have a few Eric Carle books on hand or ask the teacher to point this out the next time they read an Eric Carle book.
The teacher could have students create a story based on the idea of Follow the Line They could follow the line through the school. The students could follow the line through their own house.
Students could come up with a list of lines they see at school (PE/recess, jump ropes, bars, lines in the hall way, in the library, etc.).
Please note: These lesson plans are intended for non-profit use only. Use of these plans for commercial purposes should give attribution to the Issaquah Schools Foundation and be accompanied by a nominal donation at www.isfdn.org/donate. Thank you.
Fueling Success for Every Student, Every School