loading Skip to Main Content

Snowy Winter Landscape

Students will create a sense of space and distance by using the repetition of shapes in varying sizes in a winter landscape. Recommended for 1st Graders.

Elements of Art 

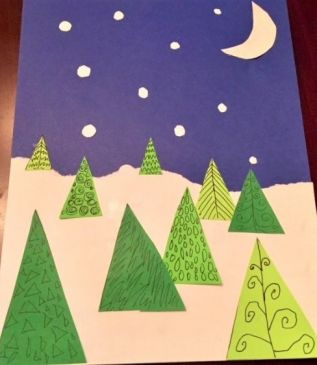
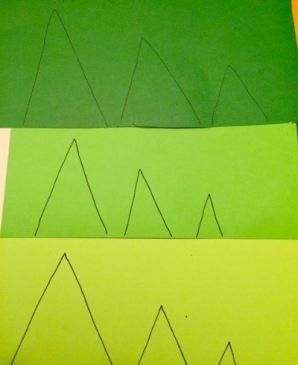
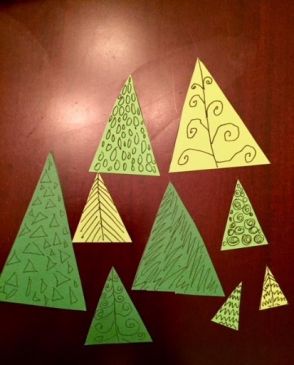
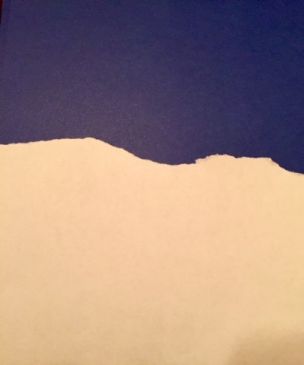
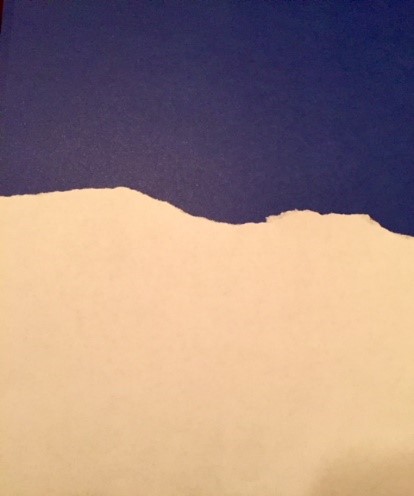
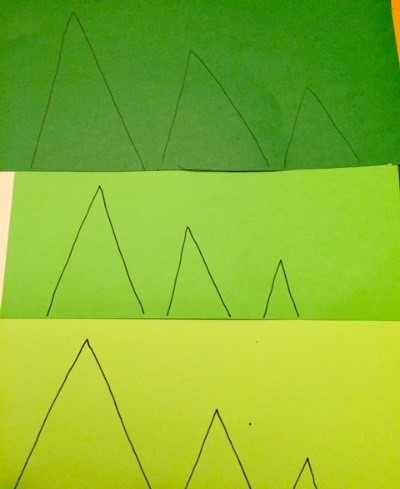
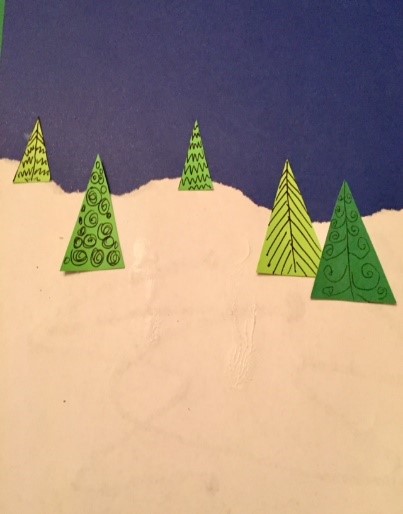
Shape: The form of an object or its outline. We will be using the shape of triangles for the trees in varying sizes.
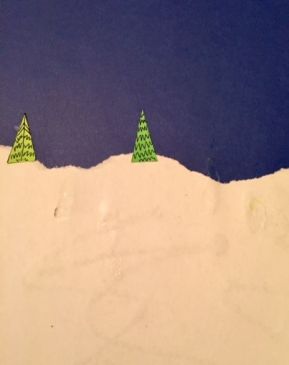
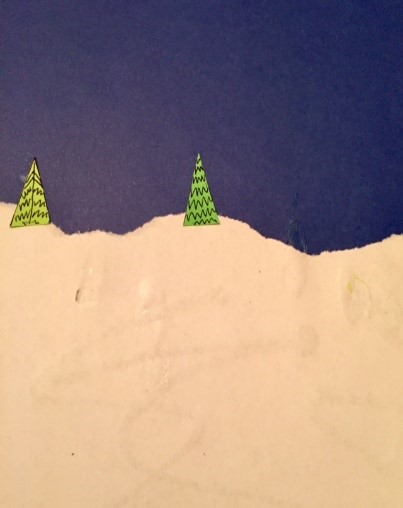
Space: The area within, around, above, or below an object. The placement of the various size trees will help in giving the composition a sense of distance. 

Principles of Design

Pattern: A combination of elements or shapes repeated in a recurring and regular arrangement.
Repetition: One object, shape, or line repeated.
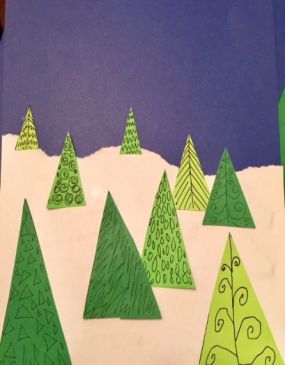
Rhythm: The repetition or alternation of elements, often with defined intervals between them. Rhythm can create a sense of movement, pattern and texture. In this lesson we will use the different sizes of trees and the patterns and lines drawn into them to establish rhythm.
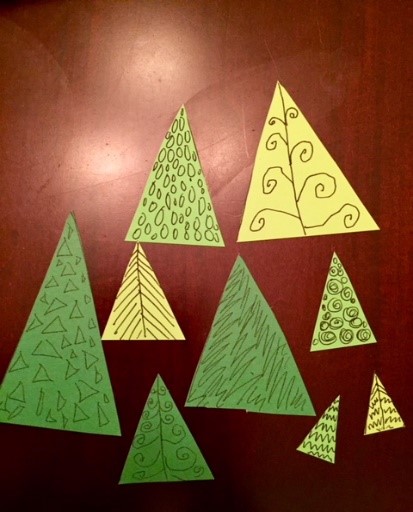
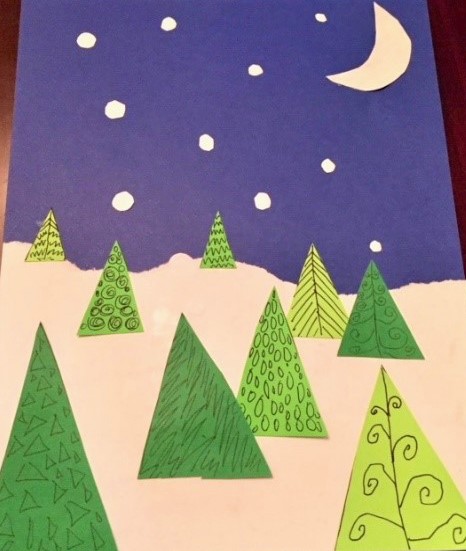
Variation (Variety): Using a range of different qualities or instances of and art element to create a desired visual effect. This lesson uses variations in color and shapes for trees in addition to the sizes of the painted snowflakes which can add to a more interesting composition.

Vocabulary Words

Landscape: artwork portraying the visible features of an area of land.

Materials & Supplies

  • Dark blue or black Construction Paper (8” x 11”) - classroom set
  • White Construction Paper (8” x 11”) - classroom set
  • Shades of green Construction Paper (8” x 11”) - classroom set
  • Tempra Paint (white)
  • Small round Paint Brush (tip comes to a point)- classroom set
  • Small Cup or Dish for Paint - classroom set
  • Black Marker (fine or medium point)- classroom set
  • Scissors- classroom set
  • Rulers- classroom set
  • Glue Stick- classroom set
  • Colored Pencil (white)- classroom set

Advanced Preparation

Find a landscape work (painting or photograph) which demonstrates trees getting smaller as the space recedes.
Precut the sheets of all colors of green construction paper into three sizes of rectangles: 1”x2”, 1.5” x 3”, 2” x 4” - 9 rectangles in all for each student 
Pass out all paper and one paintbrush to each student prior to starting lesson.
Set up drying area.

Tips & Tricks 

  • Tearing the white construction paper across the middle will work best to make jagged and even edges for the top of the snow but you can have them use scissors to cut a wavy cut across the while paper if they have difficulty in tearing.
  • Have students write their names on the back of their blue or black construction paper with a white colored pencil prior at beginning lesson.
  • Have students draw out the patterns and textures in each of their trees in their green papers prior to cutting them out. This will help them be able to get designs into most if not all of their trees easily.
  • After cutting out trees, have students group trees according to 3 sizes (large, medium, and small) on their desks before they begin gluing. 
  • Squeeze a small amount of acrylic paint into a small cup or dish and have two students share one just prior to the painting portion of this lesson.

Discussion Points

Before the lesson begins, ask students how we can determine how far something is from us. You can ask them if objects far away are bigger or smaller and also discuss the concept of overlapping.
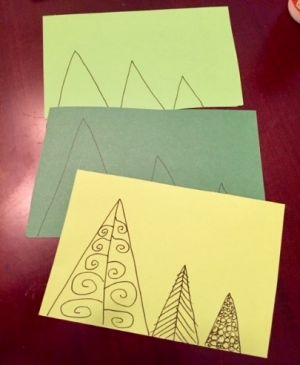
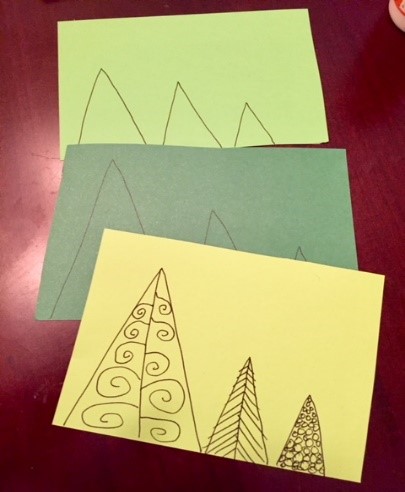
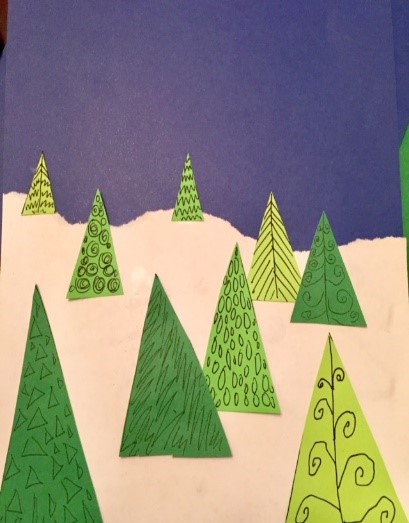
During the lesson discuss the different textures of leaves or needles on trees. Some have prickly needles close together while others are less full and have more space between the branches. Remind them to keep that in mind while drawing patterns in their trees.
When adding the paint for snow, discuss that even the snowflakes can show distance. The ones further away will be simple dots while the ones really close will appear larger and have a shape to them.

Reflection Point (Assessment of Learning Objectives)

While students are finishing the painting portion of their projects, ask students to point out which trees are the furthest and which are closest. 
Students will use placement of trees correctly to show distance – smaller in background, larger in foreground
Students will use different lines and create patterns in each tree to make an interesting variety of textures
Discuss with students how they each created a sense of rhythm in their backgrounds by the placement of their painted snow dots. Some students will have a few scattered dots representing snow which is gently falling and others will have painted in dashes that created movement like a snow flurry. 

Instructions for Lesson

  1. Using the artwork, show students how trees appear to get smaller as they recede toward the horizon. Have them look way back in the classroom to note how objects appear smaller.
  2. Using the artwork, point out that the further back things go in space, the closer they are placed to the horizon line. 
  3. Ask “where are the biggest looking trees? Where are the smallest looking trees? Which trees are supposed to be further away?”
  4. Give each student one sheet of blue or black construction paper, one sheet of white paper, and nine rectangles in three green shades.
  5. With their white colored pencil, ask them to write their names on the back side of the back or blue paper and turn it around since we will be using the other side.
  6. Using white construction paper, demonstrate how to tear paper slowly to create curved hills.
  7. Have students take their white construction paper and tear it across the middle width-wise. Instruct them to tear slowly and try and not to make a flat line. Explain to students that they need to tear it to make it slightly wavy to create what will be snow-covered hills. Keep one torn half and discard the other.
  8. While they are doing this, collect the discarded white paper to recycle for future projects.
  9. Demonstrate the next steps. Show students how to apply glue to one side of their white paper and glue it down onto their blue or black construction paper making sure that the edges of both the papers line up at the bottom. (Students may need to apply some glue to the lower half of the blue or black construction paper so the white paper can fully adhere). 
  10. You will now have what looks like a snow-covered hill and a night sky.
  11.  Have students cut their trees.
  12. Demonstrate patterns which could be used to show texture of trees (stick to one kind of tree like a conifer).
  13. Using their fine point black pens, give students time to draw different patterns, lines, and shapes to create texture on each rectangle. Encourage them to make each tree unique and to use smaller patterns or lines for the smaller trees.
        
  14. Demonstrate how to cut a rectangle into a triangle. Place a dot in the middle of a short edge, then cut from the opposite corner to the dot. Repeat on the other side. 
  15. Once their trees are all filled out and have a dot in the short end center edge, have them cut out each tree.
  16. Demonstrate how to glue the trees. Starting with the smallest trees, show students how to glue them just below the top of the white construction paper. Encourage students to leave space between the trees as to leave space for larger trees in the foreground.
  17. Give them time to glue down the smallest trees.
  18. Next, demonstrate how they will begin gluing down their medium size trees further down in the middle of the white paper. Encourage students to overlap a few trees to create a sense of distance and to try not to completely cover up any other trees in the background already glued down. 
  19. Give students time to glue down their medium trees.
  20. They will take the remaining large trees and glue those down making sure to line up the bottom flat edge to the flat bottom edge of the paper. Now we have our snowy winter forest landscape!
  21. When most students have their trees glued, stop the work and demonstrate how to create snowflakes with the paint brush. (Painting snowflakes may be omitted due to time constraints. It is not essential to the focus of creating space using different sizes of imagery.)
  22. Show the students the students how to use the tempera paint to make snowflakes. Instruct students to use their small paintbrushes and dip it into their dishes of white tempera paint and gently tap the paper (reminding them to just dip the tip and use a small amount of paint at a time.) 
  23. Students will paint different sized dots into the blue background for snowflakes and for those wanting to, they can paint a full or crescent moon somewhere in the sky. Give students time to paint and put their artwork on the drying rack.
  24. Clean up paint and supplies.

Notes for Educators 

21st Century Thinking Skills
Goal setting, observing, making connections, visualizing, sequencing, comparing and contrasting, finding evidence, problem solving. 

Habits of Mind
Creating, reflecting and thinking flexibly.

WA State Learning Standards
(VA:Cr.1.1.1) a. Engage collaboratively in exploration and imaginative play with materials. this happens when students work together to mix new colors.
(VA:Cr.1.2.1) a.Use observation and investigation in preparation for making a work of art.
(VA:Cr.2.1.1) a. Explore uses of materials and tools to create works of art or design. this happens when they learn how to mix colors using brushes and water.
(VA:Cr.2.3.1) a. Identify and classify uses of everyday objects through drawings, diagrams, sculptures or other visual means. this happens when explaining the color wheel.
(VA:Cr.3.1.1) a. Use art vocabulary to describe choices while creating art. this happens as you demonstrate, using color names and defining movement.

Arts Integration Opportunities
Science: bring in evergreen branches to draw the needles as they grow off the main stem.

Please note:  These lesson plans are intended for non-profit use only. Use of these plans for commercial purposes should give attribution to the Issaquah Schools Foundation and be accompanied by a nominal donation at www.isfdn.org/donate. Thank you.

Donate Now

Artistic Support Reference Materials

Loading...
Loading

Fueling Success for Every Student, Every School