Elements of Art
Line: an element of visual arts; the flat path of a dot through space used by artists to control the viewer’s eye movement; a long narrow mark or stroke made on or in a surface; a thin mark made by a pencil, pen, or brush. Line can also be defined as drawing from one point to another point. Lines can be zig-zag, wavy, rounded, horizontal, vertical, diagonal. The important thing about lines is that one end of the line does not connect to the other end. Otherwise it becomes a shape.
Principles of Design
Balance: a principle of design; the arrangement of elements that makes individual parts of a composition appear equally important; an arrangement of the elements to create an equal distribution of visual weight throughout the format or composition. If a composition appears top- or bottom-heavy and/or anchored by weight to one side, it is not visually balanced.
- Radial Balance: a type of balance that is equally symmetrical from the center point throughout.
- Symmetrical/Formal Balance: having balance; exact appearance on opposite sides of a dividing line or plane.
Materials & Supplies
Context
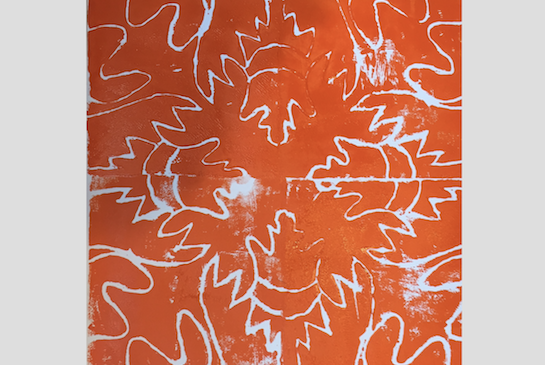
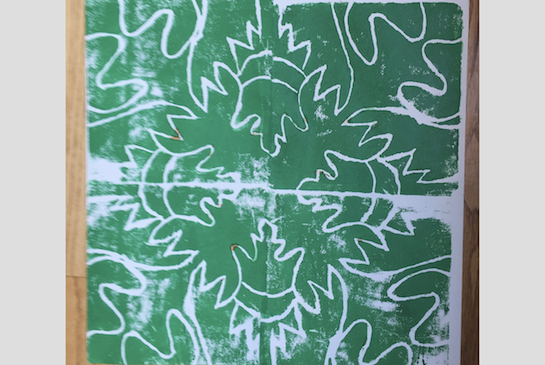
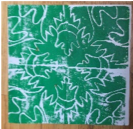
Symmetry is used in many ways including but not limited to building, architecture, tile-work, math, and industrial design. Radial symmetry is used in tile mosaic, pottery, jewelry and ceramic dishes. The inspiration for this project is ceramic pottery and kaleidoscope images.
Advanced Preparation
Prep all supplies as listed above. Line tables with newsprint for easier clean-up.
Tips & Tricks
- Have students choose one color they will use for their project. This project looks most like a kaleidoscope image if students use only one color for the four prints.
- Putting a black dot on a corner of the back of the scratch foam plate is essential for making this project a success.
- Displaying this artwork in a hallway as a mural looks particularly good (if you choose this option, offer students color choices from a palette that will look good together).
- To make clean up easier, use Styrofoam trays for inking the brayers.
Discussion Points
- Reflective symmetry is two images facing each other. To demonstrate, have two students come to the front of class, stand side by side with one arm up and one arm on their hip.This shows reflective symmetry. Point out that the line of symmetry is between the two students.
- Line of symmetry is the line you can invisible draw down the center of a piece of art to show reflection.
- Rotational Symmetry is also like a kaleidoscope. It is an image rotating around a center point in a circular fashion.To illustrate this,have four studentscome to the front of the class. Have each child put their right hand in the middle and their left hand in the air. Have them rotate a quarter turn.The image is exactly the same. Have them rotate a quarter turn, 3 more times. Have the class notice that the image (the student’s position) is the same for each quarter rotation.
- Another example of rotational symmetry is a Ferris wheel or the Great Wheel in downtown Seattle. As the wheel moves, the image remains symmetrical.
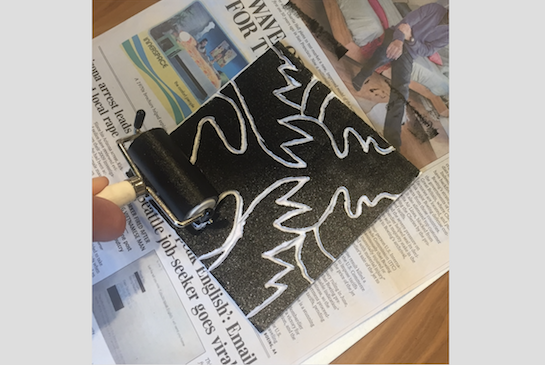
- A “printing plate” is the surface you design, carve, and ink. For this project the “printing plate” is the scratch foam.
Reflection Point (Assessment of Learning Objectives)
Students will be able to say, “Today I learned about symmetry so that I can draw a symmetrical image that is reflective. I used printmaking to create radial symmetry. I’ll know I have it when have four prints and I can point to the center point of my image and point to the line of symmetry.”
Instructions for Lesson
- Distribute supplies and paper to students.
- Demonstrate how to fold the light paper square in half to form a triangle.
- Show students where to make a dot on the bottom corner.
- Use examples and your own demonstration to show students how to draw the design. Instruct students to start at the dot and end at or near the top corner and draw an interesting design that touches both sides of the paper in several places. Give students a few minutes to complete this step on their own.
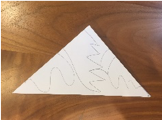
- Show students how to flip the triangle paper over so the blank side is facing up and trace over the design. Explain that their unfolded triangles will make a square.

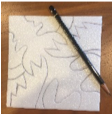
- Help students tape their designs on the scratch foam.
- Demonstrate for students how to trace over the lines, using enough pressure to make an indentation on the foam. Give students a few minutes to complete this step.
- Show students how to remove the paper line drawing and retrace lines with a different color pencil. This will indent a little more. This will make a better print. Give students time to complete this step.
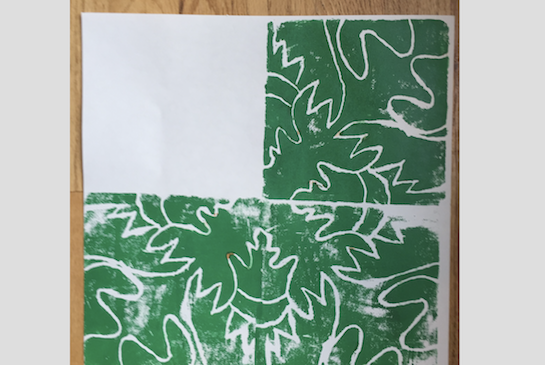
- Show students where to put a black dot on one corner on the back of the scratch foam plate. This will be the rotating point to make radial symmetry.
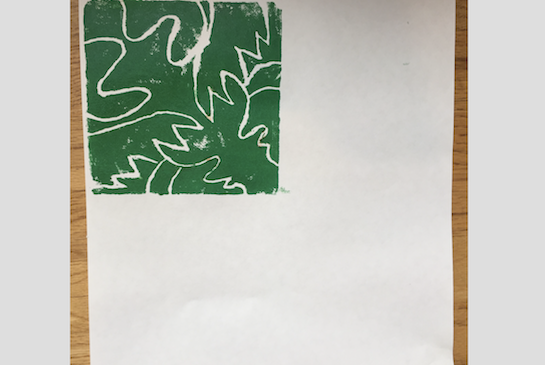
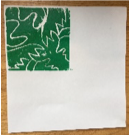
- Demonstrate how to spread a small amount of print making ink and roll it out with the brayer. Show students how to listen for a sticky sound that comes when you have the right amount of ink on the brayer, how to roll the inked brayer on the scratch foam, and how to place the square in the bottom right corner of the thick paper. Make sure students understand that they need to press down and put the dot on the back of the foam in the center of the paper. Give students a few minutes to complete this step and monitor their progress.

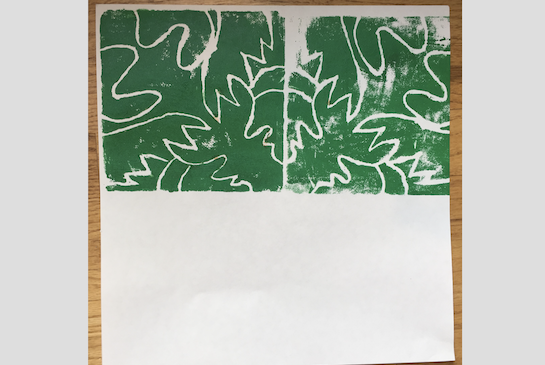
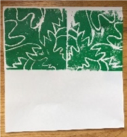
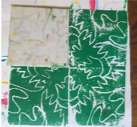
- Show students how to re-ink their printing plate. Place it on another corner of your thick paper. Make sure that the dot is in the center. Continue printing until you have filled the remaining two corners. Students will complete this after your demonstration.


Notes for Educators
21st Century Thinking Skills
Visualizing – Creating a mental image.
Finding evidence – Finding proof to support a given statement.
WA State Learning Standards
(VA:Cr1.2.2) Creating – generate and conceptualize artistic ideas and work. Make art or design with various materials and tools to explore personal interests, questions, and curiosity.
(VA:Cr2.1.2) Creating – organize and develop artistic ideas and work. Experiment with various materials and tools to explore personal interest in a work of art or design.
Arts Integration Opportunities
Mathematics and geometry.
Cultural arts.
Please note: These lesson plans are intended for non-profit use only. Use of these plans for commercial purposes should give attribution to the Issaquah Schools Foundation and be accompanied by a nominal donation at www.isfdn.org/donate. Thank you.
Donate Now