loading Skip to Main Content

Ceramic Pinch Pot Mugs

Using clay tools and techniques, students form and decorate a cup with handle. Recommended for 4th Graders.

Elements of Art

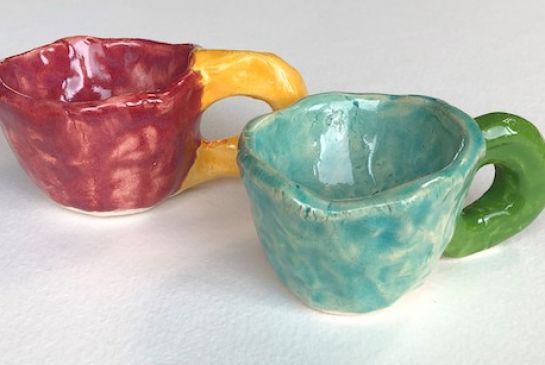
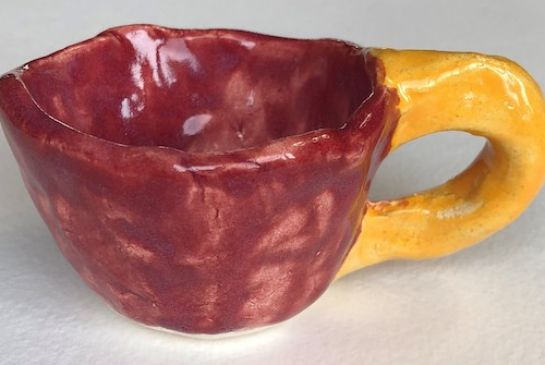
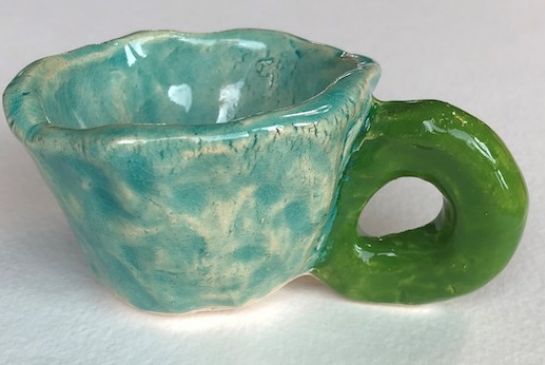
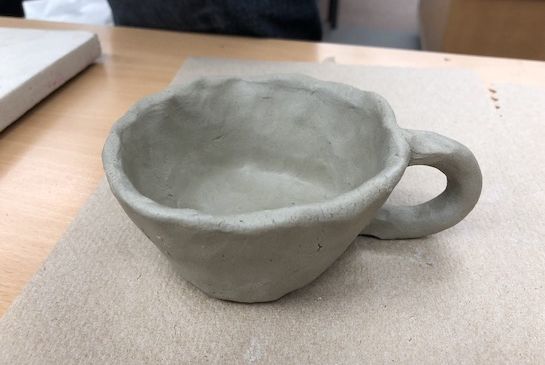
Form: an element of visual arts; a three-dimensional object that has height, length, width, and depth. A cup with handle in this lesson.
Texture: the art element that refers to how objects look or feel. Textures can be visual, seen with the eyes, or tactile, both seen with the eyes as well as felt when touched. Actual texture is natural (tactile). Simulated texture is artificial (visual). 
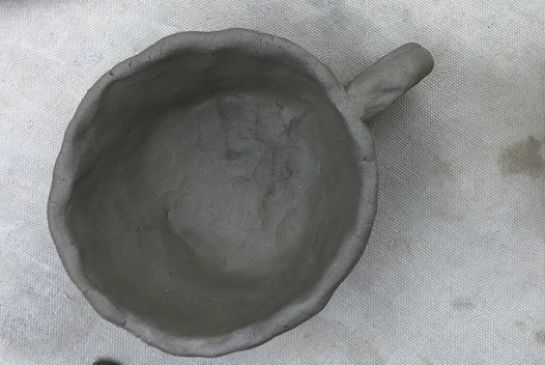
Principles of Design

Contrasta principle of design; a technique that shows differences in the elements of visual arts in an artwork, such as smooth/rough textures, light/dark colors, or thick/thin lines. In this lesson, the difference between the smooth interior and decorated exterior of the cup. 
Pattern: a principle of design; the repetition of the elements of visual arts in an organized way. In this lesson, repeated shapes impressed on outside of cup.
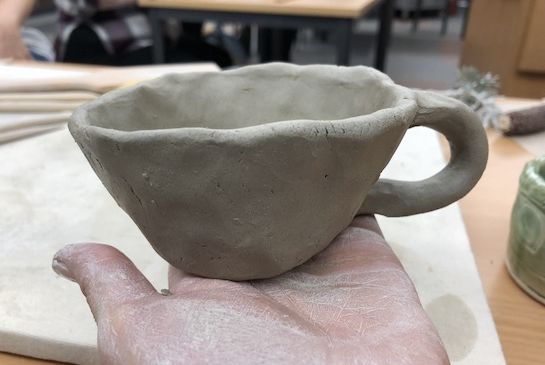
Scale/Proportiona principle of design; the relationship of parts to a whole or parts to one another in regard to size and placement. The relationship in scale between the cup and handle.

Vocabulary Words

Bisqueware: fired clay.
Clay: a mixture of minerals and clay particles which is often found at lake sides and dug out of the ground.  This material is malleable and when fired becomes permanently hard, like stone.
Coil: a rolled piece of clay that resembles a thin sausage.
Fire: the method of permanently hardening dried clay in a kiln.
Glaze: glass-based coating painted over bisqueware then refiredto seal the clay surface. Glaze makes a cup safe for drinking from and changes the texture.
Greenware: unfired clay.
Kiln: the machine that heats the clay until it hardens (matures) permanently.
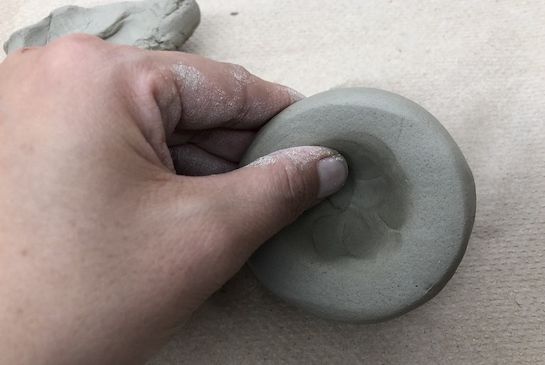
Pinch pot: clay formed into a pot by pinching.
Scratch to attach: the method of attaching 2 wet pieces of clay together.
Slip (also called slurry): wet clay that acts as glue.

Materials & Supplies

  • Low fire clay: LF-06 White: 25 lb. bag per class.

  • Low fire (cone 05-06) food-safe colored or clear glaze.
  • Paintbrush(es) for glazing.
  • Class set of wooden clay tools for pressing line into clay. Toothpicks or wooden skewers can also be used.
  • Wire tool for cutting clay
  • Small natural sponges for smoothing clay. These are about the size of a large coin. 
  • Small plastic containers to contain slip (wet clay the consistency of melted ice-cream).
  • Class set of plastic forks to scratch areas to be attached to each other.
  • Class set of vinyl or canvas placemats.
  • Simple cups or mugs or pictures of them.

Context (History and/or Artists)

A pinch pot is a simple form of hand-made pottery produced from ancient times to the present. It has been widely employed across cultures and times. More information about clay and its use in art can be found on the Issaquah Schools Foundation Clay Reference Page.

Advanced Preparation

Cut cubes of clay the size of a tennis ball. Break off clay the size of a plum for the handles. Cover, store in plastic bags. Prepare slip by adding water to clay, stirring until it is the consistency of melted ice cream.

Tips & Tricks

  • Never cut a slice of clay straight across the top of the newly opened bag. Cut down and across. 
  • When attaching, students MUST attach with both water and clay: water isn’t enough. They must also score (scratch) before adding slip. Slip isn’t enough. If attention isn't paid to this detail, the handles will fall off of the mugs when drying and/or firing.
  • Add water using the small sponge when clay is drying out or overworked.
  • If students work the clay for too long they may need to exchange it for softer clay.
  • Dried clay can be softened if left in a plastic bag with wet paper towels. The towels should be removed after the clay softens to avoid mold.
  • Children tend to pinch too hard and overwork the clay so warn them against this tendency, possibly even demonstrate doing it ‘wrong.’
  • If the students have never used clay before you can leave a little on the tables for them to manipulate. 

Discussion Points

  • Students probably use factory made cups at home that consist of slip poured into molds. Before factories, cups were (and still are) made by hand, either on a pottery wheel or as a pinch pot. 
  • Talk about the importance of handles being proportional to the cup body: big enough to fit at least 2 fingers through but not so big that it causes the cup to tip over.
  • Talk about the 3 stages the clay went through: 1) soft and pliable: greenware, 2) fired in a kiln to become bisqueware and 3) glazeware: fired a second time with glaze.
  • Explain that clay must dry as one piece: pieces can’t be attached unless they are the same degree of ‘wetness,’ and that clay must be completely dry before firing. This is because clay shrinks when it dries and pulls apart at weak, thin areas like joints.
  • Explain that if air is trapped in clay it may expand in the kiln to the point of shattering the clay, so this is why we roll and pinch it evenly.
  • Explain that only slip can hold 2 separate pieces together and the scored/scratched lines are necessary. You can illustrate this by having them put their hands together by clasping the fingers rather than just touching palms.
  • Explain that a smooth texture is achieved by working with soft clay, using fingers and/or tools. Point out the importance of having a very smooth rim to drink from. Glaze is a forgiving addition which will fill in some cracks, so they don’t have to get too worried about making it perfectly smooth.

Instructions for Lesson

Before students arrive place mats, all tools and shared containers of slip on the tables. If available, place some ceramic mugs on the tables along with clay tools.

  1. Demonstrate rolling a chunk of clay the size of a tennis ball in your hands to make a smooth ball.
  2. With the ball in one hand press your thumb into the center to make an opening, pushing down as far as possible without breaking through the bottom (approximately 1”). If you break through, start over.
  3. Gently and evenly pinch the walls. Avoid pinching the rim because it may get too thin and sharp. Students can tap the base gently on the table to flatten or tap the rim to thicken if it’s too thin. Explain to them that the direction of the pinching/pulling affects the final shape: since you want a cup you pull gently upward more than outward.
  4. Demonstrate tapping the cup gently on its sides with your fingers bracing the inside, to make the walls more uniform.
  5. With a wooden tool demonstrate making a pattern with the thick end or writing your name with the sharper end. Keep your fingers bracing the inside. Emphasize that clay shrinks when it dries so it’s critical not to go too deep into the clay wall. 
  6. Demonstrate making a coil of clay by rolling it GENTLY on the mat about the thickness of a fat piece of licorice (or a thin piece of string cheese). Sponge a small amount of slip across the coil to keep it supple. 
  7. Determine the correct length needed for the cup handle and cut it with the wooden clay tool so that each end is somewhat flat. 
  8. Tap each end on the mat until it’s flat enough to scratch into it with the fork. 
  9. Scratch the places on the cup that the handle will be attached to. The top of the handle should be attached as close to the rim as possible. Refer to the term “scratch to attach.” They remember it better this way.
  10. Spread a generous amount of slip on each end and attach the handle.
  11. Clean any extra slip from the sides with the sponge and use your finger to rub out the seam. 
  12. Pass out the clay and monitor their efforts. If students have overworked the clay have them return it to the bag and take a new ball. Watch the time: the stages should progress fairly quickly to make the cup body.
  13. Use your discretion when putting names on the mugs. Alphabet pasta is one option (it can be pressed into the bottom of the cup and will burn away when fired) but students can also use a toothpick to carefully scratch their name into their cup. However, make sure it is legible to keep track of pieces and assist if necessary.
  14. Completely air dry (2 weeks is ample time) before firing. If you can schedule another quick lesson, the students can glaze their own bisqueware cups. Never glaze the bottom of the cup where it touches the kiln shelf. Please note: students can’t actually drink out of the cup if it’s not glazed.

Reflection Point (Assessment of Learning Objectives)

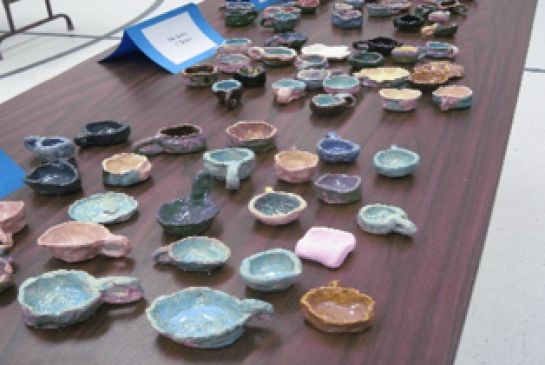
Students are able to form a cup with walls no larger than 1 inch, which doesn’t wobble when standing. The rim isn’t sharp. The handle remains attached after drying. The inside walls are smooth and the decoration on the outside doesn’t penetrate the walls. Students use clay tools when appropriate.

References and Attributions

Lesson written by Cynthia Moring, ceramic mug examples by students of Cougar Ridge Elementary School.

Notes for Educators

21st Century Thinking Skills
Observing, making connections, visualizing, sequencing, comparing/contrasting, determining main idea, problem solving, cause and effect, decision making.

WA State Learning Standards
(VA:Cr1.2.4) a. Collaboratively set goals and create artwork that is meaningful and has purpose to the makers.
(VA:Cr2.1.4) a. Explore and invent art-making techniques and approaches.
(VA:Cr2.2.4) a. When making works of art, utilize and care for materials, tools, and equipment in a manner that prevents danger to oneself and others.
(VA:Re9.1.4) a. Apply one set of criteria to evaluate more than one work of art.
(VA:Cn10.1.4) a. Create works of art that reflect community cultural traditions.
(VA:Cn11.1.4) a. Through observation, infer information about time, place, and culture in which a work of art was created.

Please note:  These lesson plans are intended for non-profit use only. Use of these plans for commercial purposes should give attribution to the Issaquah Schools Foundation and be accompanied by a nominal donation at www.isfdn.org/donate. Thank you.

Donate Now

Artistic Support Reference Materials

Loading...
Loading

Fueling Success for Every Student, Every School