Color: an element of visual art; the visible range of reflected light. Color has three properties: hue, value, and intensity.
Shape: a two-dimensional (flat) area enclosed by a line, square, rectangle, circle, triangle, octagon.
Color Wheel: colors arranged in a circle to show color relationships.
Primary Colors: the basic colors from which all other colors are mixed: traditionally, red, yellow, and blue; no other colors can be mixed to make primary colors.
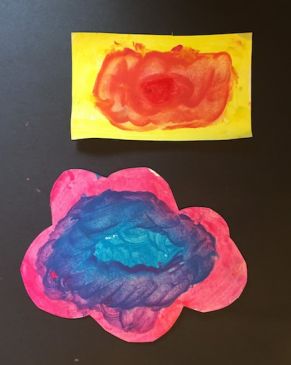
Secondary Colors: colors that are created by mixing two primary colors together in equal parts: green, violet, and orange.
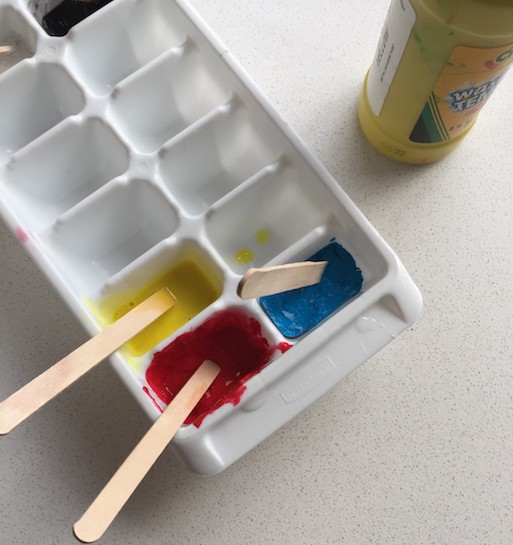
Prepare the color ice cubes. Mix two parts tempera to one-part water. Pour into ice cube trays. Wrap the ice cube tray with tin foil and poke popsicle sticks into the paint ice cubes. Punch a hole through the tin foil so the popsicle stick is straight. Freeze the ice cube paint tray. Prepare enough color ice cubes for each student to have three ice cubes: one yellow, one red, and one blue.

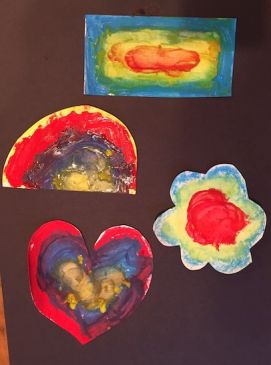
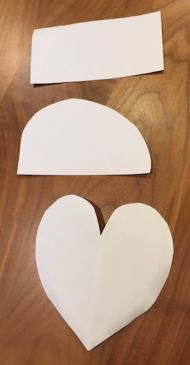
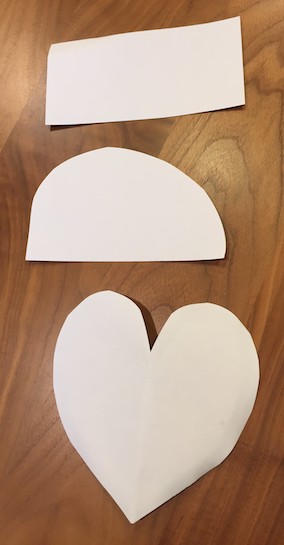
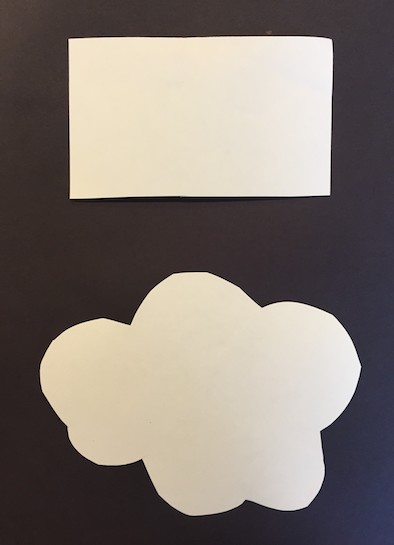
Pre-cut card stock into a variety of shapes. Examples are hearts, clouds, circles, diamonds,and/or rainbow shapes.
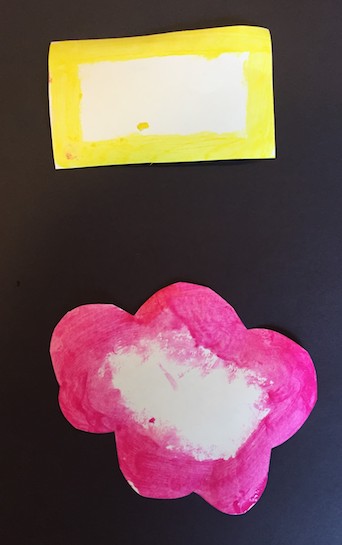
Primary colors – red, blue, and yellow. These are the basis for creating other colors.
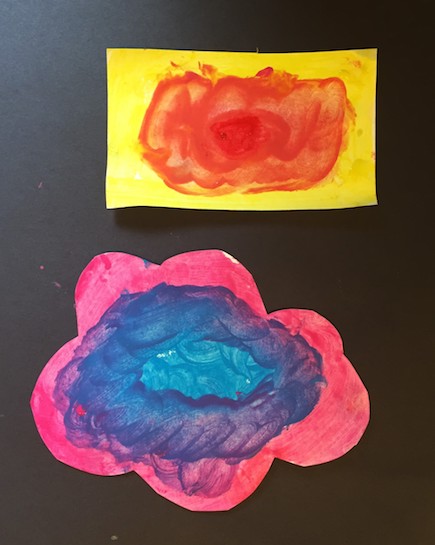
Secondary colors – green, purple, and orange. The secondary colors are made by mixing primary colors. Colors can be bright, dull, dark, and light.
Display the three primary colors and discuss what things in their environment are yellow (lemons, the sun, bananas), red (apples, fire trucks, strawberries), blue (sky, water).
Introduce the color wheel and tell them that a color wheel is a tool to help artists understand color.The color wheel shows how to create secondary colors. Discuss how when you mix two primary colors you will get a secondary color.
Name the various shapes they can choose from to paint. Include students in identifying the shapes.
Students can identify the primary and secondary colors.
Students can identify a combination of primary colors and the resulting secondary color.
Students can make secondary colors by mixing the correct primary colors.
Adapted from Arts Integration Lessons funded by the Issaquah Schools Foundation in 2011.
21st Century Thinking Skills
Observing, visualizing, comparing and contrasting, cause and effect, finding evidence, predicting and making connections.
WA State Learning Standards
(VA:Cr1.1.K) Creating-Investigate, plan, and make. Engage in exploration and imaginative play with materials.
(VA:Cr.2.1.K) Creating-Investigate. Through experimentation, build skills in various media and approaches to art-making.
(VA:Cr.3.1.K) Creating-Reflect, refine, continue. Explain the processof making art while creating.
Arts Integration Opportunities
Students make their own ice cube paints.
Science concept -liquids and solids. Discuss how liquids take the form of any shape of a mold. In this case the liquid will form to the ice cube tray. Make a comparison chart of liquids and solids. Put the ice cube paints in the freezer for the next day. Freezing the paint requires 3-4 hours (or overnight) to properly freeze. Discuss how the liquid became a solid. Discuss the ice attributes: hard and cold.
Please note: These lesson plans are intended for non-profit use only. Use of these plans for commercial purposes should give attribution to the Issaquah Schools Foundation and be accompanied by a nominal donation at www.isfdn.org/donate. Thank you.
Fueling Success for Every Student, Every School