Advanced Preparation
Cut 1-inch slabs from clay blocks.
Roll clay into slabs with rolling pin and guides or a slab roller.
Check to see that template fits nicely with extra clay around it.
Repeat previous step to make 1 slab for each student.
Tips & Tricks
- Clay can be prepared ahead of time by keeping clay moist in covered containers with damp sponges (or damp towels or newsprint)until ready to use. Keep each piece separated with plastic wrap (IMPORTANT to prevent them from sticking together).
- Make a few extra sunflower bowls for absent students or to use in case of emergency (one is dropped, etc.).
Discussion Points
Use an image of a sunflower to discuss the shapes: triangle and circle.
Have the students draw circles and triangles in the air with their fingers.
Discuss what texture means by asking them to feel things within reach. Show a piece of clay with various textures created by the end of the skewer, pencil or plastic knife.
Reflection Point (Assessment of Learning Objectives)
Students will identify circles and triangles within an image and create them in their bowl.
Students will use tools to cut, incise and texturize clay as well as glaze the bisque clay.
Students will draw a sunflower with the circle in the center and triangles on the sides in scrap clay.
Instructions for Lesson
Clay Session:
- Set up students’ desks with scrap clay, mats, sunflower templates, pencils and texture tools.
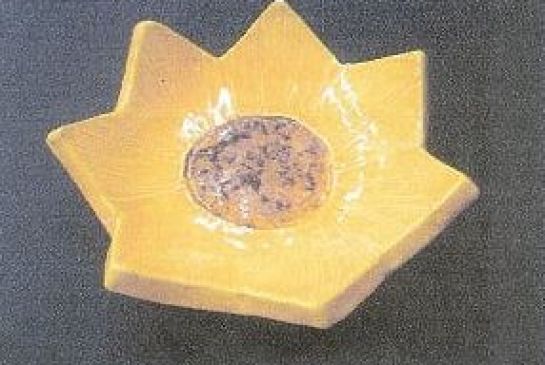
- Show pictures of sunflowers and draw a simple sunflower on the board.
.jpg)
- Ask the students to identify the triangles and the circle.
- Ask the students to make a triangle with their scrap clay (or have them flatten the clay and draw a triangle on it with a dull pencil or skewer). Ask them to repeat using a circle. Ask them to draw a sunflower using a circle and triangles.
.jpg)
.jpg)
- Pass out clay slabs and water bowls (tell them not to touch either until instructed).
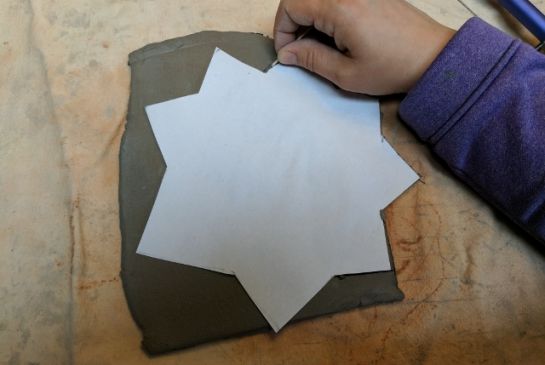
- Place sunflower template onto clay slab.
.jpg)
- Demonstrate cutting around the template with their skewer held straight up and press down to touch the clay mat, to avoid cutting under the template. Also start the cut from the inside of the corner and drag it outward to the point. As you do this explain radial symmetry and have them think of other things that look like this. (flowers, pizza, bicycle wheel, etc.)
.jpg)
- Using a skewer have the students cut around the template. Make sure they go all the way through the clay. Lift off template.
- Demonstrate smoothing the edges of the clay after they are cut.
.jpg)
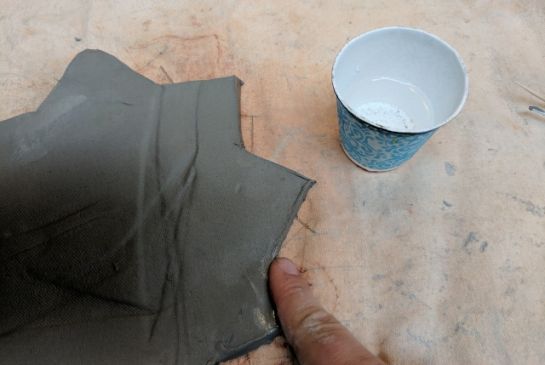
- Have the students dip their finger in the bowl of water and use it to smooth the outer edges of the sunflower. Once the students are done, dump out the water from their cups, leaving the cup for a circle template.
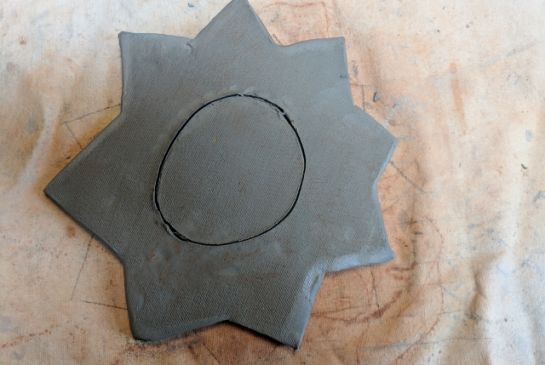
- Use the empty cups as a template. Have the students center the cup on the sunflower and press gently to leave a circle indent for their sunflower. Tell them not to press too deep and puncture through the clay to their desk.
.jpg)
- Using texture tools demonstrate how to create texture in the center circle. Emphasize that they should not press too hard or it will create a hole in their sunflower bowl.
- Have the students practice adding texture on their scrap clay.
.jpg)
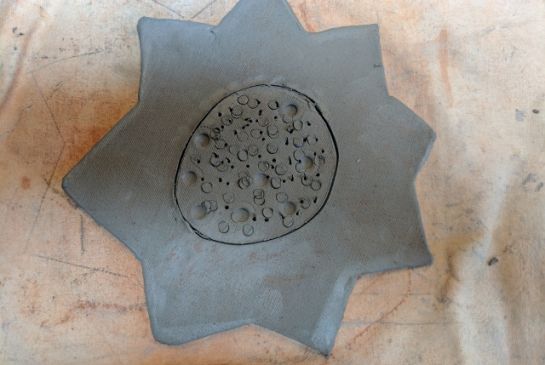
- After practicing on their scrap clay, have the students add texture to the center of their flowers.
%201.jpg)
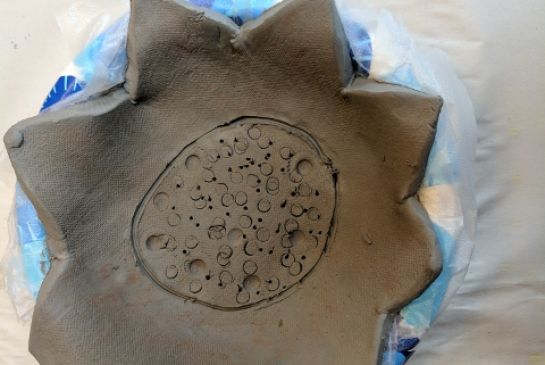
- Once it is finished being texturized, have an adult write each student’s name and date on the bottom of the sunflower and put it in a bowl. Bowl on the right has plastic wrap as it has a coating that would cause the clay to stick.
.jpg)
.jpg)
.jpg)
- Gently tap it on the desk a couple times to allow the Sunflower to form into the bowl shape.
- Allow to dry for 9-14 days. After 5 days you can remove the sunflower from the bowl so that it can dry more evenly.
- Follow standard bisque fire procedures.
Glaze Session:
- Have students’ desks arranged in table groupings so they can share glazes.
- Place newsprint (to protect desks and make clean up easier) on each desk and give each student a paintbrush.
- Place yellow low-fire glaze in center of table.
- Briefly talk to the students about the changes that happen to glaze in the kiln.
- Instruct the students to glaze the bottom of the bowls with 2 coats.
- Students then let it dry a few minutes and turn it over and glaze 3 coats over all the “triangle” parts of the flower. Have them try to avoid the circle in the middle.
- Once they are finished put black or brown (whatever is available) on the table for the centers of the flowers. Use new brushes. Do not put the black or brown out with the petal colors or the entire flower may end up painted black or brown.
- Put 3-4 coats of glaze on the center.
- Follow standard glaze fire procedures. IMPORTANT: Bowls MUST be placed on stilts to ensure they do not stick to the kiln shelf. When loading, do not allow them to touch each other, the sides of the kiln, or the shelf posts.
References and Attributions
The J. Paul Getty Museum reference materials. ThoughtCo. Principles of Art and Design article.
Adapted from “Sunflower Bowl Lesson” written by Heidi Furman at Newcastle Elementary.
Notes for Educators
21st Century Thinking Skills
Persisting, creating, taking responsible risks, observing, sequencing, problem solving, cause and effect.
WA State Learning Standards
(VA:Cr2.1.K) a. Through experimentation, build skills in various media and approaches to art-making
(VA:Cr2.3.K) a. Create art that represents natural and constructed environments.
(VA:Cr3.1.K) a. Explain the process of making art while creating.
(VA:Re7.2.K) a. Describe what an image represents.
(VA:Re8.1.K) a. Interpret art by identifying subject matter and describing relevant details.
(VA:Cn11.1.K) a. Identify a purpose of an artwork.
Please note: These lesson plans are intended for non-profit use only. Use of these plans for commercial purposes should give attribution to the Issaquah Schools Foundation and be accompanied by a nominal donation at www.isfdn.org/donate. Thank you.
Donate Now