loading Skip to Main Content

Warm and Cool Leaves, a Color Study

Students will learn about warm and cool colors while drawing leaves with oil pastels then painting with watercolors. Recommended for Kindergarten.

Elements of Art

Color: warm colors are red, orange, and yellow. Cool colors are blue, green, and purple.
Line: a long narrow mark or stroke made on or in a surface.
Shape: a two-dimensional (flat) area enclosed by a line.
- Organic Shape: a shape found in nature.

Principles of Design

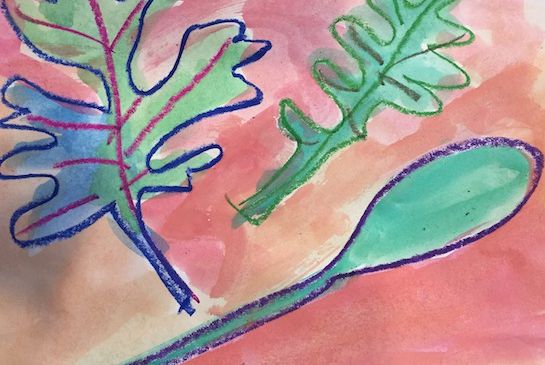
Contrast: the difference between two things. In this case warm and cool colors, used to make them more visually interesting or grab your attention.

Vocabulary Words

Background: the area around the leaves.
Color Wheel: a color wheel is a tool that artists use for understanding color. It shows the primary and secondary colors, and cool and warm colors. A color wheel can help us remember which colors are in the same cool or warm color family.
Outline: the outer line used to make the shape.

Materials & Supplies

  • Watercolor Paper (8 x 11” white) or other paper (80 pound or heaver)
  • Round Paint brushes (Softer, sable brush tips preferred)
  • Oil pastels in warm colors: orange, yellow, red
  • Watercolor paints (preferably in colors: red, orange, yellow, green, blue, purple)
  • Water cups at the students’ tables to rinse between colors
  • Paper towels
  • Warm color leaves to view
  • Optional – simple leaf templates
  • Pencils

Advanced Preparation

Prepare all the supplies: water cups, paper, oil pastels, water color paints, and brushes. 
Put newspaper under the students’ desks as painting can be a bit messy.
Get a color wheel. 
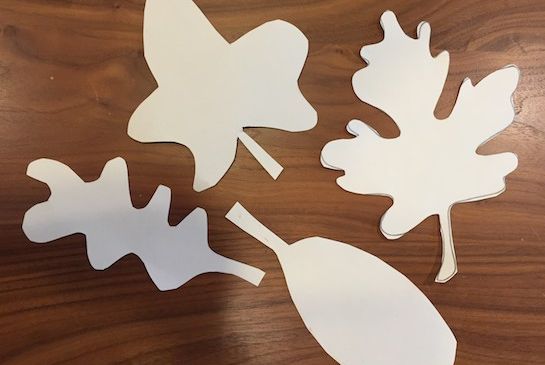
Collect a variety of real leaves for students to observe. 20-30 leaves.
Order books from the library: Red Leaf, Yellow Leaf by Lois Ehlert or Owl Moon by Jane Yolen.

Tips & Tricks 

  • Have a variety of leaf template shapes and sizes for the Kindergarteners to trace. Kindergarteners have a wide range of skills, so it is helpful to have some very simple leaf templates to trace. They can always add variety and details when they use the oil pastel to add veins to their leaves. 
  • Some watercolor trays are manipulative. If you are able to change the water color pallet order, consider arranging the colors by warm and cool colors. Take out the navy, black, brown and white paint. If you cannot change the water colors, don’t worry about it. In that case, just tell the students which colors they can use.
  • For this project, students will work at different speeds. Consider having extra white paper in case they want to draw or do a second painting. 

Discussion Points

The big idea of this lesson is warm and cool colors.
Ask the students to “Think of something warm and yellow” then “Think of something cool and blue,” taking answers.
Show the students pictures from one of the two books. Then ask the class after looking at the pictures, if they have other colors to add that relate to either warm or cool colors. 

Reflection Point (Assessment of Learning Objectives)

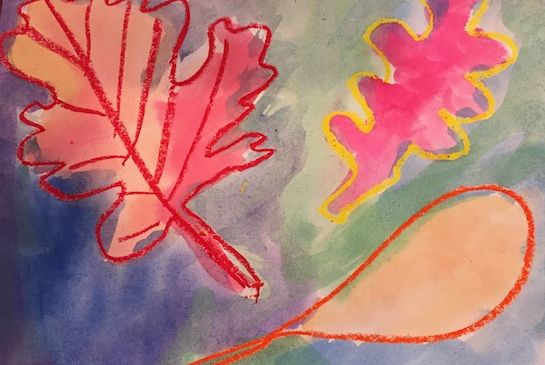
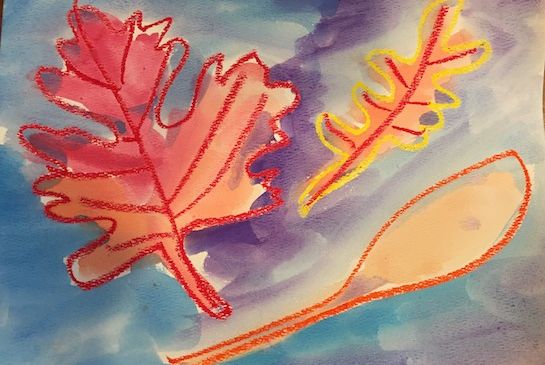
Students have used cool colors for their back ground.
Students have traced leaves onto their page and outlined them with warm color pastels.

Instructions for Lesson

  1. Have a short discussion about warm and cool colors and look at the images from the books. 
  2. Explain to the students that they are going to be drawing leaves. But before they start drawing, they will need to do some observation.
  3. Using the document camera view some leaves. Ask the students what they noticed or observed about the leaves. The emphasis here is noticing some of the details. Some key points are:
    Color: Help the students notice the variations of color (all leaves are not green). Leaves are brown, yellow, orange, red and a mixture of colors.
    Texture and Line: Help the students notice the “bumpy” lines in the leaf called veins. Show them that there is a big leaf vein in the middle and little veins that branch out from the main vain. Help students notice that the veins have varying thickness as well. Shape: Have students describe the shapes of the leaves (this may be a little hard as it is not the main talking point, but worthwhile to emphasize).
  4. Demonstrate choosing three leaves to use as templates. Arrange the leaves, then rearrange the leaves to show how you are thinking about your artwork. Trace one leaf. Trace another leaf and the last leaf. Do this in pencil.
  5. Outline the leaves in oil pastels using warm colors. Draw the outline of the leaf with the oil pastel on top of the pencil. Then draw the veins inside the leaf. You can change colors.
  6. Stop here and give the students time complete this part of the lesson. Distribute only warm colored pastels for students to use.
  7. Teach the watercolor portion of the lesson. First demonstrate how to “wake-up” the paint by dripping a little bit of water into the different paint colors.
  8. Teach the students to use the tip of the brush to collect the paint. The more time they twirl the tip in the paint, the more paint they will collect on the bush, and the brighter the color will be on their paper.
  9. Demonstrate painting the leaf with a variety of warm colors. 
  10. Stop here and give the students time to paint their leaves.
  11. Demonstrate painting the background. Get a new brush to paint the background in cool colors (green, blue, purple).
  12. Stop here and give the students time to paint the background in cool colors.
  13. When there are ten minutes left in the session, give the students a five-minute warning.
  14. After five minutes, ask the students to clean up.
  15. Do an “art walk.” Have the students place their artwork on their desks. Have them walk around the room to look at their classmates’ artwork. 
  16. Ask the students to return to their seats. Discuss what they notice. Help the students to use the word “I notice” instead of “I like.” For example, “I noticed that the leaves are red and the background is blue.”

References and Attributions

Adapted from Arts Lesson funded by the Issaquah Schools Foundation, 2011.

Notes for Educators

21st Century Thinking Skills
Observing, Persisting, creating, taking responsible risks, reflecting, observing, making connections, sequencing, classifying, comparing/contrasting, finding evidence, cause & effect and analyzing. 

WA State Learning Standards
(VA:Cr.1.1.K)Creating-Investigate, plan, make. Engage in exploration and imaginative play with materials.
(VA:Cr1.2.K) a. Engage collaboratively in creative art-making in response to an artistic problem.
(VA:Cr2.1.K) a. Through experimentation, build skills in various media and approaches to art-making.
(VA:Cr2.2.K) a. Identify safe and non-toxic art materials, tools, and equipment.
(VA:Cr.2.3.K)Creating-Investigate. Organize and develop artistic ideas and work. Create art that represents natural and constructed environments.
(VA:Re7.2.K) a. Describe what an image represents.
(VA:Re8.1.K) a. Interpret art by identifying subject matter and describing relevant details.

Arts Integration Opportunities
Literature – the books Owl Moon and Arrow to the Sun are good for both the arts and literature, story-telling and folk-tale.
Science. Resist with wax crayon and water color is a scientific idea. Also, when the children are observing the leaves, observation is a scientific academic connection.

Please note:  These lesson plans are intended for non-profit use only. Use of these plans for commercial purposes should give attribution to the Issaquah Schools Foundation and be accompanied by a nominal donation at www.isfdn.org/donate. Thank you.

Donate Now

Artistic Support Reference Materials

Loading...
Loading

Fueling Success for Every Student, Every School