loading Skip to Main Content

Apple Prints

Students will use apple halves and printmaking tools to create a composition using line and shape. Recommended for 1st Graders.

Elements of Art

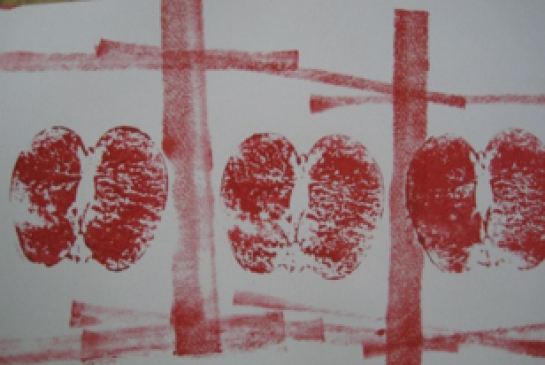
Line: the flat path of a dot through space used by artists to control the viewer’s eye movement; a long narrow mark or stroke made on or in a surface; a thin mark made by a pencil, pen, or brush. A mark with greater length than width. In this lesson it is straight, either horizontal (side-to-side) or vertical (up & down).
Shape: a two-dimensional (flat) area enclosed by a line. It is either geometric or, as in this lesson, organic (with irregular, curved edges).
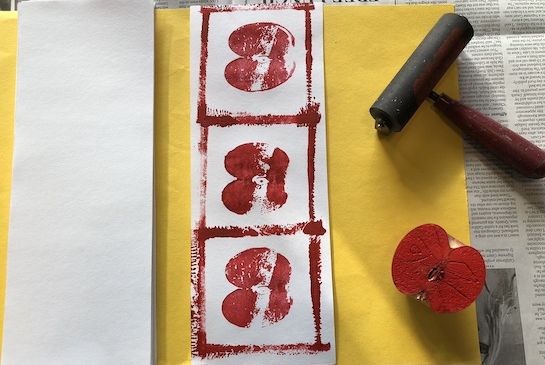
Principles of Design

Balancethe visual weight of the composition, so that the image feels stable and ‘right’. In this lesson symmetry is used: in which both sides of a composition have the same elements in the same position, as in a mirror-image.
Pattern: the repetition of the elements of visual arts in an organized way. In this lesson it is shape & line.

Additional Vocabulary

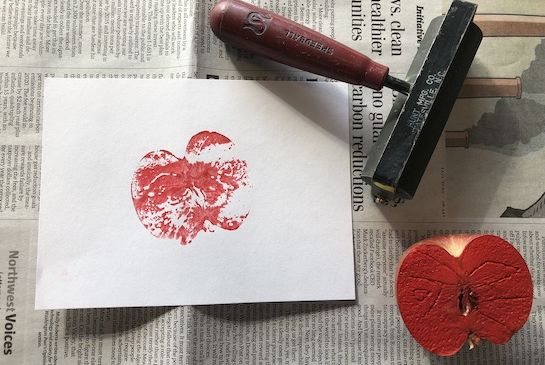
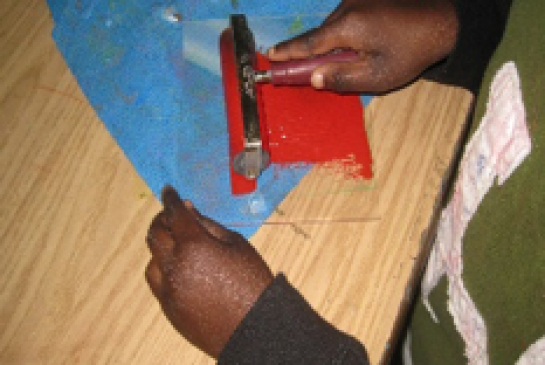
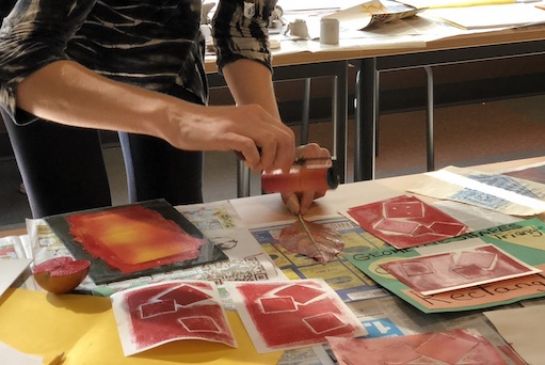
Brayer: a printmaking tool that rolls ink into an even layer across the object to be printed with.
Plexiglas (‘plexi’): The smooth, washable surface used to spread printer’s ink onto the brayer.

Materials & Supplies

  • Plexiglas, or flat plastic: approx. 5”x7”
  • Large tube red water-based printer’s ink: Speedball brand recommended
  • Class set pencils or colored pencils
  • Full or half class set of 4”-5” brayers
  • White drawing paper: 4.5”x12”
  • Bag of small red apples
  • Paper towels
  • Class set of large t-shirts or aprons
  • Art stamp and stamp pad, any color       


Context (History and/or Artists)

Printmaking involves the creation of a master plate from which multiple images are made. The artist chooses a surface to be the plate. The 4 main types of printmaking are woodcuts, lithography (stone), serigraphy (stencil on fabric) and intaglio (metal).  In this case it is an apple-half, but other fruits or vegetables could be used, such as starfruit, kiwi, potato or zucchini.

Advanced Preparation

  • Cut the apples in half from the top down, remove seeds without disturbing the core. Use the halves that are flattest. Press the apple flesh onto a paper towel to remove moisture.

Tips & Tricks

  • A 2”-3” squirt of ink is good for one or 2 applications and then more must be added. DON’T allow students to squirt the ink. Keep the tube on your person or near you at all times.
  • Look at the Plexiglas after it the ink is spread: too much ink has ripples; too little reveals the Plexiglas through the ink layer.
  • Have students drop off their brayers and Plexiglas in a sink or bucket  for easy rinsing by an adult later.
  • Once printer’s ink is dry it can still smear if wetted. So always keep the print dry, it is not waterproof.

Discussion Points

  • Explain that all printmaking involves a ‘master’, that artists spend most of their time preparing  which  produces multiple copies that can be printed quickly and inexpensively, so that a work of art can be seen by more people and cost less money.
  • Explain the basics of printmaking using an art stamp and stamp pad, pointing out that the parts of the stamp that touched the inkpad transfer the color to the paper, combined with pressure. Handprints and fingerprints are another example of this process.
  • Show students the brayer and Plexiglas (or other non-porous surface) to explain that if the master is too big to fit on a stamp pad, we apply the ink with a brayer that has been loaded evenly with ink, taken from an evenly spread layer on the Plexiglas.
  • Talk about the two types of shapes: geometric and organic and ask what handprints’ shape is.  Show them the apple half and ask the same.
  • Discuss the definitions of pattern and symmetry.

Reflection Point (Assessment of Learning Objectives)

Students will:
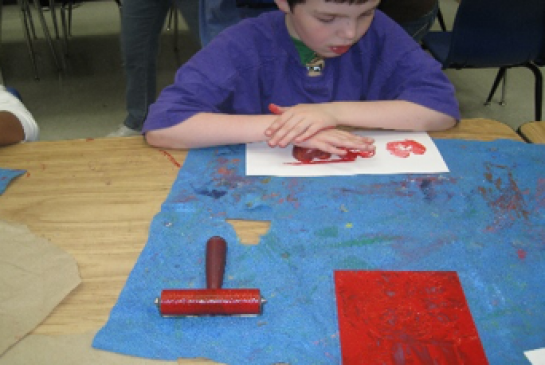
 - use brayers, Plexiglas and printer’s ink on paper
 - stamp with cut apples
 - create a composition using line & organic shape

Instructions for Lesson

  1. The instructor should demonstrate first, so gather students around a large table or do it under an overhead projector. Begin by squirting a ‘slug’s worth’ (2”-3” line) of printer’s ink onto the Plexiglas and rolling a brayer onto a Plexiglas, moving it in all four directions to spread it evenly without going to the edge. The goal is not to cover the Plexiglas but to get an even layer onto the brayer.
  2. The instructor can then roll the ink across the flat side of the cut apple and stamp it in the center of the paper. The composition will be symmetrical (same on both sides) and the next images will move left and right of the center image.
  3. Repeat by rolling the brayer onto the apple again, and remind students when you repeat the same shape that you are making a pattern.
  4. Point out that no two prints are identical because the amount of ink and the amount of pressure changes every time. We can decide if we need more or less ink next time based on the clarity of the print we just made. No print will be perfect.
  5. Finally, re-ink the brayer & roll a vertical & horizontal line ‘border’ around the paper’s edges & between the shapes, while repeating the lines’ directions as you roll. Remind them not to cover the apples. 
  6. Now students can make their prints & outline them with brayer lines. 
  7. Those who are finished can use up the excess ink on plain white paper in any way they want. Kids just love to roll the brayer!
  8. Have them sign their names in the lower right corner like a real artist, using a colored pencil.
  9. Variations: you can do this on cards, borders, paper bags or as ‘leaves’ on a pre-drawn tree.

References and Attributions

Lesson written by Cynthia Moring.

Notes for Educators

21st Century Thinking Skills
Observing, making connections, visualizing, sequencing, problem solving, cause and effect, decision making.

WA State Learning Standards
(VA:Cr1.2.1) a. Use observation and investigation in preparation for making a work of art.
(VA:Cr2.1.1) a. Explore uses of materials and tools to create works of art or design.
(VA:Cr2.2.1) a. Demonstrate safe and proper procedures for using materials, tools, and equipment while making art.
(VA:Cr3.1.1) a. Use art vocabulary to describe choices while creating art. 
(VA:Re7.2.1) a. Compare images that represent the same subject.
(VA:Re8.1.1) a. Interpret art by categorizing subject matter and identifying the characteristics of form.

Please note:  These lesson plans are intended for non-profit use only. Use of these plans for commercial purposes should give attribution to the Issaquah Schools Foundation and be accompanied by a nominal donation at www.isfdn.org/donate. Thank you.

Donate Now

Artistic Support Reference Materials

Loading...
Loading

Fueling Success for Every Student, Every School