Line: a long narrow mark or stroke made on or in a surface; a thin mark made by a pencil, pen, or brush. A mark with greater length than width. line types: straight and curved. Straight lines are used in this lesson and the line directions are vertical, horizontal, diagonal.
Shape: a two-dimensional (flat) area enclosed by a line. It is either geometric (symmetrical, usually straight edged) or organic (curved, irregular) This lesson uses geometric shapes: squares, rectangles and circles.
Pattern: the repetition of the elements in an organized way. In this lesson they are shape, color & line.
repetition of the elements in an organized way. In this lesson color should repeat on each side to maintain the symmetry.
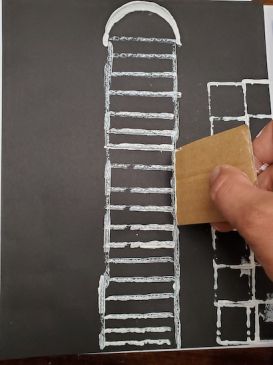
Brayer: the tool used to spread the ink in a thin layer for printing.
Details: small overlapping designs that make the whole more interesting.
Overlapping: when shapes are made over other shapes.
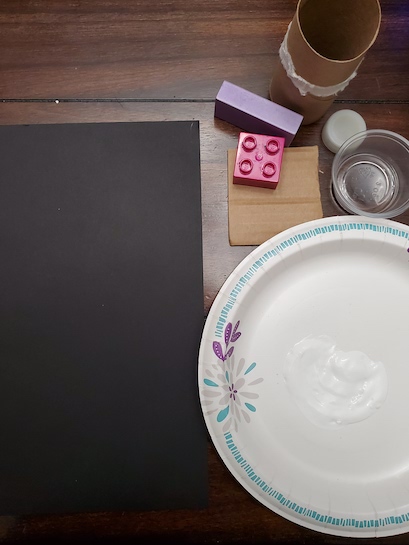
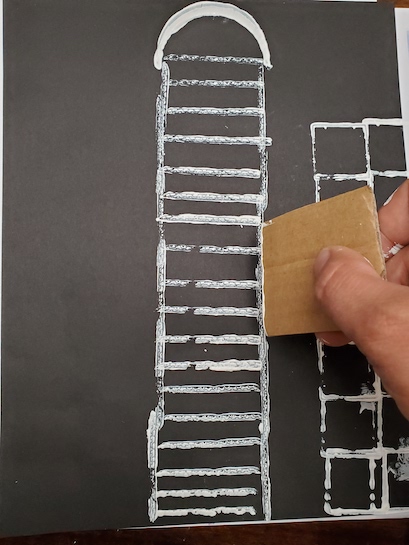
• Recyclable materials which create geometric shapes & lines for printing
Frank Lloyd Wright was an American architect born in 1867 in Wisconsin. He designed more than 1000 buildings during his life. He also designed other things such as furniture or stained glass. His most famous building is Fallingwater, which is a house built to rise above a waterfall. Wright pioneered an American style of architecture and is thought of as one of the greatest architects the world has known.
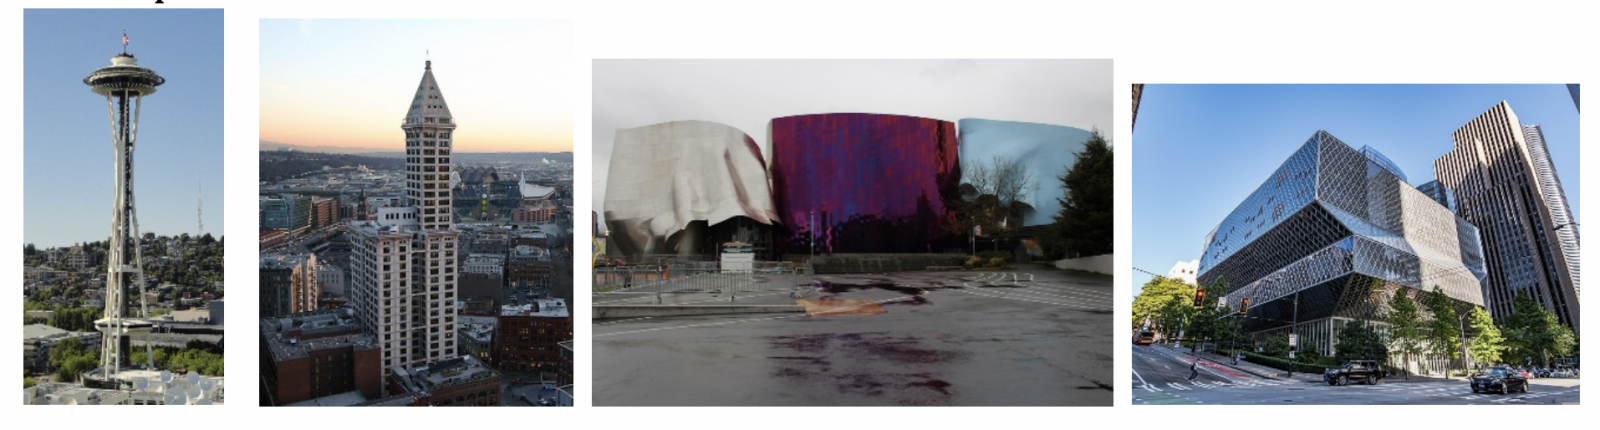
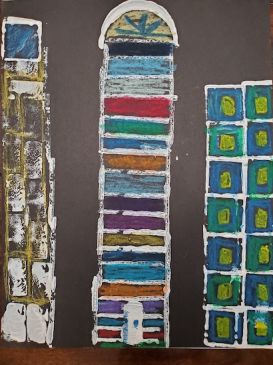
Students will see buildings as repeated straight lines and geometric shapes.
They will use basic relief printmaking methods.
They will use basic vocabulary to describe line directions and geometric shapes.
Prepare each student’s plate with white printer’s ink. Squirt about a 2” line per student. Set aside.
Write the above vocabulary that’s in bold on the board and repeat it with students. Have them draw straight lines going in the 3 directions with their fingers in the air while repeating the direction names.

Lesson written by Rachelle Roberts.
Kiddle website: Frank Lloyd Wright Facts for Kids
Hubbert, Beth. “Building with a Line.” SchoolArts, Jan. 2011, pp. 21–23. Joseph. “Museum of Pop Culture.” Flickr, 4 Apr. 2018; Kalilich, Jordan. “Wikimedia Commons.” Wikimedia Commons, 30 Oct. 2011; M. “Wikimedia Commons.” Wikimedia Commons, 17 Jan. 2020, https://commons.wikimedia.org/wiki/File:Seattle_Library_01.jpg. Maloney, Christopher. “Wikimedia Commons.” Wikimedia Commons, 22 Jan. 2008.
21st Century Thinking Skills
Observing, Making Connections, Sequencing, Visualizing, Comparing/Contrasting, Finding Evidence, Cause and Effect, Decision Making, Evaluating.
WA State Learning Standards
(VA:Cr1.1.1) a. Engage collaboratively in exploration and imaginative play with materials.
(VA:Cr1.2.1) a. Use observation and investigation in preparation for making a work of art.
(VA:Cr2.1.1) a. Explore uses of materials and tools to create works of art or design.
(VA:Cr2.2.1) a. Demonstrate safe and proper procedures for using materials, tools, and equipment while making art.
(VA:Cr2.3.1) a. Identify and classify uses of everyday objects through drawings, diagrams, sculptures, or other visual means. In this lesson, they identify buildings.
(VA:Cr3.1.1) a. Use art vocabulary to describe choices while creating art.
(VA:Re7.1.1) a. Select and describe works of art that illustrate daily life experiences of one’s self and others.
(VA:Re7.2.1) a. Compare images that represent the same subject. This happens when viewing different kinds of buildings.
(VA:Re8.1.1) a. Interpret art by categorizing subject matter and identifying the characteristics of form. This happens when you look for line and geometric shape in building designs.
Arts Integration Opportunities
Social Studies: communities.
Math: equal units, counting shapes, measuring.
Please note: These lesson plans are intended for non-profit use only. Use of these plans for commercial purposes should give attribution to the Issaquah Schools Foundation and be accompanied by a nominal donation at www.isfdn.org/donate. Thank you.
Fueling Success for Every Student, Every School