Advanced Preparation
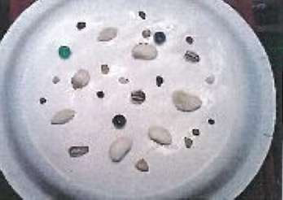
Prepare examples of real texture using familiar small items from nature or everyday life. Keep them examples a flat box to be passed around.
Prepare quick slide show of images, both in photographs & art that show textured subjects in nature or everyday life.
Tips & Tricks
- Double the foil if necessary.
- At least 2 instructors are needed for this: 1 to manage the glitter applications & both to help with the foil & cutting paper.
- Once liquid glue is applied is can’t be removed, so no erasing or trying to smear off any unwanted glue lines.
- Less squeezing & less glue than you think you need! Students tend to over-squeeze.
- Instruct students (repeatedly) to not make “lakes, puddles, oceans or rivers” of glue: only Dots & Lines.
Discussion Points
- Write the word ‘texture’ on the whiteboard and ask students to repeat it. Use this word often during the lesson.
- Talk about words that might be used to describe different types of textures: fuzzy, soft, hard, etc.
- Discuss how different textures might feel: bumpy, wet, prickly, etc.
Reflection Point (Assessment of Learning Objectives)
Students will:
- Point out & describe different kinds of actual & visual texture.
- Point out & describe contrast of textures.
- Create a work of art with actual rough/smooth texture contrasts.
- Use liquid glue to ‘draw’ texture.
Instructions for Lesson
- Show the class actual textured objects briefly & ask what they might feel like. If time permits, pass all or some of these objects quickly around to feel.
- Demonstrate making the tagboard circle very sticky with a glue stick. Then apply the small textured pieces to cover most, not all, of the surface.
- Ask the students if they can see where the bumpy & smooth textures are. Explain that these textures ‘contrast’ with each other: they are very different. Have the word ‘contrast’ already written on the white board. Have students repeat the word and use it often during the lesson.
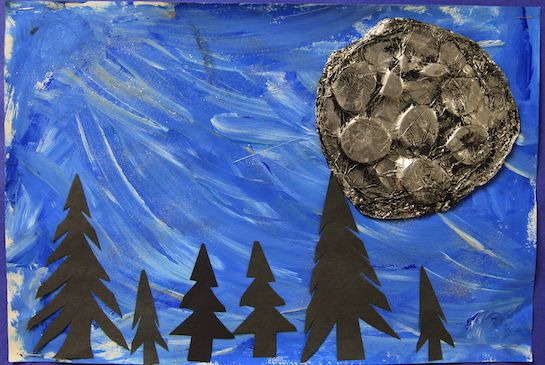
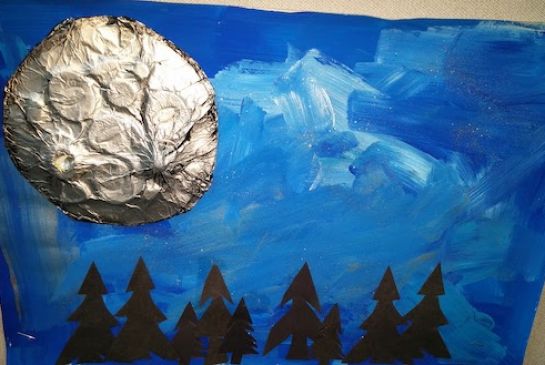
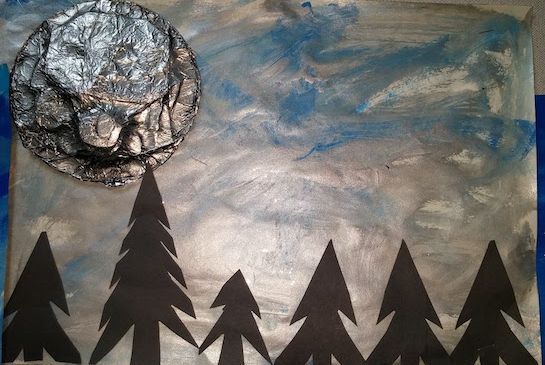
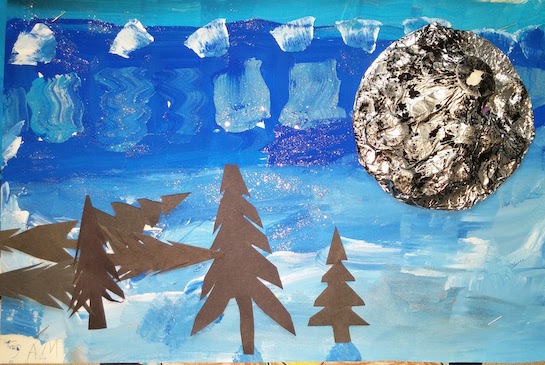
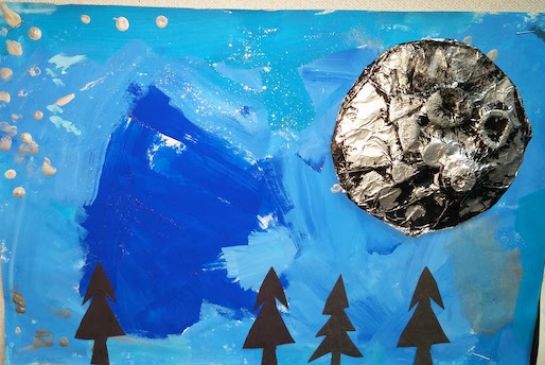
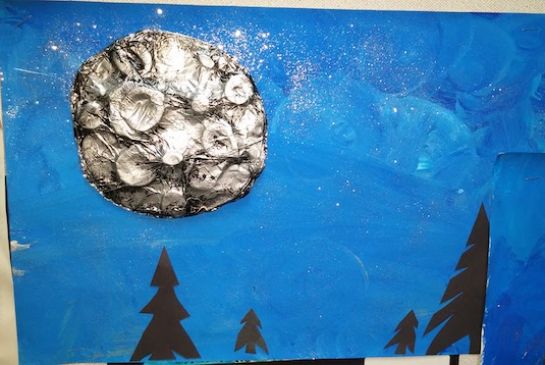
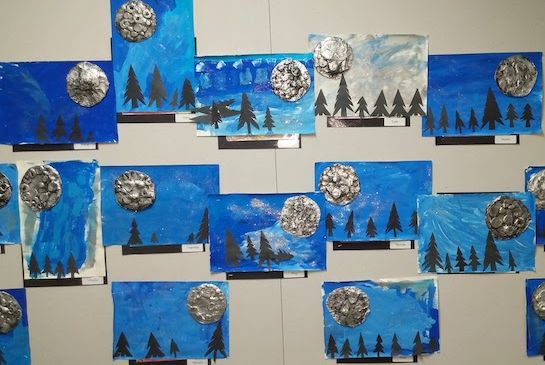
- Show a finished example of this lesson & ask where the contrast is. (Between the textured moon, stars & the smooth background.)
- Flip your textured circle upside down on a pre-measured piece of foil (doubled if necessary). Carefully fold the foil edges over the tagboard edges. Flip it over & gently push on the foil to make more bumps.
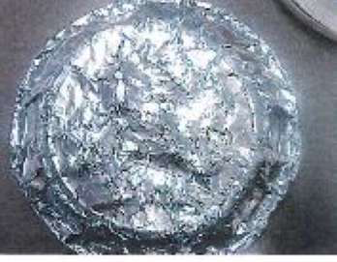
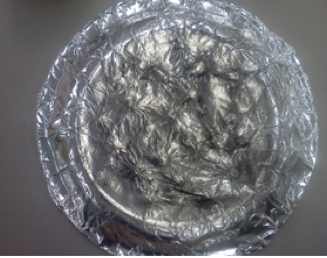
- Have students do the same with their ‘moons.’ Set moons aside.
- Demonstrate cutting the black paper lengthwise to create a horizon that fits along the bottom of the blue paper, or cut triangles & small rectangles to make ‘trees’. Use glue stick to adhere, leaving room for the moon.
- Have students do the same.
- Demonstrate how to apply liquid glue around the back rim of the moon: quickly as if drawing a line. Tell students they can’t erase glue lines and remind them that it is OK. Flip the moon over & attach to the blue paper over the horizon or trees.
- Have students do the same.
- Demonstrate how to draw a dot of glue, with quick thin lines of glue trailing from the dot to represent a shooting star.
- Take your picture to the glitter box, gather students around to watch you shake glitter onto your star(s) & shake off into the box.
- Have students do the same. There should be a ‘glitter station’ with at least two or more flat, wide boxes for multiple students to lean over.
- Set aside to dry overnight. Any moons that fall off can be stapled later.
- Optional additions: Wipe black shoe polish over foil to accentuate texture. Rub off with cotton balls.
- Another option: Use lighter blue tempera paint to prepare background before starting project. Paint should be dry enough to glue over by the end of the project if students aren’t too heavy-handed with the paint.
References and Attributions
Adapted from the “Metallic Moon” lesson from the 2011 ISF Arts Integration grant.
Notes for Educators
21st Century Thinking Skills
Thinking Flexibly, Persisting, Creating, Taking Responsible Risks, Reflecting, Observing, Making Connections, Visualizing, Comparing/Contrasting, Finding Evidence, Cause and Effect, Decision Making, Evaluating.
WA State Learning Standards
(VA:Cr1.1.1) a. Engage collaboratively in exploration and imaginative play with materials. This happens when they explore different textures.
(VA:Cr1.2.1) a. Use observation and investigation in preparation for making a work of art.This happens when they watch the presentation of the lesson.
(VA:Cr2.1.1) a. Explore uses of materials and tools to create works of art or design.This happens when using scissors, paper, glue, glitter, foil & textured objects.
(VA:Cr2.2.1) a. Demonstrate safe and proper procedures for using materials, tools, and equipment while making art.
(VA:Cr3.1.1) a. Use art vocabulary to describe choices while creating art. This happens when you explain ‘texture’ & ‘contrast’.
(VA:Re8.1.1) a. Interpret art by categorizing subject matter and identifying the characteristics of form. This happens when contrasting subject matters’ textures.
Arts Integration Opportunities
Writing: procedural (how we did it), informative (what texture is, what contrast is), spelling words, descriptive (which parts have which textures).
Please note: These lesson plans are intended for non-profit use only. Use of these plans for commercial purposes should give attribution to the Issaquah Schools Foundation and be accompanied by a nominal donation at www.isfdn.org/donate. Thank you.
Donate Now