Context (History and/or Artists)
How long have clay projects been around? Clay pots have been found in current day Iran and China that date back to 5000 B.C. – that’s more than 7000 years ago! People used clay to make containers for food and to make bricks to build houses (baked clay mixed with straw called adobe). Back then they used fire to cook and harden the clay. Today, in modern times, a kiln is used. More information about the history of clay and its use in art on the Issaquah Schools Foundation Clay Reference Page.
Advanced Preparation
- Pick one or two templates for students to use. Please see the final pages of the Printable Lesson Plan for a selection of pre-drawn templates.
- Copy and cut out templates (unless school already has them).
- Cut a slab of clay from clay block.
- Roll clay into a slab that is approx. ¼-3/8” thick with rolling pin and lath (wooden guide sticks) or use a slab roller.
- Store slabs in an air tight container lined with damp newsprint or plastic wrap. Lay down plastic wrap, clay, spritz with water, plastic wrap, clay, spritz and so on. Can store for months if checked and spritzed every couple of weeks.
- Double check to see that template fits the slabs.
- Repeat previous steps to make 1 slab for each student.
- Assemble materials and texture tools.
- Gather ceramic samples or pictures of samples.
Tips & Tricks
- Two class sessions are needed for this project
- Keep the clay moist before the children use it. Clay can be prepared ahead of time by keeping clay moist in covered containers with damp sponges (or damp towels or newsprint)until ready to use. Keep each piece separated with plastic wrap (IMPORTANT to prevent them from sticking together).
- If a student is absent for the first session, be sure to make a shape for them to glaze in session 2.
- Have all of the templates pre-cut before the class.
- Glazing can be done as a class or you can pull the students out into the hallway and work in small groups (especially helpful if using many colors).
- Glaze will look chalky and often not much like the finished color until it is fired in the kiln.
- Fire and glaze your demonstration piece to have on hand as a future example if not needed by a student. Write on some tape, what glaze and clay was used and adhere to the back.
Discussion Points
- What is texture? Feel your hair and compare it to you skin. Feel the rug and compare it to your desk top. Describe with words: soft, smooth, rough, bumpy or scratchy.
- Why do artists use texture? To explain the real texture of the object they are showing, to create interest, to make a specific spot stand out or recede or to surprise the viewer.
- How can we use texture in our artwork? We can create interest and contrast with our use of different textures in our work.
- How can texture be created on clay? Using our fingers and tools we can create many textures in our soft clay.
- Clay is made up of minerals from the earth – specifically silica and alumina. Often clay is found near rivers where small particles of rock are carried down to a lower part and collect together to form clay.
- Clay is plastic when it’s wet –which means it can be pushed, stretched, stamped, or impressed.
- Clay shrinks and hardens as it dries. When wet it has no structural strength. It can slump or distort if handled roughly. Bone-dry clay is quite brittle before firing.
- Clay vitrifies when subjected to sufficient heat in the kiln. It can become hard, durable and waterproof with the application of glaze.
- A special electric oven called a kiln is used to cook the clay. How hot does your kitchen oven at home reach when you are cooking food? 375 or 400 degrees F? Our kiln will cook these projects at about 1800 -2000 degrees F.
- Cooking in a kiln is called firing. This is important because it makes the clay stronger and more waterproof. Clay that has been kiln fired would not return to a soft state even if it were in water for a long time. That is because the extreme heat causes permanent physical and chemical changes to occur. These reactions, among other changes, cause the clay to be converted into a ceramic material.
- When the project is completely dry it will be fired in the kiln for the first time (bisque fired) and look like this when they are done (hold up a sample of bisque fired piece).
Reflection Point (Assessment of Learning Objectives)
Students should be able to recognize texture in the sample pieces and create texture on their own slab project. Students will use appropriate clay tools to create texture.
Instructions for Lesson
Session 1: Clay Shaping
- Talk about your discussion points.
- Bring in pieces made with clay or show slides of different ceramic pieces. Have pieces with a variety of different textures. Ask and discuss these questions with students:
- How do you think each piece would feel?
- Why do you think the artist chose to have it look that way?
- How would it be different if it were just smooth?
- Give each student a scrap piece of clay about the size of a golf ball.
- Have students use their texture tools and test their textures on their scrap clay to find several that they like. Demonstrate how to create a few textures first. Encourage them to use items in an unusual way to see how many textures they can get from one item. Have them practice putting the right amount of pressure (They need enough pressure to make texture but not so much to make holes in the clay).
- Have students pick the textures they want to use for their project.
- Demonstrate the making of the project – Laying the template on, gently tracing and then cutting around it with a skewer or plastic knifeupright (straight like a tree), adding the desired texture and smoothing the edges with their fingers.
- Give each child a pre-rolled slab and a template.
- Using their skewer or plastic knife, have the students gently trace around the template onto the clay.
- The students will cut around the templates and remove the excess clay.
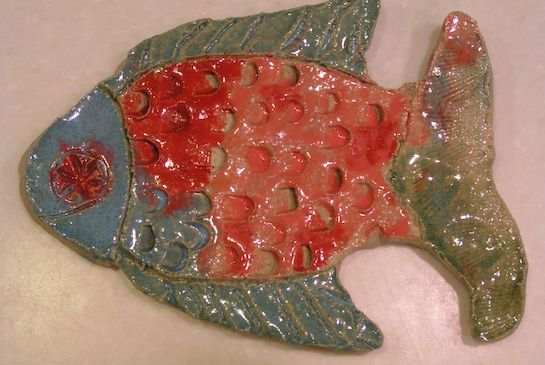
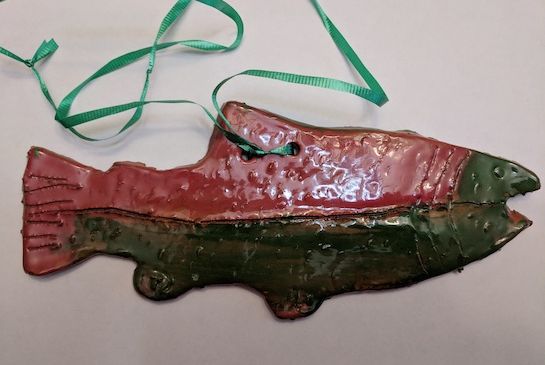
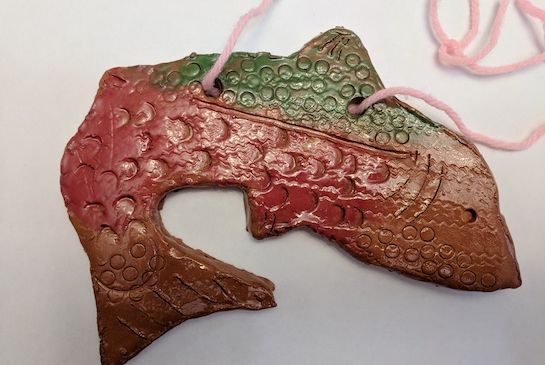
Optional: Students can divide up their image into parts and make a different texture for each different section (as shown in the fish example above).
- Have the students add texture to their clay using the texture tools. **Don’t let them push into the clay too hard. They should not make any holes in the clay**
- Have the student's smooth out the edges of their piece gently with a finger, and brush off clay beads from cutting (If this step is skipped the edges could become sharp once fired).
- Write the students names and the year on the back of their piece with a pencil.
- Optional: If desired, make any holes with a straw for hanging.
- Optional: If draping projects over a mold, have the students do that now (directions below).
- Place slabs onto a newsprint lined flat space to dry for at least a week or two.
- Collect the scrap clay, put it back into a plastic bag, spray with water and twist tie tightly for future use. This is officially scrap clay.
- The clay should take on a chalk-like finish and should no longer be cold when it is ‘bone dry’ and therefore ready to bisque fire.
- Bisque fire pieces in the kiln.
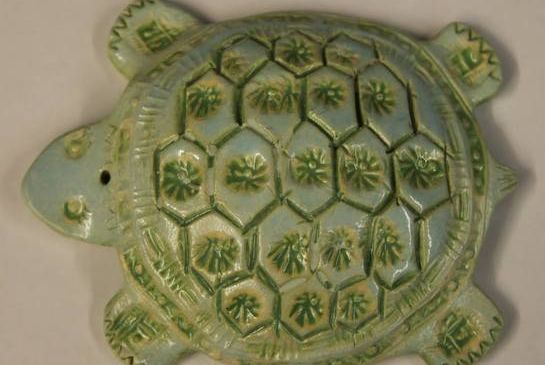
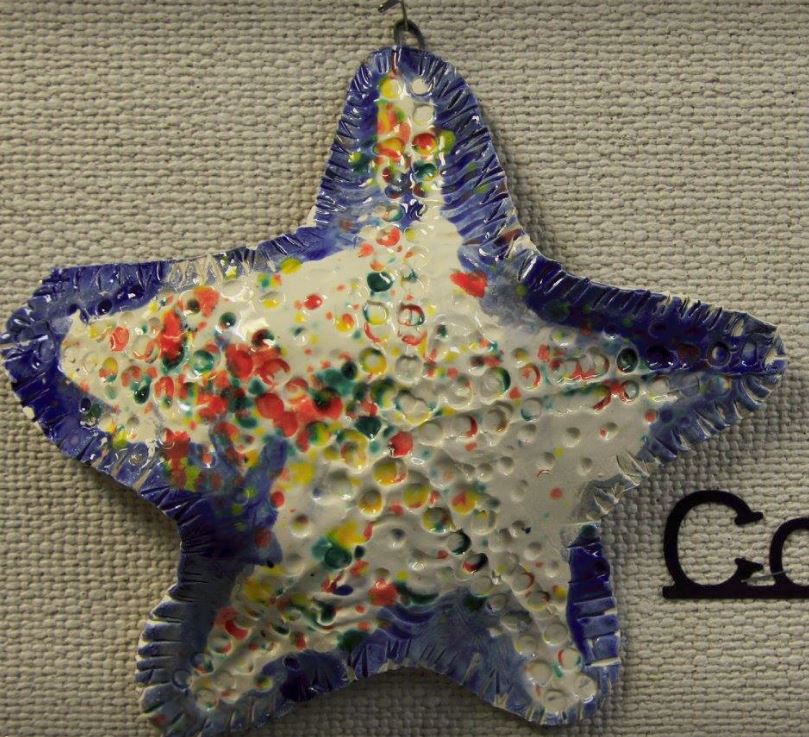
Instructions for draping over a mold (also called “slumping,” used in the starfish and turtle examples below).
-
Drape shape over mold (a paper bowl or anything permeable that will help the clay keep shape as it dries).
- Add texture.
- Leave on mold until it is hard enough to keep shape on its own (one day is enough).
- Remove the mold either that afternoon or the next day. Do not leave on mold until bone dry as it will crack (the clay shrinks as it dries but the mold does not).

 Examples of clay pieces made using a mold
Instructions for joining clay (also called “scratch and attach” or “slipping and scoring”) if your students will be connecting any clay pieces together.
- Lightly scratch a crosshatch pattern in the clay where the part is to be attached.
- Scratch another crosshatch pattern to the underside of the part being attached.
- Dip your finger in some water and use this “magic finger” to rub the “magic glue” (water) where the part will go.
- Put the part where it goes and give it a tiny twist and attach it to the slab.
- Give it the “wiggle test.” Give it a little wiggle and make sure it does not come off. If it does, repeat the process.
Session 2: Glazing
- Mix your chosen glazes well. They can settle and need to be shaken or mixed before use.
- Put the glazes into paint cups and use brushes dedicated to specific glaze colors. (Each brush will stay with the color of the glaze. NO rinsing brushes and using in multiple colors. This keeps the glaze colors separate and the glaze from getting watery.) You will need to refill the cups often to minimize waste of glaze.
- Have the students glaze the tops of the slab shape. Do not glaze the bottoms! (The glaze will stick the entire piece to the kiln shelves.)
- DAB the glaze on, not brush it. Glaze soaks into the clay and will dry too fast for long strokes.
- Put on two coats of each color.
- Wash or sponge off any glaze from the bottom of the pieces or they will stick to the kiln shelves.
- Follow the school procedures for firing in the kiln.
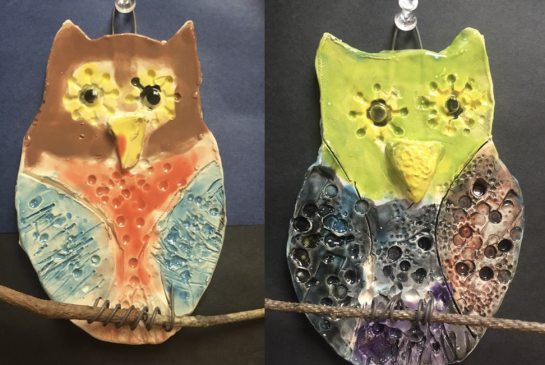
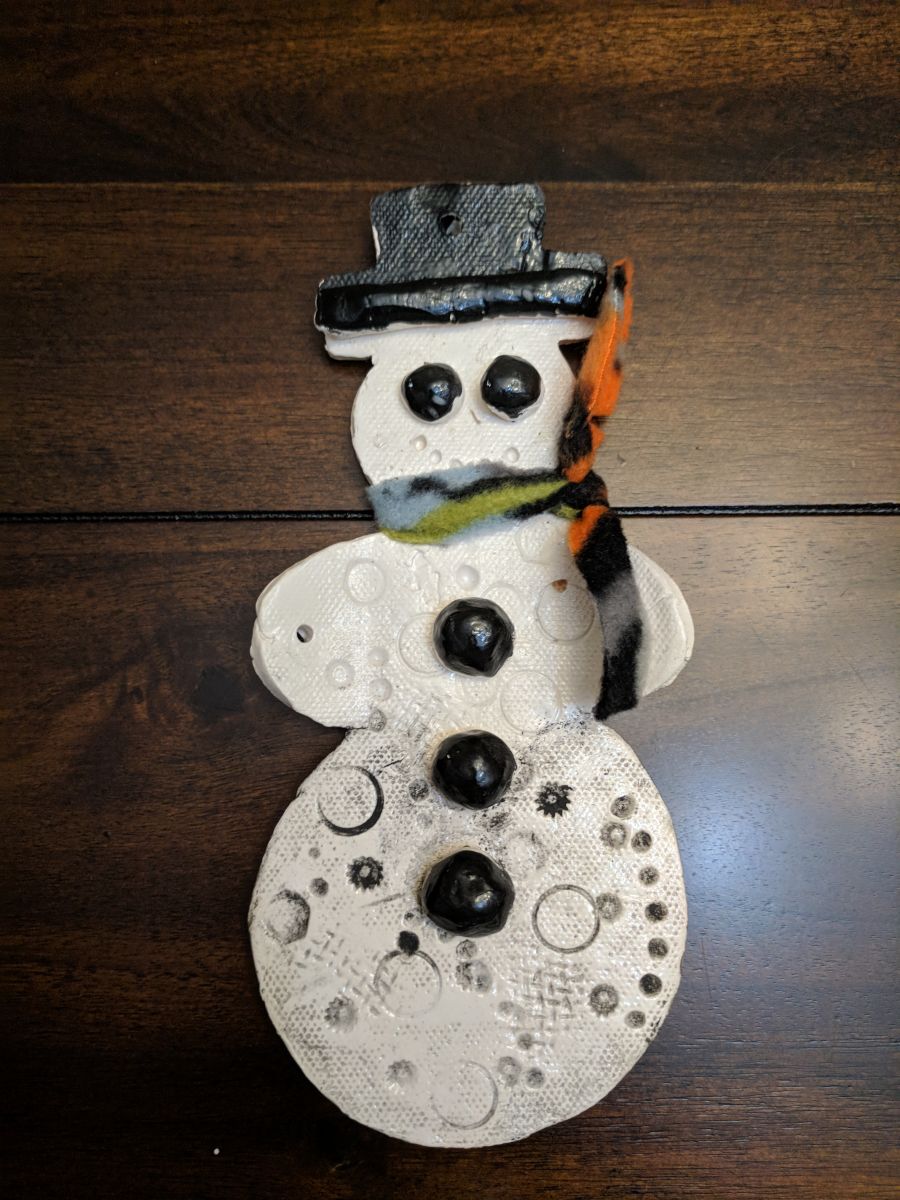
 Examples of finished (glazed and fired) clay pieces
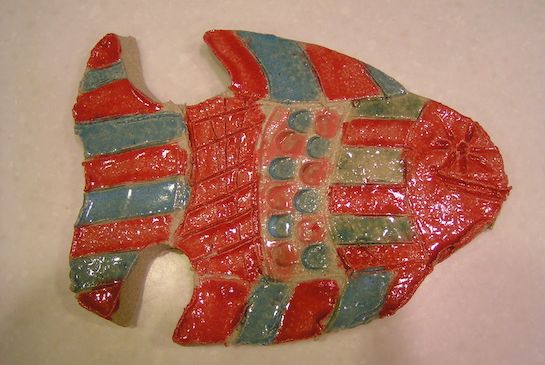
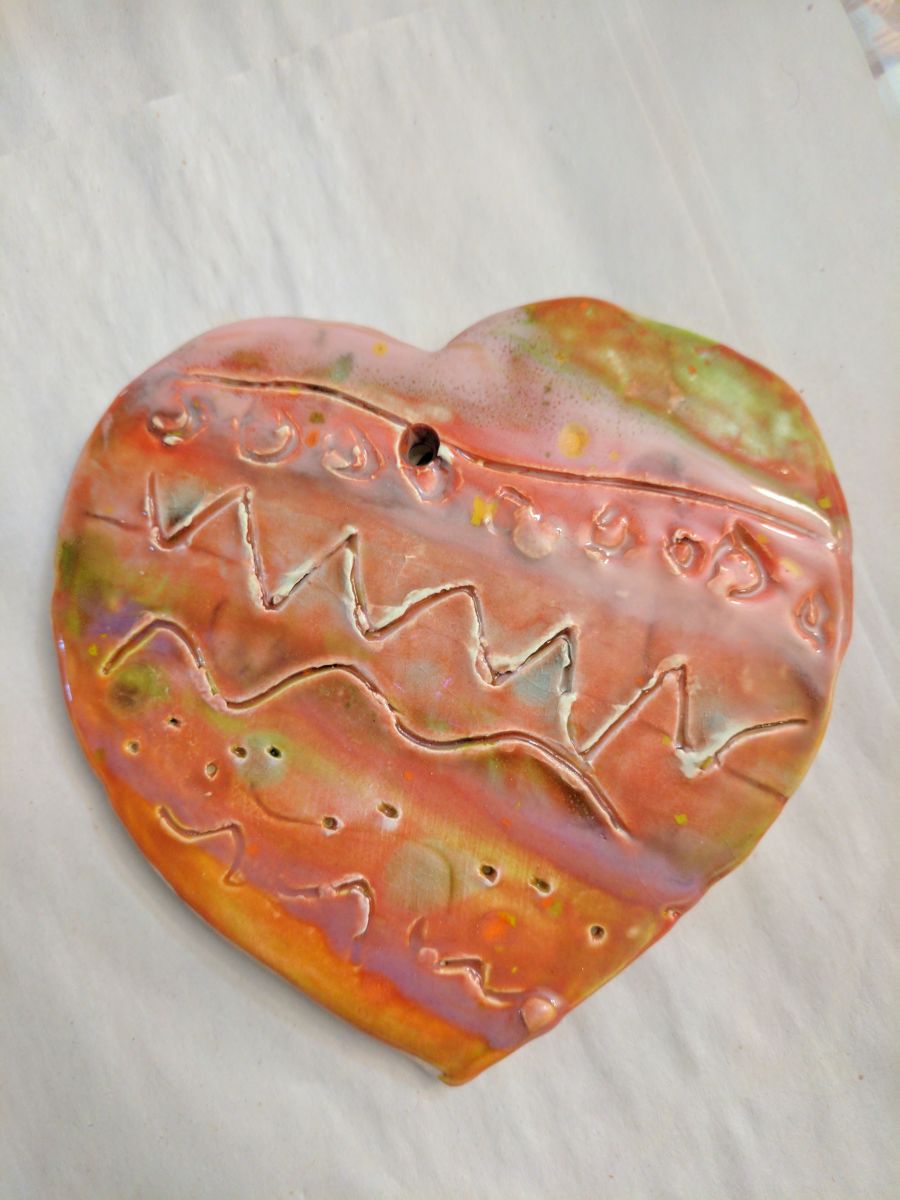
Alternative to glazing: Tempera-Wash resist
- Have the students color their piece with oil pastels. Use bright colors and enough pressure to create a resist.
- As they color, have them leave some white spaces. It is ok to not fill the entire piece with color.
- The students will then paint over the entire piece with watered-down black tempera paint.
- If the oil pastels are not visible once painted, turn the water faucet on low and give the piece a gentle rinse. Do not scrub or rinse excessively. You want the black to stay on all the spaces that were white.
- Let dry, and do not fire in the kiln.
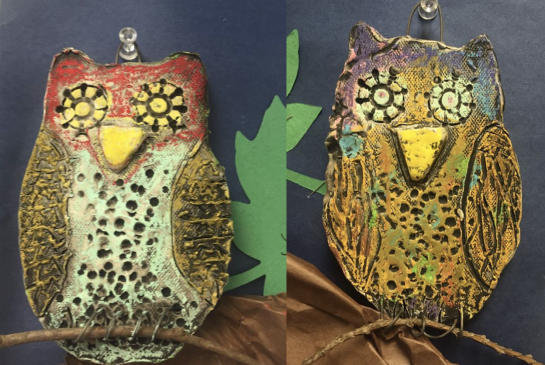
 Finished examples of clay Tempera-Resist pieces
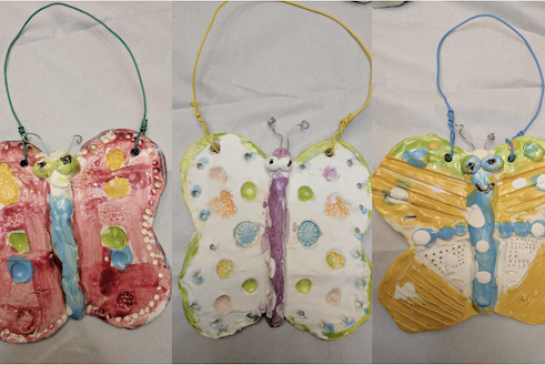
Additional Examples using other shapes:

Variations
Slabs can be cut to any shape. Consider making your own templates that tie into the classes’ current curriculum in science or social studies. Any form with a main shape and no skinny protuberances will work. Here are some other ideas: Astronauts – space & solar system, boats, bugs/butterflies -symmetry, cats, dinosaurs , fish – oceans, flowers (could add a little bee on it), hearts – seasonal, houses – social studies, gingerbread people – seasonal, jellies – oceans, penguins – polar, planets – solar systems, polar bears – polar, pumpkins – seasonal, sea stars – oceans, sharks – oceans, snowmen – seasonal, stars – seasonal/science, trees – environment. Students or docents can make their own shapes by folding a paper in half and cutting a symmetrical shape.
References and Attributions
Lesson adapted from Juliette Ripley-Dunkelberger. Photo Attributions: Sea Star – Endeavour Elementary, Owls – Endeavour Elementary, Turtles – Beth Koontz and Issaquah Valley Elementary, Picture frame – Issaquah Valley Elementary, Salmon – Sunset and Challenger Elementary, Butterflies – Challenger Elementary, Hearts – Challenger Elementary, Tropical fish – Challenger Elementary, Salmon – Sunset Elementary, Snowman – Sunny Hills Elementary.
Notes for Educators
21st Century Thinking Skills
Persisting, creating, innovation, Taking Responsible risks, reflecting, observing, making connections, visualizing, case & effect, decision making, evaluating.
WA State Learning Standards
(VA:Cr1.1.1) a. Engage collaboratively in exploration and imaginative play with materials. This happens when students use tools to make textures in clay.
(VA:Cr1.2.1) a. Use observation and investigation in preparation for making a work of art. This happens when watching demonstrations and viewing examples.
(VA:Cr2.1.1) a. Explore uses of materials and tools to create works of art or design. This happens when using clay tools.
(VA:Cr2.2.1) a. Demonstrate safe and proper procedures for using materials, tools, and equipment while making art.
(VA:Cr3.1.1) a. Use art vocabulary to describe choices while creating art. This happens when using vocabulary as defined in this lesson.
(VA:Re.7.2.1) a. Compare images that represent the same subject. this happens when finished work is displayed.
Art Integration Opportunities
Writing: procedural writing, vocabulary words can be added to spelling lists.
Natural Science: if studying certain topics, the templates can reflect this.
Please note: These lesson plans are intended for non-profit use only. Use of these plans for commercial purposes should give attribution to the Issaquah Schools Foundation and be accompanied by a nominal donation at www.isfdn.org/donate. Thank you.
Donate Now