Form: an object found in three dimensions, having height, width and depth.
Shape: a two-dimensional (flat) area enclosed by a line. It is either geometric (symmetrical, usually straight edged or circular) or organic (curved, irregular).
Balance (Symmetrical): having exact appearance on opposite sides of a central dividing line or plane.
Clay: a mixture of minerals and clay particles which is often found at lake sides and dug out of the ground. This material is malleable and when fired becomes permanently hard, like stone.
Glazes: glazes are a mixture of clay, water, colorants and silica. When fired they become colorful, hard and glassy.
Beetles are insects. They have three parts to their body: head, thorax and abdomen. They have six legs and 2 antennae. They are symmetrical along a center line.

This lesson requires two sessions, you will need to book time and kiln time for both.
Find images of rain forest beetles to either show in a PowerPoint or print on paper for them to look at.
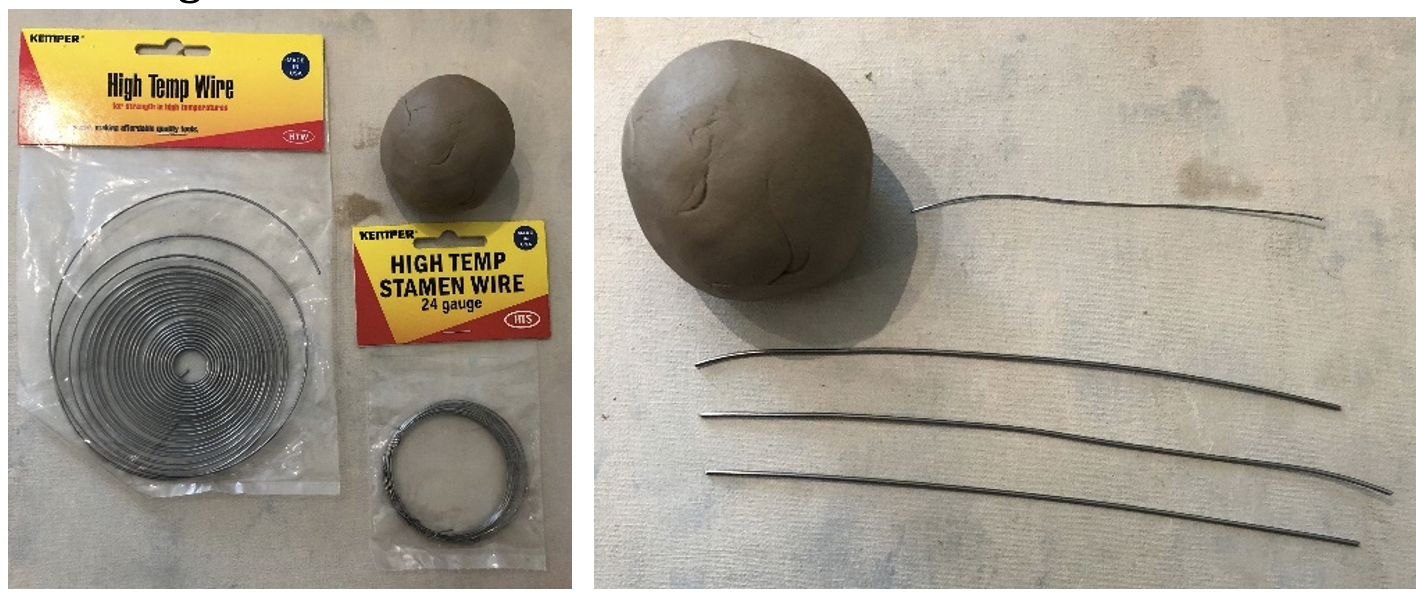
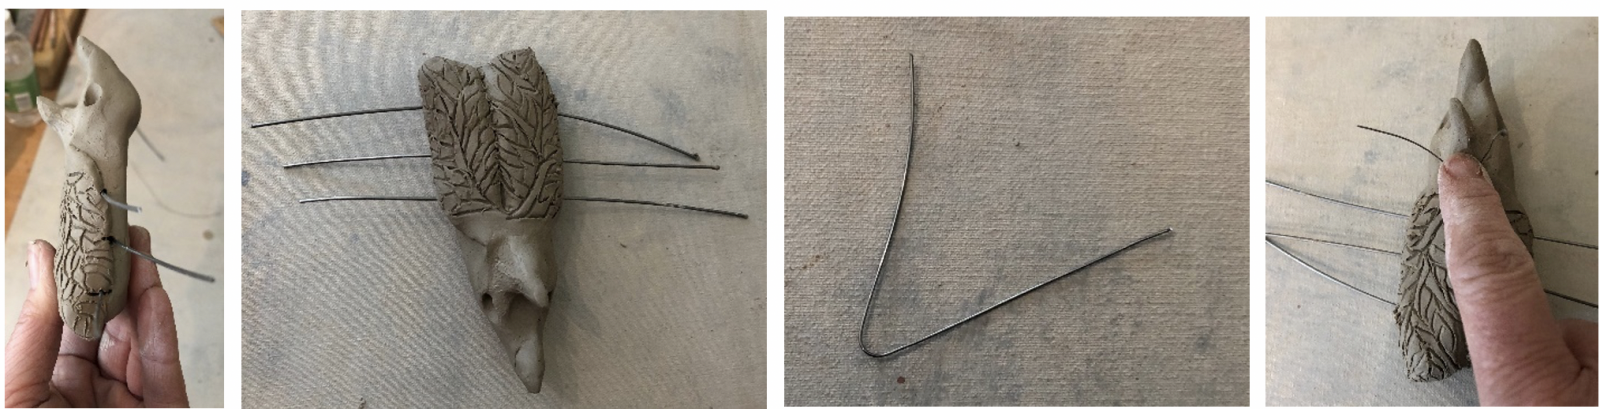
Cut the High fire wire into 5” lengths, 3 per beetle.
Cut clay into small 3.5” x 3.5” x 1” blocks using the wire cutting tool, students can mold or pound into a tangerine sized ball.
How do you know that something is an insect? (Consider adding a Beetle car, cow or building into the slide show so they must pick out the ones that are not insects)
Find the body parts of a beetle in each image. Point out the symmetry of coloring on the body.
What is clay? Have they ever found clay someplace? Where?
Students will create a symmetrical, anatomically correct beetle after looking at rain forest beetles. They will become familiar with the properties of clay and tools used to work with clay.
Building - Preparation
Set up your workspace with butcher paper taped to the tables or canvas for students to work on. Every student’s space should have a block of clay and a pencil.
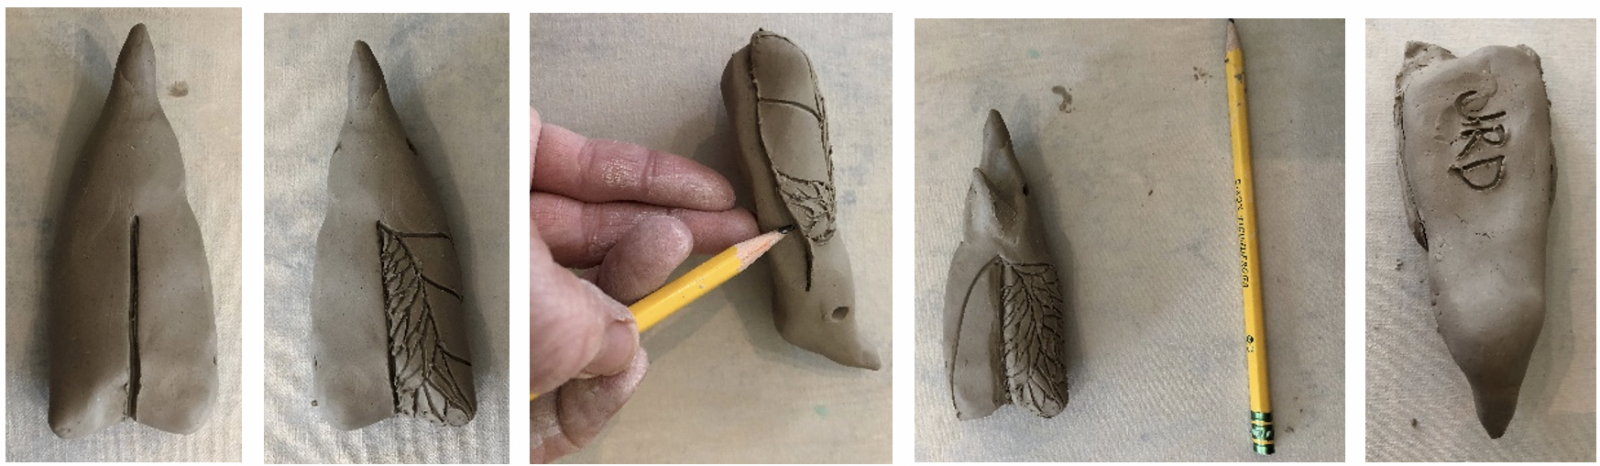
In this project students will mold their forms from the piece of clay they have. They will only take clay off they don’t want it. All the shape will be “pinched” out of the main ball. We will not be doing any attachments – this includes any horns for stag horn beetles.
Leave up images of beetles so students can see them.
Building - Lesson


Glazing – after bisque firing
Preparation
- Before you work with students, use your needle nose pliers to curl the end of the wires into a circle to create a foot. And bend the legs down so that the beetle stands on all six feet.
- Set up your workspace with butcher paper taped to the tables. Pour glazes, in small amounts, into small cups. The brush with that glaze ‘lives’ in that cup so they will need to take turns with glazes. Set out the images of the beetles on the table to inspire students to glaze brilliantly.
Glaze is not paint, it’s more like clay/glass mixed with water to spread it:
Lesson written by Juliette Ripley-Dunkelberger.
21st Century Thinking Skills
Goal setting, observing, making connections, visualizing, sequencing, comparing/contrasting, finding evidence, problem solving, cause and effect, decision making, evaluating.
WA State Learning Standards
(VA:Cr1.1.2) a. Brainstorm collaboratively multiple approaches to an art or design problem.
(VA:Cr1.2.2) a. Make art or design with various materials and tools to explore personal interests, questions, and curiosity.
(VA:Cr2.1.2) a. Experiment with various materials and tools to explore personal interests in a work of art or design.
(VA:Cr2.2.2) a. Demonstrate safe procedures for using and cleaning art tools, equipment, and studio spaces.
(VA:Cr3.1.2) a. Discuss and reflect with peers about choices made in creating artwork. This happens if time is allotted for this.
(VA:Pr4.1.2) a. Categorize artwork based on a theme or concept for an exhibit.
(VA:Pr5.1.2) a. Distinguish between different materials or artistic techniques for preparing artwork for presentation. This happens when metal and clay are used for different sculptural purposes.
(VA:Re7.1.2) a. Perceive and describe aesthetic characteristics of one’s natural world and constructed environments.
(VA:Re9.1.2) a. Use learned art vocabulary to express preferences about artwork.
Arts Integration Opportunities
Science: rain forest, ecosystems.
Procedural writing.
Please note: These lesson plans are intended for non-profit use only. Use of these plans for commercial purposes should give attribution to the Issaquah Schools Foundation and be accompanied by a nominal donation at www.isfdn.org/donate. Thank you.
Fueling Success for Every Student, Every School


