Context (History and/or Artists)
How long have clay projects been around? Clay pots have been found in current day Iran and China that date back to 5000 B.C. – that’s more than 7000 years ago! People used clay to make containers for food and to make bricks to build houses (baked clay mixed with straw called adobe). Back then they used fire to cook and harden the clay. Today, in modern times, a kiln is used.
Advanced Preparation
- Book two sessions – one for building and one for glazing.
- Allow at least one hour to roll clay into slabs. This can be done the day before and placed in a large plastic storage container. Place plastic trash bags between each layer of slabs and place moist sponges in the corners of the tub before sealing with a lid.
- Gather texture tools and other supplies ahead of time to use the day of the wet clay lesson.
- Create a beak template.
- For the glazing lesson, prepare the glazes by stirring and pouring into small bowls for the kids to paint on their projects.
Tips & Tricks
- Don’t forget to remove the pencil before leaving clay to air dry or it will get stuck as the clay shrinks while drying.
- Use one brush per color of glaze, this cuts down on mixing of glazes.
- When cutting clay, hold the cutting implement vertically to insure a vertical edge is cut.

Discussion Points
- Clay is made up of minerals from the earth – specifically silica and alumina. Often clay is found near rivers where small particles of rock are carried down to a lower part and collect together to form clay.
- Clay is plastic when it’s wet –which means it can be pushed, stretched, stamped, or impressed.
- Clay shrinks and hardens as it dries. When wet it has no structural strength. It can slump or distort if handled roughly. Bone-dry clay is quite brittle before firing.
- Clay vitrifies when subjected to sufficient heat in the kiln. It can become hard, durable and waterproof with the application of glaze.
- A special electric oven called a kiln is used to cook the clay. How hot does your kitchen oven at home reach when you are cooking food? 375 or 400 degrees F? Our kiln will cook these projects at about 1800 -2000 degrees F.
- Cooking in a kiln is called firing. This is important because it makes the clay stronger and more waterproof. Clay that has been kiln fired would not return to a soft state even if it were in water for a long time. That is because the extreme heat causes permanent physical and chemical changes to occur. These reactions, among other changes, cause the clay to be converted into a ceramic material.
- When the project is completely dry it will be fired in the kiln for the first time (bisque fired) and look like this when they are done (hold up a sample of bisque fired piece).
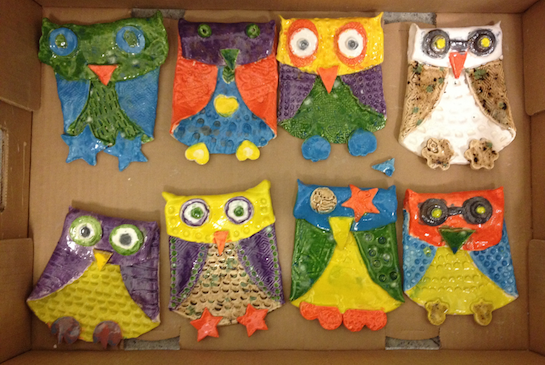
- After that, there will be a second art session when students will paint the projects with glaze, a special liquid like a paint that’s made of materials that include ground up glass. The piece will then be fired again in the kiln and will turn out like this (show a glaze-fired piece).
- Discuss texture, symmetrical balance and pattern. Write the definitions on the board, read them aloud and use those terms during the lesson.
Reflection Point (Assessment of Learning Objectives)
Students will identify different kinds of actual texture: rough, smooth, bumpy.
Students will use tools to create texture in soft clay.
Students will create an object using the slab clay method that contains texture.
Instructions for Lesson
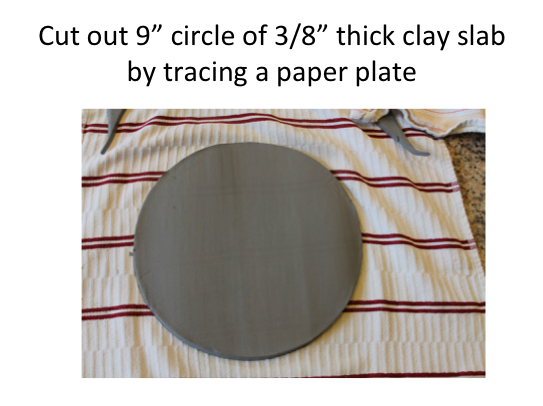
- Use the overhead projector or gather the students close to show them this process. Demonstrate the whole process then walk the students through it again with them doing it at their desks. Demonstrate placing a paper plate on their clay and cutting with their implement held vertically (like a tree), setting the scrap aside and smoothing the edges with their finger.

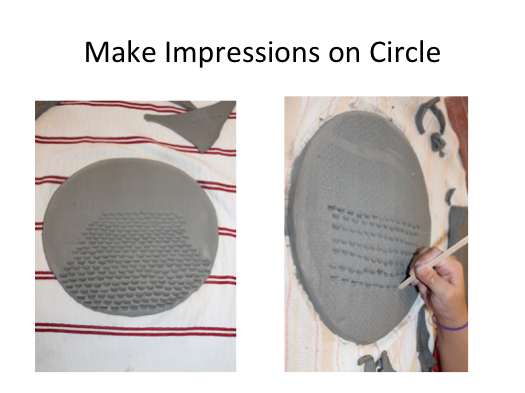
- Talk about textures here. Have students practice making patterns in their scrap clay with multiple tools. They are looking for three textures that they want to use on their owl.
- When they are happy with a tool & pattern then have them press the chest pattern they have chosen into the clay circle.
- Have students watch this again, then let them fold in their wings and add texture to their wings.
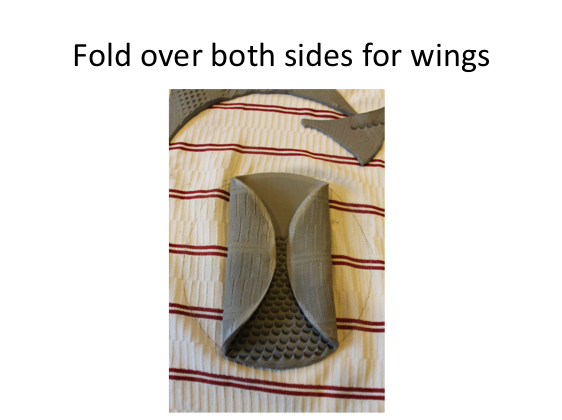
.png)
- Stop students and demonstrate this part again.
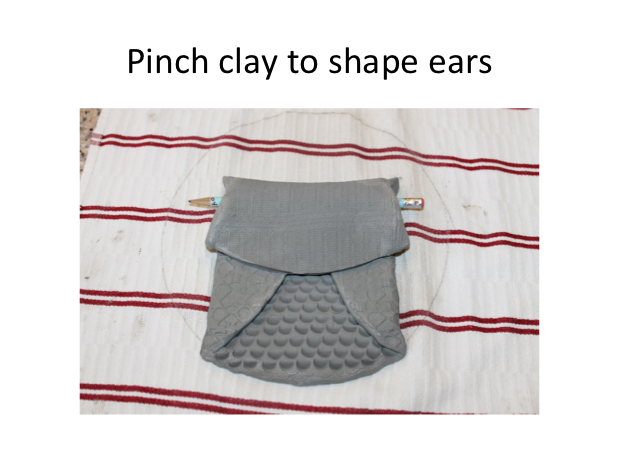
a) Gently place the pencil on the clay and then fold over the top portion about 1/3 the way down the body.
b) Pinch little ‘ear’ points at the edges of the fold
c) Stamp a pattern around the border of the head making sure to avoid the pencil.
d) It is important that they can move the pencil after they have pressed the texture around their owl’s head.
- Have students complete this step.

- Demonstrate cutting out different sized circles for eyes and feet. If texture is desired, texture the clay before cutting out the circles.
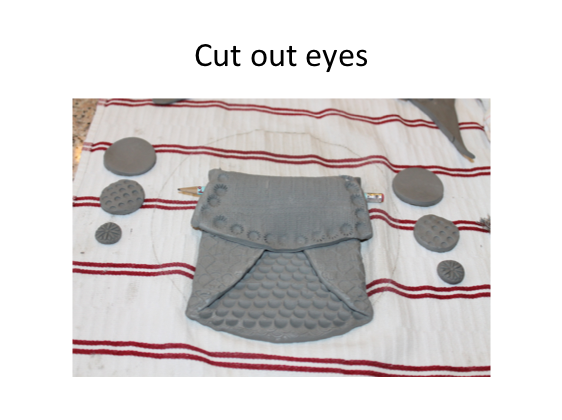
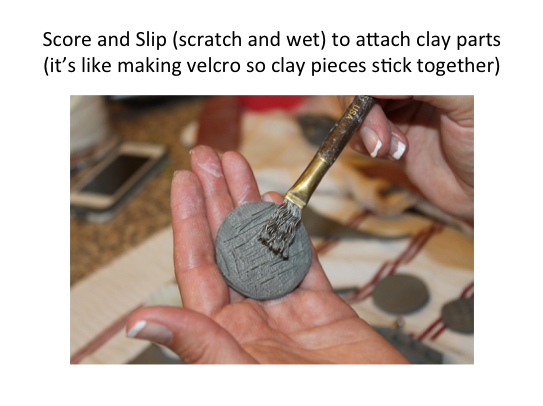
- Demonstrate attaching the eye parts together by scoring and adding slip (or a damp finger) to both surfaces. Then gently press together. When you have completed one eye, demonstrate the same technique for adding it to the face.
- Use a template to cut out the beak.
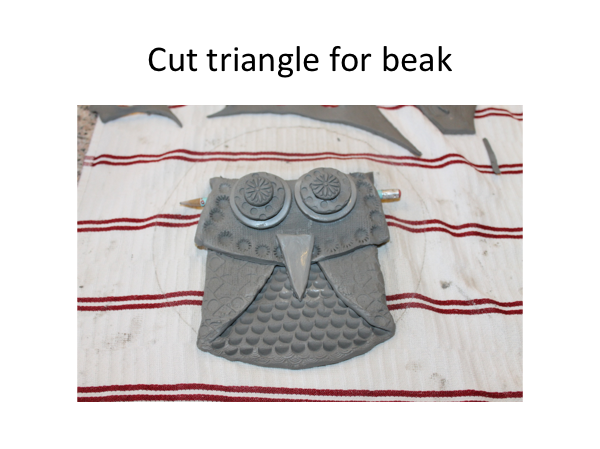
- Have students complete this step.
- Attach the beak and feet in the same way as step 9.

- Have adult helpers gently place the piece face down in their hand and write the students name and year on the back.
- Remove the pencil before the pieces dry, perhaps as you are storing them for drying.
- When warm and dry to the touch (approximately 2 weeks later), bisque fire owls.
- Using the tips for glazing bisque ware, have students glaze their owls.
- Pieces can go directly back into the kiln for a glaze firing, no drying time needed.
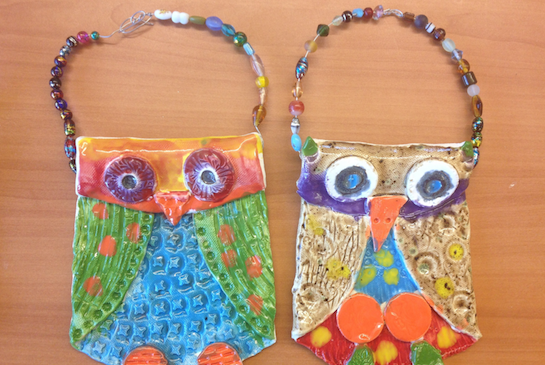
- Students can string wire, beaded wire, colored pipe cleaners or cording through the pieces for hanging.
References and Attributions
Lesson from Creekside Elementary, written by Beth Koontz.
Wikipedia, J. Paul Getty Museum reference materials, ThoughtCo.
Notes for Educators
21st Century Thinking Skills
Thinking flexibly, persisting, creating, taking responsible risks, observing, making connections, visualizing, sequencing, comparing/contrasting, decision making.
WA State Learning Standards
(VA:Cr1.2.2) a. Make art or design with various materials and tools to explore personal interests, questions, and curiosity. This happens when using the tolls to make different textures
(VA:Cr2.2.2) a. Demonstrate safe procedures for using and cleaning art tools, equipment, and studio spaces.
(VA:Cr3.1.2) a. Discuss and reflect with peers about choices made in creating artwork. This happens when choosing tools to make texture.
(VA:Pr5.1.2) a. Distinguish between different materials or artistic techniques for preparing artwork for presentation. This happens when planning ahead to hand the piece by making an opening for the wire, pipe cleaner or cord.
(VA:Re9.1.2) a. Use learned art vocabulary to express preferences about artwork. This happens when art vocabulary is used during this lesson.
Please note: These lesson plans are intended for non-profit use only. Use of these plans for commercial purposes should give attribution to the Issaquah Schools Foundation and be accompanied by a nominal donation at www.isfdn.org/donate. Thank you.
Donate Now