Context (History and/or Artists)
Clay pots have been found in current day Iran and China that date back to 5000 B.C. – that’s more than 7000 years ago! People used clay to make containers for food and to make bricks to build houses (baked clay mixed with straw called adobe). Back then they used fire to cook and harden the clay. Today we use clay for all sorts of things and a kiln is used to harden it. More information about the history of clay and the use of clay in art can be found HERE.
Advanced Preparation
- Book two sessions – one for building and one for glazing.
- Allow at least one hour to roll clay into slabs. This can be done the day or week before and placed in a large plastic storage container. Place plastic trash bags between each layer of slabs and place moist sponges in the corners of the tub before sealing with a lid.
- Gather texture tools and other supplies ahead of time to use the day of the wet clay lesson.
- Bring bisqued pieces to show students.
- Bring natural stuff for them to look at: pine cones, seed pods, flowers, conifer branches, etc.
- Find a good space to dry the students work, this will take about two weeks before they can be fired the first time.
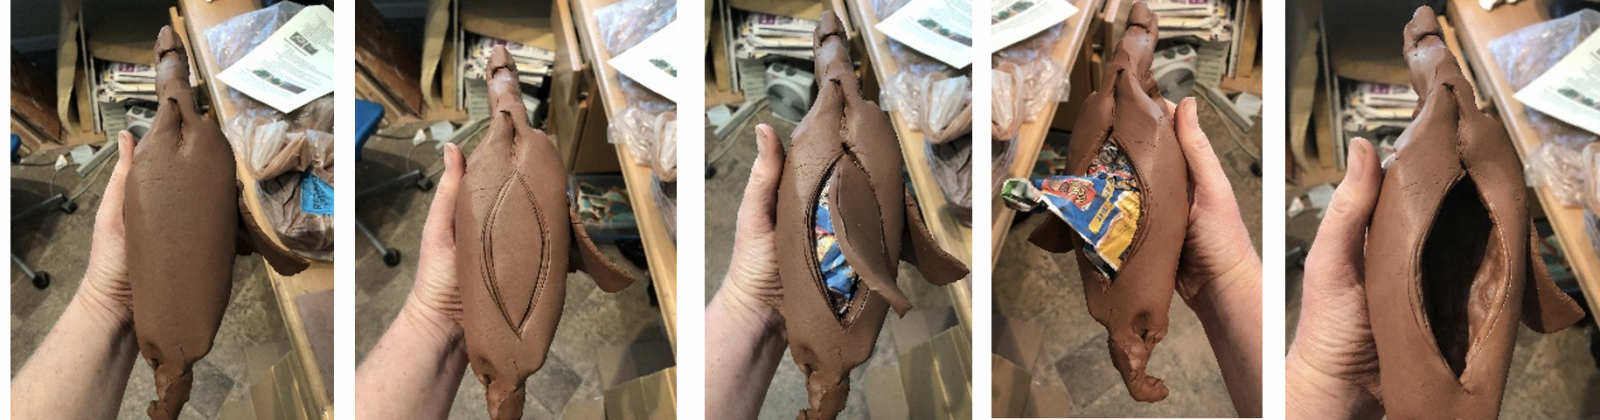
- Plan to come back the day after building to cut open the base of the dragons and remove the newspaper*.
- For the glazing lesson, prepare the glazes by stirring and pouring into small bowls for the kids to paint on their projects.
- Glazing can be done as a whole class or as a pull out with a few students at a time.
Tips & Tricks
- When demonstrating, keep your finished piece to use when demonstrating glazing. It’s also good to have a couple extra for any absent students to glaze.
- If prepping a whole class of slabs – run them all through the clay roller at the higher height then all through at lower height to save time.
- When cutting clay, hold the cutting tool vertically to ensure a vertical edge is cut.
- Use one brush per color of glaze, to cuts prevent accidentally mixing colors.
- Pour small amounts of glaze into cups. It’s easy to refill and you will waste less glaze.
Discussion Points
- Write the definitions on the board, read them aloud and use those terms during the lesson.
- Where is clay found? How is clay made? (erosion breaks down rocks and the small clay particles sink to the bottom of lakes and rivers. Water tends to collect over clay pockets).
- Our clay was dug out, cleaned, made into a “block” form and put into bags before we bought it to use today.
- Can you think of some things made of clay? (Tiles, pottery, dishes, sinks, tubs, toilets etc)
- Clay shrinks as it dries, since the water took up space.
- Clay becomes stone like when fired in the kiln. It is more durable and waterproof with the application of glaze.
Reflection Point (Assessment of Learning Objectives)
Students will:
- use tools to create texture in soft clay.
- score and pinch clay to secure additions.
- create a form using the slab clay method that contains texture.
- use art vocabulary.
- use good craftsmanship.
Instructions for Lesson
- Demonstrate:
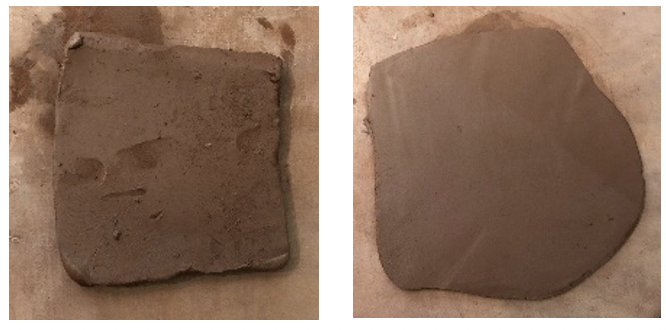
a) Lightly smooth the clay surface with your finger, getting rid of any marks or dents.
b) Place the plate on the slab of clay, hold it down with one hand and cut around it with the knife/skewer held vertically so the cut is at a right angle.
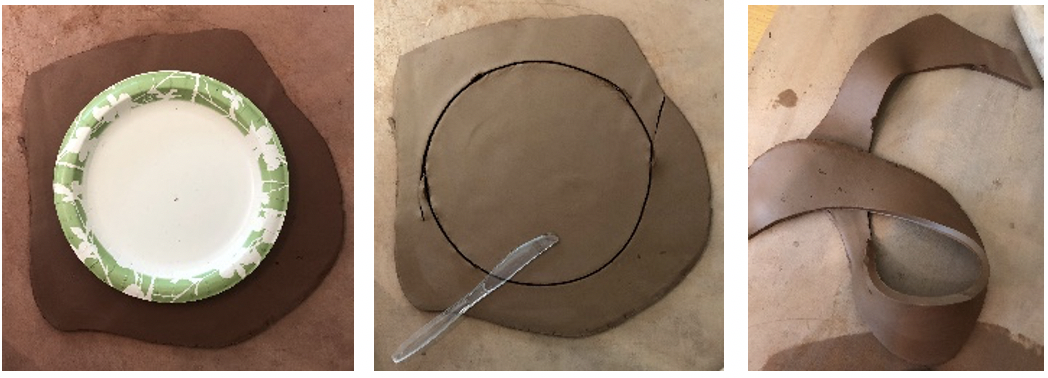
d) Practice making textures on the scrap clay with various tools until you find some that you want to use for your final work. Talk about your thought process as you work.
- Students may smooth and cut their clay.
- Students can practice making at least 5 different textures.
- Walk around and chat with them about using the tools and the textures they have discovered. Share aloud what you are seeing when appropriate.
- When most students are done experimenting with texture then move on to the next step.
- Demonstrate:
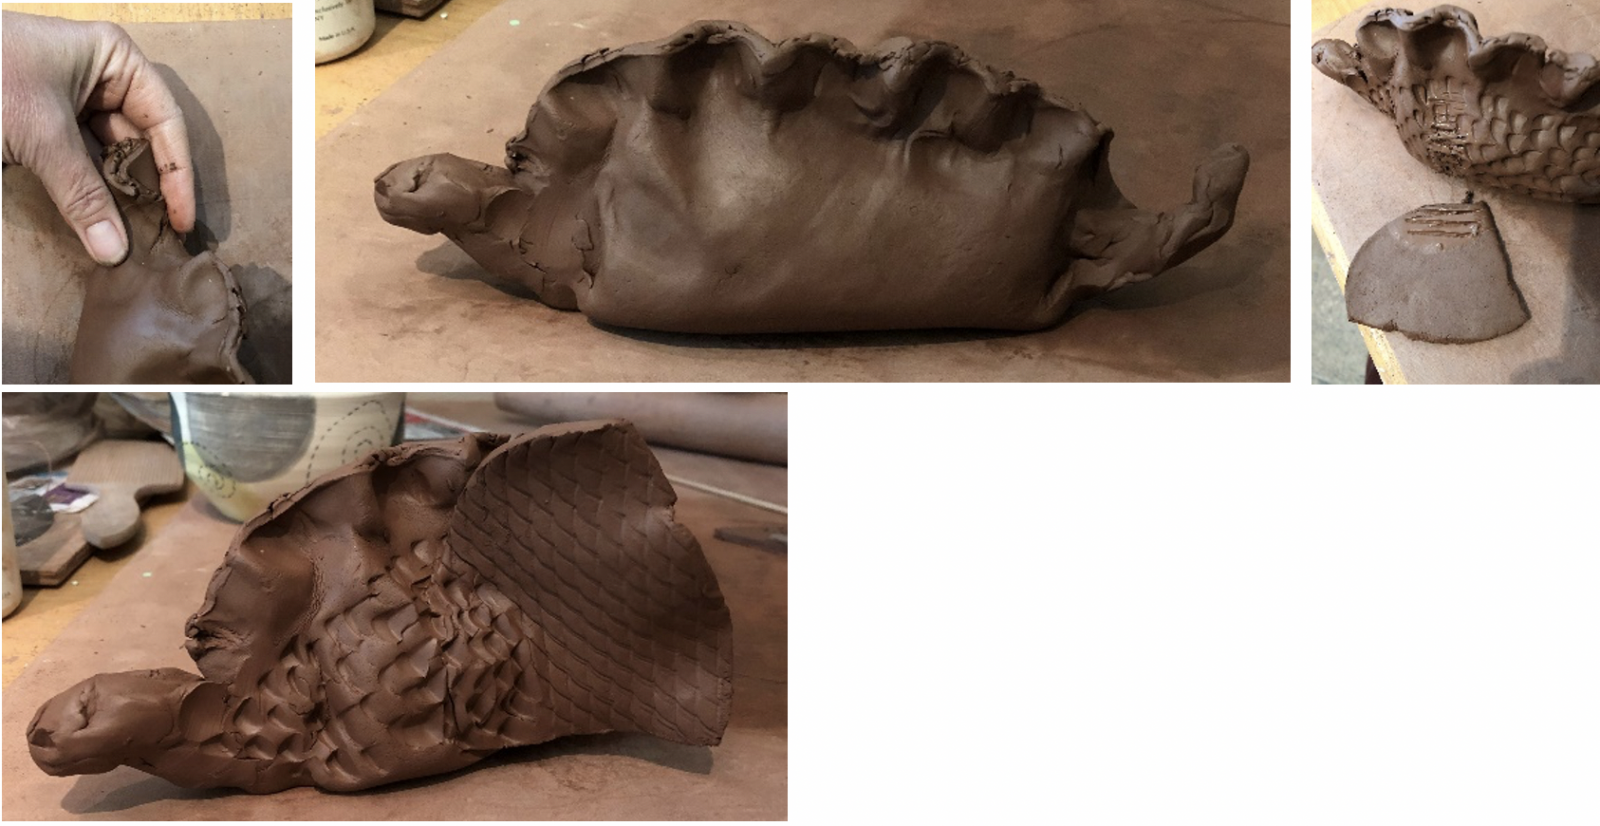
a) make a wad of newsprint that will fit in the middle of their clay “tortilla”. The clay should be able to close easily around this wad of paper, so not too big.
b) Score the edge of the “tortilla”.

c) Dip your finger in the water and brush that along the scoring without flattening it.
d) folding up the sides of the “tortilla” to make your “taco” and pinch the edges together to close the form. You should have what looks to be a clay dumpling at this point.
- Students may wad paper, score their clay, fold up and pinch closed the “taco”.
- Demonstrate:
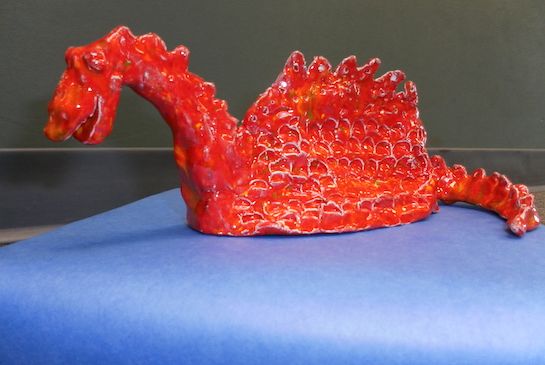
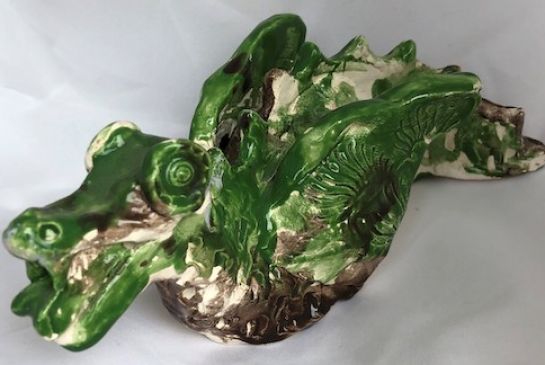
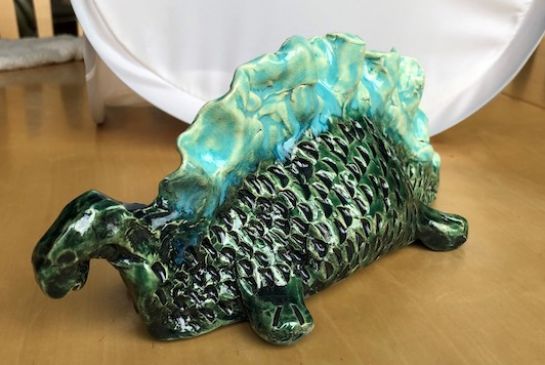
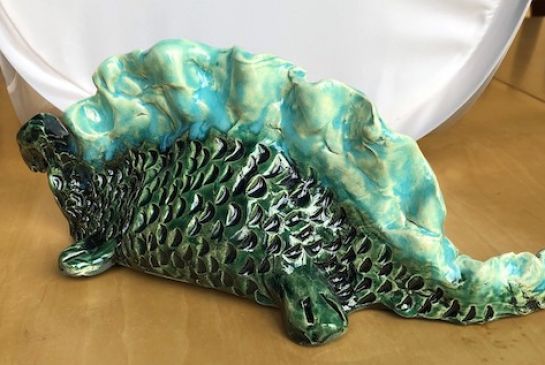
a) pinching out the head and tail from the thick ends of the “taco”, making sure that they are no thinner than 3/8” at any point (clay gets very brittle when dry and skinny and can break off).
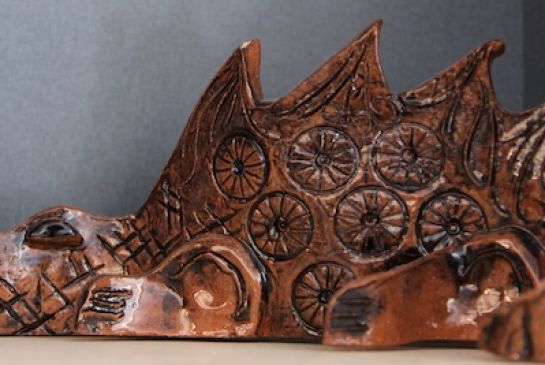
b) Adding the desired textures to the body of the dragon.
- Allow students to finish their dragon.
- Place the work in a safe place to dry.
- *The next day, come back and cut open the bottom of the dragon. Pull out the newsprint and smooth the cut edges of the clay. If you neglect this the dragons will “pop” in the kiln as the trapped air cannot escape.
Instructions for Glazing the Dragon
- Set up your space:
a) with paper on the table to make for easy clean up.
b) With a single brush for each glaze color. Students can ask for turns if needed.
c) Pour a small amount of glaze in little cups and refill as needed. That way if glaze gets mixed you don’t “lose” a whole bottle.
- Demonstrate:
a) Dipping the brush into the glaze dabbing the glaze onto the bisqued clay.
i. The glaze will dry very fast and almost stick.
ii. It doesn’t move around like paint. Brushing more only moves it around.
b) Glazing a section and then starting at the beginning again, to get two full coats of glaze on each section.
- Students can glaze their pieces.
- Wipe the bottoms of the pieces off with a damp sponge or paper towel before they go into the kiln to be sure no glaze is on the bottom. It will stick to the kiln shelf.
References and Attributions
*Vikki Hoffman, the person who started developing district trainings for art docents in 2000, would teach this lesson on an annual basis. It was one of her favorite lessons. She passed away in 2013 and her legacy of collected art docent lessons are the basis of the Issaquah Schools Foundation’s lesson library today.
Notes for Educators
21st Century Thinking Skills
Thinking flexibly, persisting, questioning, creating, innovating, listening with empathy, taking responsible risks, observing, making connections, visualizing, sequencing, predicting, comparing/contrasting, determining main idea, finding evidence, problem solving, cause and effect, determining point of view, decision making.
WA State Learning Standards
(VA:Cr1.2.2) a. Make art or design with various materials and tools to explore personal interests, questions, and curiosity.
(VA:Cr2.1.2) a. Experiment with various materials and tools to explore personal interests in a work of art or design.
(VA:Cr2.2.2) a. Demonstrate safe procedures for using and cleaning art tools, equipment, and studio spaces.
(VA:Cr3.1.2) a. Discuss and reflect with peers about choices made in creating artwork. This happens if you share choices you see students making as they work.
(VA:Pr5.1.2) a. Distinguish between different materials or artistic techniques for preparing artwork for presentation.
(VA:Re9.1.2) a. Use learned art vocabulary to express preferences about artwork.
(VA:Cn11.1.2) a. Compare and contrast cultural uses of artwork from different times and places.
Please note: These lesson plans are intended for non-profit use only. Use of these plans for commercial purposes should give attribution to the Issaquah Schools Foundation and be accompanied by a nominal donation at www.isfdn.org/donate. Thank you.
Donate Now