Line: an element of visual arts; the flat path of a dot through space used by artists to control the viewer’s eye movement; a long narrow mark or stroke made on or in a surface; a thin mark made by a pencil, pen, or brush.
Shape: a two-dimensional (flat) area enclosed by a line: geometric: shapes and/or forms that are based on mathematical principles, such as a square/cube, circle/sphere, triangle/cone, or pyramid. organic: shapes and/or forms that are irregular, often curving or rounded, and more informal than geometric shapes.
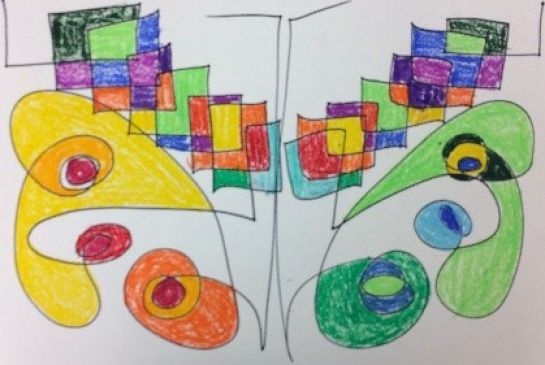
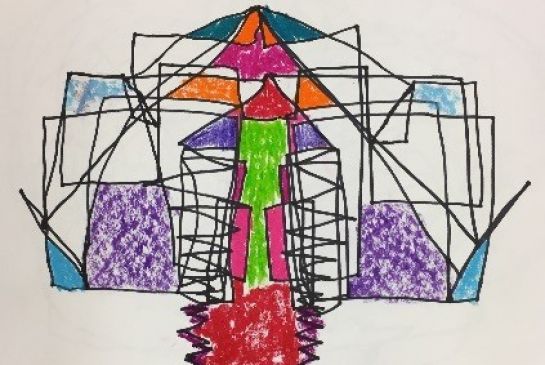
Balance: the way the elements are arranged so that individual parts appear equally distributed visually throughout the composition. i.e. spread out in a visually interesting way. Symmetrical Balance is the exact appearance on opposite sides of a dividing line or plane.
Pattern: repetition of the elements in an organized way. In this lesson color should repeat on each side to maintain the symmetry.
Unity: all parts of the work of art are connected, creating a sense of completeness. Too much unity is boring & needs variety. Too much variety brings chaos and needs unity. An interesting design is neither boring nor confusing.
Craftsmanship: A way of working that includes following directions, neatness and proper use of tools.
Geometric: any shapes and/or forms based on math principles, such as a square/cube, circle/sphere, triangle/cone, pyramid, etc.
Non-representational: A design that doesn’t look like anything from real life.
Organic: shapes and/or forms, often curvilinear in appearance, that are similar to those found in nature, such as plants, animals, and rocks.
Parallel lines: straight lines that run side-by-side and never cross.
• Black fine tip permanent markers (2 per student)
• Pencils (1 per student)
• Painter’s Tape or Masking Tape
• Colored markers, crayons or oil pastels
Students will use line, shape and color to create a symmetrical non-representational design.
They will create an interesting design, using variety and unity.
They will use good craftsmanship.
They will understand the difference between geometric and organic line and shape.
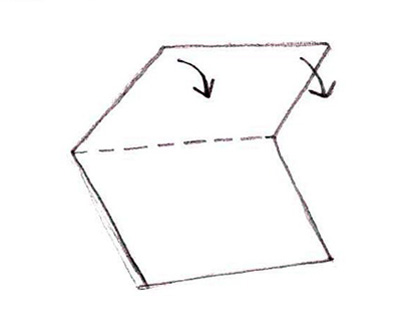
Students make a continuous line by keeping the marker on the paper.
Demonstrate practicing on the paper with the pen caps on.... just to get the feel. Draw squiggly lines while you call these lines “organic.”
As you draw, model:
“Go slowly to notice what you are doing.”
“Move your hands slowly. It’s OK to stop, but always keep your marker on the paper.”
“Keep your hands from crossing over the mid-line.”
“Have your hands moving at the same time.”
“Decide when you’ve made enough lines, so your design isn’t boring or confusing.”
Show an example of sharp lines, geometric lines on second paper.
As you draw, model:
“I want my hands to draw the same thing on each side. This is called symmetry.”
“Don’t plan too much. Let your hands be the boss, but don’t scribble.”
Take Two Lines for a Walk:
Lesson developed by Leslie MacInnes, Art Teacher, St. Joseph’s School, Issaquah, WA. Issaquah Valley Elementary PTSA Art Docent Program Lesson: Simple One-Line Drawing.
21st Century Thinking Skills
Thinking flexibly, persisting, taking responsible risks, reflecting, observing, visualizing, sequencing, comparing/contrasting, determining main idea, decision making.
WA State Learning Standards
(VA:Cr1.1.2) a. Brainstorm collaboratively multiple approaches to an art or design problem. This happens when more than one drawing is made.
(VA:Cr3.1.2) a. Discuss and reflect with peers about choices made in creating artwork. This happens when peers compare their designs.
(VA:Pr5.1.2) a. Distinguish between different materials or artistic techniques for preparing artwork for presentation. This happens when noticing how drawing with both hands simultaneously impacts the design.
(VA:Re7.1.2) a. Perceive and describe aesthetic characteristics of one’s natural world and constructed environments. This happens when looking for examples of organic vs geometric lines.
(VA:Re8.1.2) a. Interpret art by identifying the mood suggested by a work of art and describing relevant subject matter and characteristics of form. This happens when students relate their feelings to a particular type of line.
(VA:Re9.1.2) a. Use learned art vocabulary to express preferences about artwork. This happens if students and instructor use the listed vocabulary as they are working.
Arts Integration Opportunities
Writing: include vocabulary on spelling lists.
Science: look for evidence of symmetry in nature.
Please note: These lesson plans are intended for non-profit use only. Use of these plans for commercial purposes should give attribution to the Issaquah Schools Foundation and be accompanied by a nominal donation at www.isfdn.org/donate. Thank you.
Fueling Success for Every Student, Every School