loading Skip to Main Content

Cardboard Portraits

Layering cardboard shapes and textures, students will create a portrait in relief. Recommended for 3rd Graders.

Elements of Art

Shape: a flat, 2-dimensional (height and width) figure created within joined lines.
Texture: the quality of the surface: how it feels. Changes of texture add interest.

Principles of Design

Proportion:  the relationship of parts of an object to its whole, eg. the nose in relationship to the face.

Additional Vocabulary

Collage: a way of making a work of art by gluing different objects, materials, and textures to a surface.
Craftsmanship: A way of working that includes following directions, neatness and proper use of tools.
Details: additional features added to create interest.
Layering: placing something on top of something else to create depth and texture.
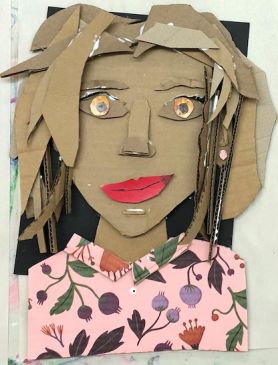
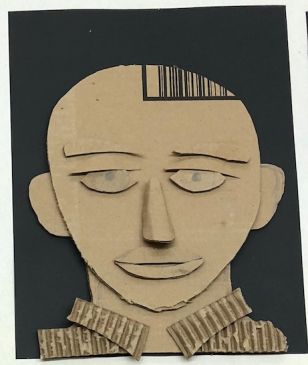
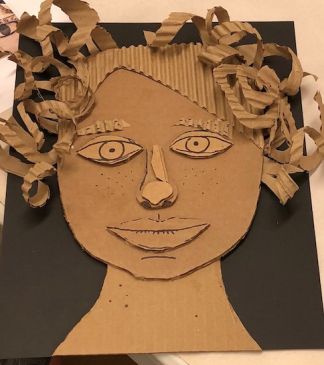
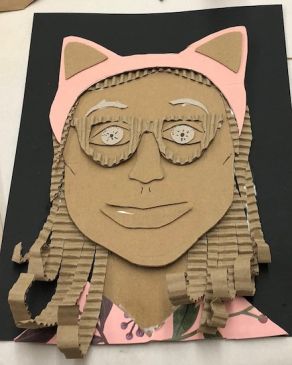
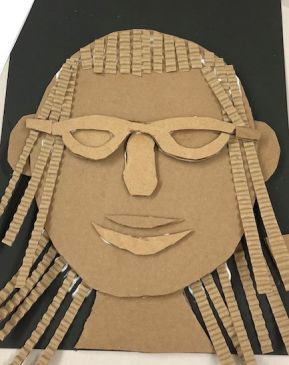
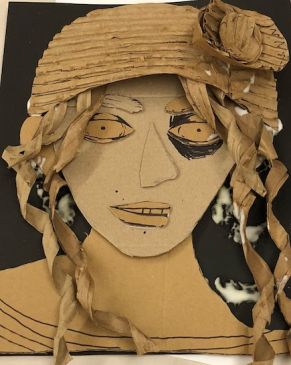
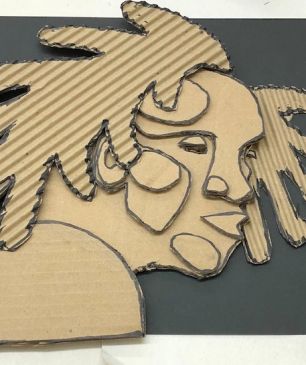
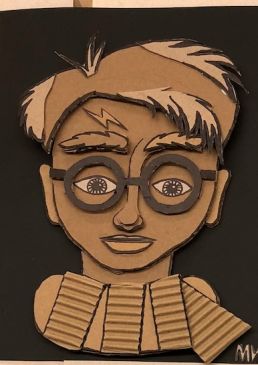
Portrait:  the visual representation of a person’s head and shoulders.
Recycling: to repurpose discarded items as new products.  Upcycling turns discarded items into  better-quality products.
Relief: a work of art that projects from but belongs to the wall or background surface. 

Materials & Supplies

  • 9” x 12” black or dark colored card stock or construction paper
  • Used cardboard shipping boxes, cut into 9”x 12” sheets and smaller
  • Corrugated cardboard, peeled to reveal corrugation, in 4” x 6” pieces
  • Liquid white glue, bottles
  • Large scissors
  • Pencils
  • Black permanent markers
  • Decorative paper
  • Thin cardboard (cereal boxes), cut in 9”x12” pieces and smaller

Context (History and/or Artists)

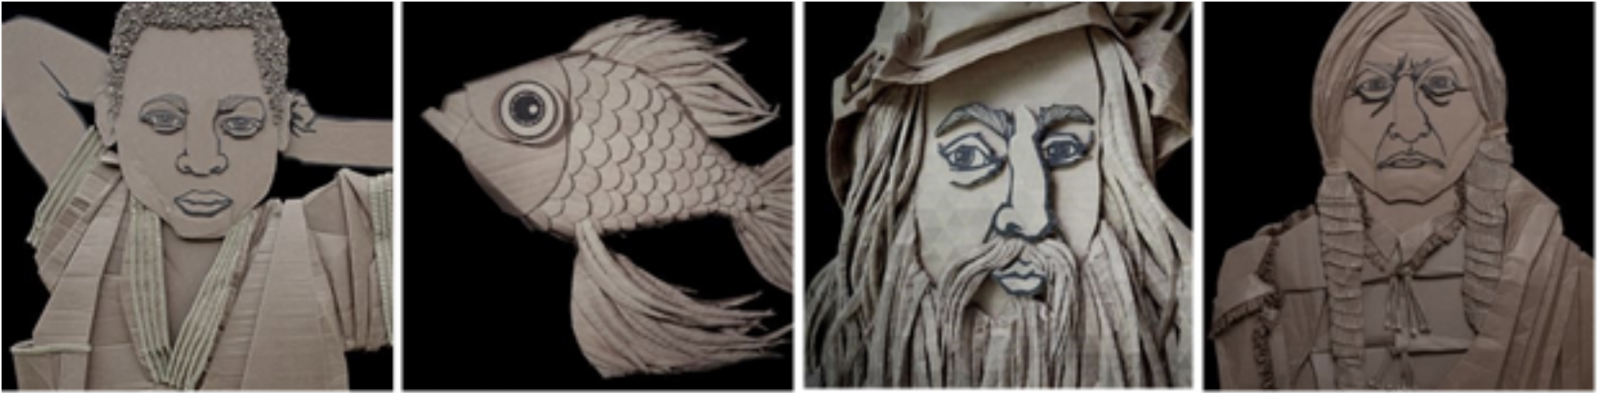
Ali Golzad is a Texas-based self-taught artist, originally from Sweden by way of Iran. He specializes in digital and reclaimed art. Golzad developed his own style working in various mediums. His drive to create, while still caring for our planet, enabled him to look at ordinary objects in a new light and transform commonly discarded materials into something meaningful.  
His work is abstract and figurative, inspired by the cubism of Pablo Picasso, Henri Matisse, Marcel Duchamp, and Alexander Calder.
Ali Golzado artwork from recycled materials cardboard collage

Advanced Preparation

Cut the cardboard pieces so there is a large assortment of sizes and textures.
Prepare images of relief sculpture, work by Golzad, paper collage artists and 2 cubist artists whose work best aligns with this lesson.
For your demonstration, precut face and feature shapes (eyes, nose, etc.). Keep a few thin tagboard pieces to demonstrate cutting hair textures, or paper pieces to fold.

Tips & Tricks

  • Third graders can obsess over tiny details and run out of work-time. It’s your job to keep things moving along, “by this time most of you should have completed step…”
  • Corrugated cardboard is easier to fold and cut along the parallel lines of the corrugation.
  • Peel the thin paper layer over the corrugated cardboard to show the corrugation.
  • Advanced Techniques*
    • Cardboard can be dented and pushed with blunt points of scissors, large erasers or pencils to create texture and wrinkles 
    • Thin tagboard can be cut into smaller, more detailed pieces. 
    • Soften the cardboard by folding and rolling the cardboard to make it easier to fold and manipulate
    • Add volume by folding the cardboard for the nose or other features (be aware of the direction of the corrugations)  
    • Roll paper tightly to create ‘hair’, or loosely to create ‘fabric folds.’
  • Torn edges give a rough, natural edge.

Discussion Points

  • Post all vocabulary words and discuss their meanings. Use them during the lesson. 
  • Talk about how repurposing discarded material respects our environment by reducing waste and offers another medium to create new uses and unique compositions. The interesting aspect of this is, the pieces change their original appearance and they are surprisingly sturdy and flexible. Show examples of repurposed paper in collages and relief portraits.
  • Show cubist portrait art to familiarize students with blocky, geometric shapes that replace naturally organic shapes found in nature. As in the cubist style, the face and its features will take on more geometric shapes in the relief portrait.
  • Pass around some actual examples of this lesson so students can see and feel the layering.

Reflection Point (Assessment of Learning Objectives)

Students will observe portraits then use good craftsmanship to create a relief portrait.

Instructions for Lesson

  1. After covering the discussion points, pass out scratch paper and pencils.
  2. Talk about the subject for your portrait: a family member, a special person or hero, a friend, the grown-up you want to be or a made-up face.
  3. Demonstrate how the face can be broken in shapes and sketch these with students:
    • Oval shape for head
    • Almond or olive sized shapes for eyes
    • Orange slice shape for mouth 
    • C shape for ears
    • Triangle or rectangle for nose
    • Neck is a trapezoid almost as wide as the head
  4. Show students placement of shapes to represent human proportions by drawing them:
    • Eyes ½ way down the face
    • Nose in-between eyes takes up half of the half (1/4 of face)
    • Lips are as wide as from our pupil to pupil
    • Ears start at the level of our eyes and are as long as our nose
  5. Demonstrate layering from largest shape, the face, to smaller feature shapes. Save the thinner, detailed cutting for the topmost layer, and cut that under the overhead projector. Paper strips can be fringed, rolled, or wrinkled to suggest hair or clothing.
  6. Have students begin: keep in mind the shapes & proportions:
    • draw the head, neck, eyes, nose, mouth, hair, ears and details (glasses, necklace…)  onto cardboard or thinner tagboard for smaller pieces
    • Cut out all the shapes
    • Organize the shapes on the black background – Trim for size, add features
    • Use advanced techniques before gluing: denting, pushing, soften and roll, folds, fringe
    • Consider the order before gluing the layers: neck & head, eyes, nose, mouth, hair, other details
  7. Show examples of how to use colored papers to highlight personal touches.
  8. Frame/name the artwork.

References and Attributions

Lesson written by Aline Bloch.
Examples of Ali Gozad’s artwork from: http://golzadartblog.com/category/recycled-art/.

Notes for Educators

21st Century Thinking Skills
Thinking flexibly, persisting, creating, innovating, taking responsible risks, listening with empathy, reflecting, goal setting, observing, making connections, visualizing, sequencing, comparing/contrasting, determining main idea, finding evidence, determining point of view, cause and effect, decision making, evaluating.

WA State Learning Standards
(VA:Cr1.1.3) a. Elaborate on an imaginative idea.
(VA:Cr1.2.3) a. Apply knowledge of available resources, tools, and technologies to investigate personal ideas through the artmaking process.
(VA:Cr2.1.3) a. Create personally satisfying artwork, using a variety of artistic processes and materials. This happens when students make personal choices about content, and use good craftsmanship.
(VA:Cr2.2.3) a. Demonstrate an understanding of the safe and proficient use of materials, tools, and equipment for a variety of artistic processes.
(VA:Cr3.1.3) a. Elaborate visual information by adding details in an artwork to enhance emerging meaning.
(VA:Re7.2.3) a. Determine messages communicated by an image. This happens when details and texture inform the viewer about the person portrayed.
(VA:Re8.1.3) a. Interpret art by analyzing use of media to create subject matter, characteristics of form, and mood.
(VA:Re9.1.3) a. Evaluate an artwork based on given criteria.
(VA:Cn10.1.3) a. Develop a work of art based on observations of surroundings.

Please note:  These lesson plans are intended for non-profit use only. Use of these plans for commercial purposes should give attribution to the Issaquah Schools Foundation and be accompanied by a nominal donation at www.isfdn.org/donate. Thank you.

Donate Now

Artistic Support Reference Materials

Loading...
Loading

Fueling Success for Every Student, Every School