Color: the visible range of reflected light. Complementary colors: colors that are opposite one another on the color wheel, such as yellow/violet, blue/orange, and red/green.
Line a mark between two points. (In this lesson, various types of lines are used: Converging: Lines that come together and approach a meeting point or actually meet. Diagonal: Lines from opposing corners. Vertical: the up-and-down orientation of a line, shape, or form.
Horizontal: a line that is parallel to the horizon.)
Shape: a 2-dimensional (flat) area enclosed by a line, either geometric or organic. In this lesson geometric shapes are used. Shapes can be geometric or organic. They are flat, express length and width.
Form: an element of visual arts; a three-dimensional object that has height, length, width, and depth. A cylinder, cube, sphere. 2-dimensional: having width and height. 3-dimensional: having actual height, width, and depth and existing in three-dimensional spaces; or having the illusion of existing in three dimensions. Implied forms: 3-dimensional forms that are implied in the 2-dimensional drawing by use of shading and value giving depth where none exists.
Value: relative lightness and darkness.
Focal Point: the part of an artwork that is emphasized in some way and attracts the eye and attention of the viewer; also called the center of interest
Repetition: the repeated use of particular elements of visual arts to create a pattern, movement, rhythm, or unity.
Optical: Having to do with vision or occurring visually but not necessarily physically.
Optical Illusion: Something that occurs visually but not physically. This occurrence “tricks” the eyes into thinking something is really happening when it is not.
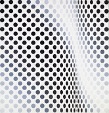
Optical art (Op Art): Abstract art that uses optical illusions as the subject matter
Cones: a solid or hollow object, which tapers from a circular or roughly circular base to a point.
Op Art is short for ‘optical art’. The word optical describes how our eyes see. Op Art is a form of abstract art that uses shape, line, color and pattern to create an illusion of movement, hidden imagery, vibrating patterns, or warping shapes.
Vega-Nor – Victor Vasarely 1969
.jpg)
Considered the father of the Op Art, Victor Vasarely was born on April 9th, 1908 in Hungary. Internationally recognized as one of the most important artists of the 20th century, his innovations in color and optical illusion have had a strong influence on many modern artists. Spanning most of his career, our collection of his prints and sculptures explores his forays into some of his most famous works such as the plastic alphabet and other iconic periods.
Pause - Bridget Riley 1964
Born in London in 1931, Bridget Riley is a skilled artist trained in painting, drawing and sculpture most famous for her involvement in the Op Art movement of the 1960s. Her artwork contains geometric elements and her use of shapes and value tricks your brain into thinking they are moving, a very cool effect. Students love looking at examples of her work.
More information about Bridget Riley and her work can be found at Slideshare or Tate.
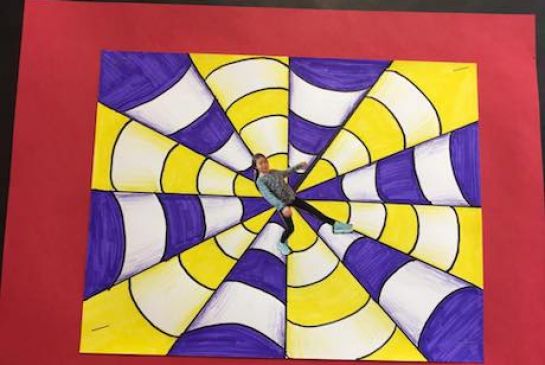
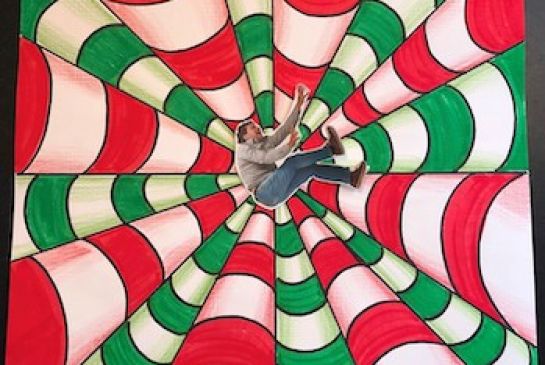
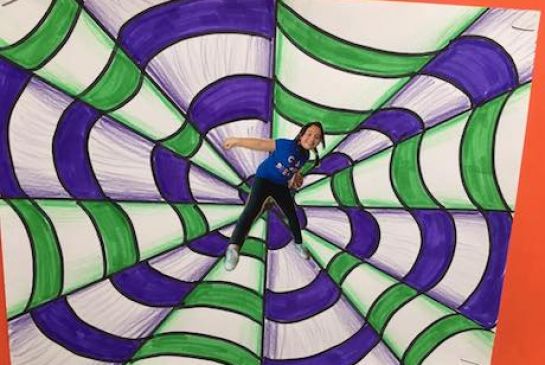
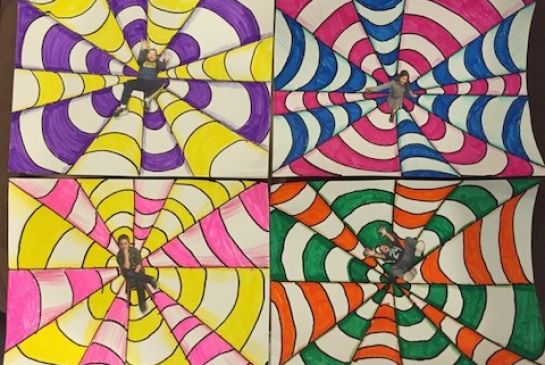
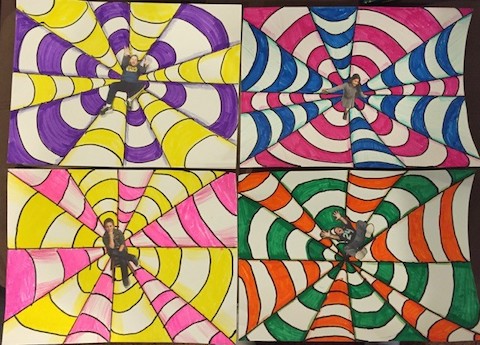
Capture and print photos of each student in a movement or falling pose; as if falling into a tunnel.
Allow one hour for the lesson but if you are concerned you will be short on time, you could have the photos pre-cut.
Did the student create a work of art following the directions as given?
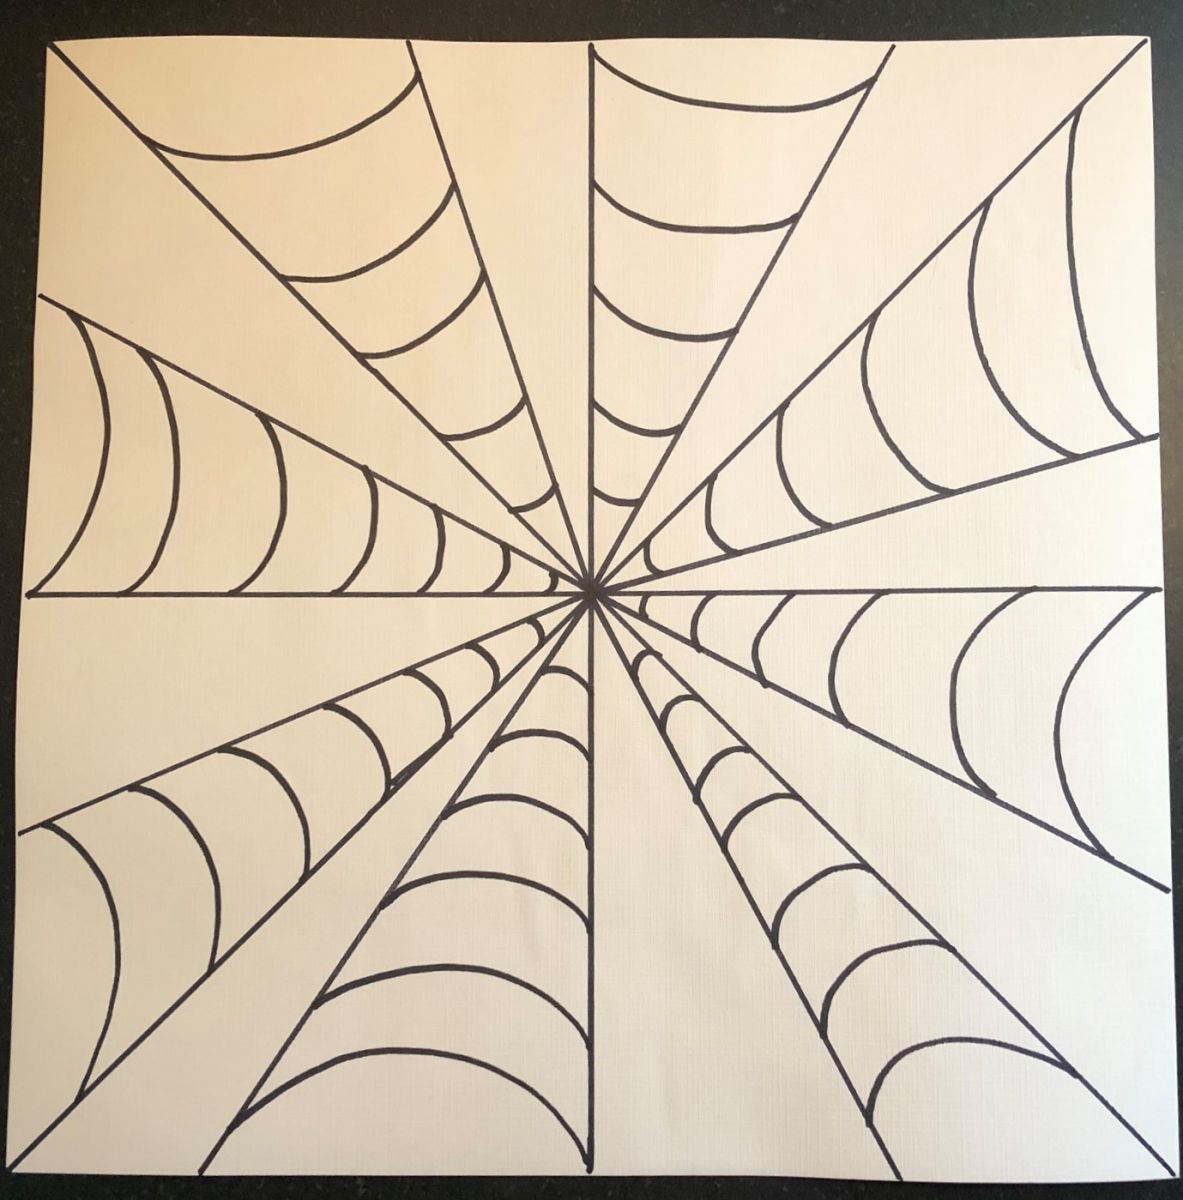
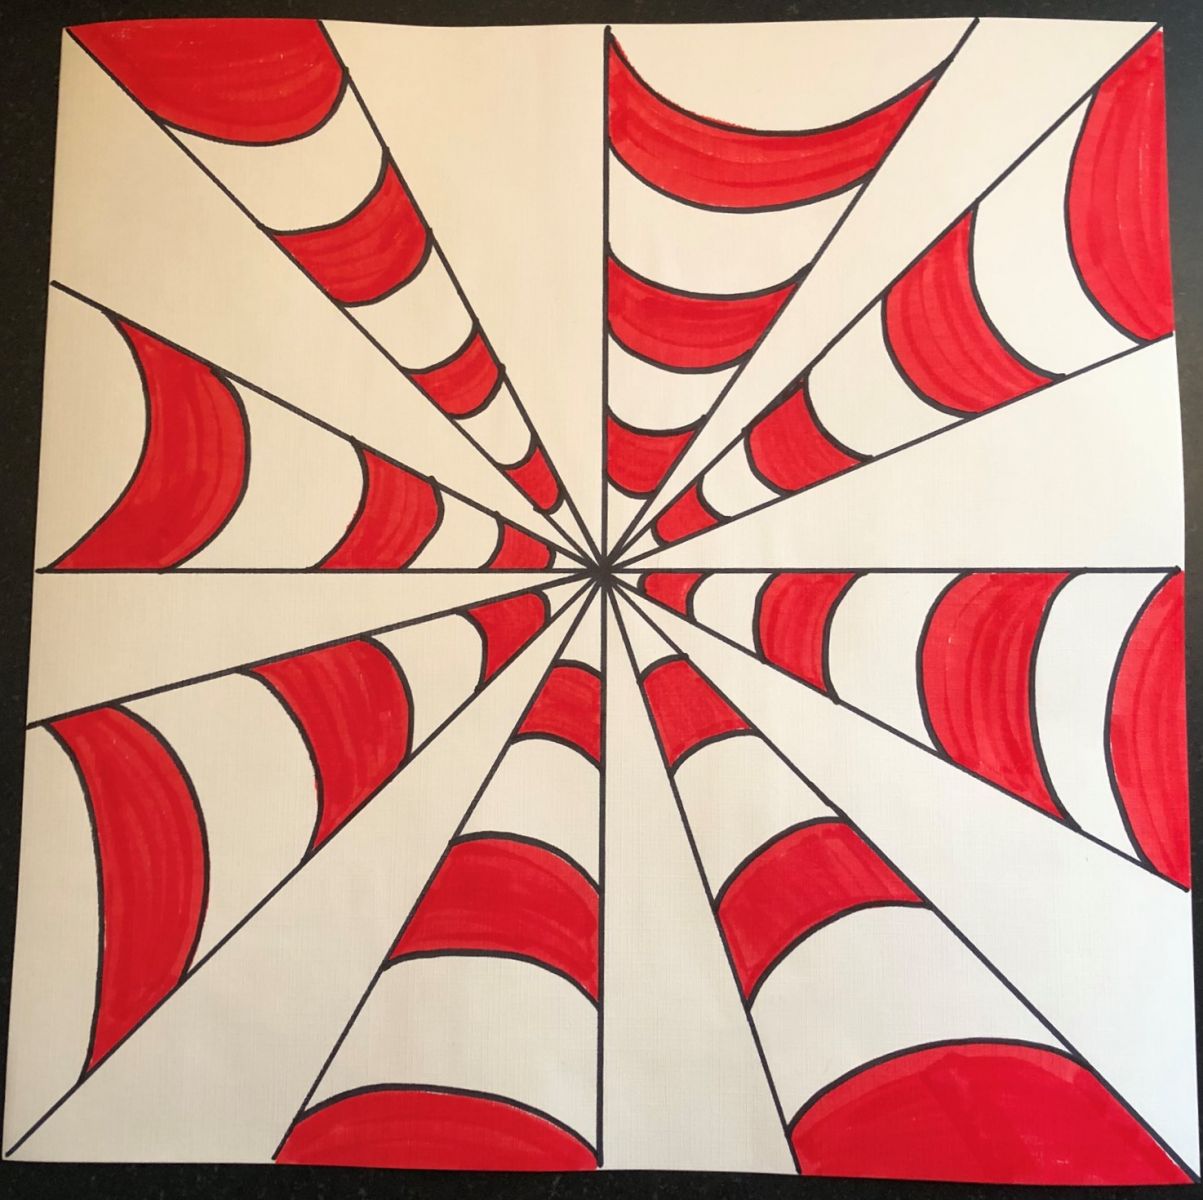
Did the student draw convergent lines? Choose complementary colors schemes? Use curved lines to create a 3D look? Demonstrate creating value using colored pencils? Provide a focal point?
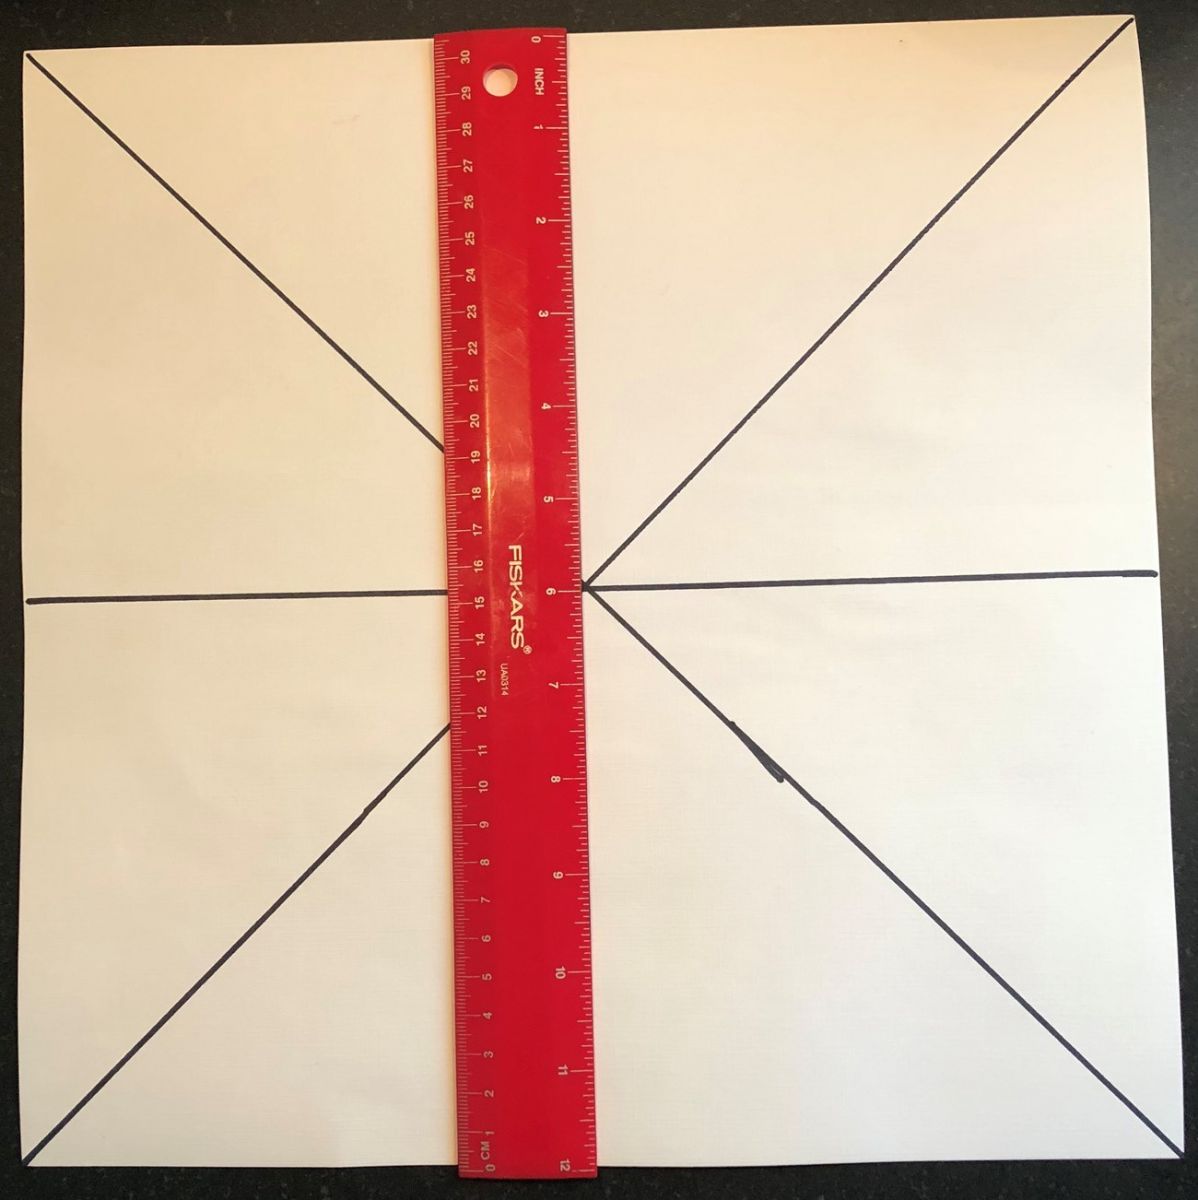
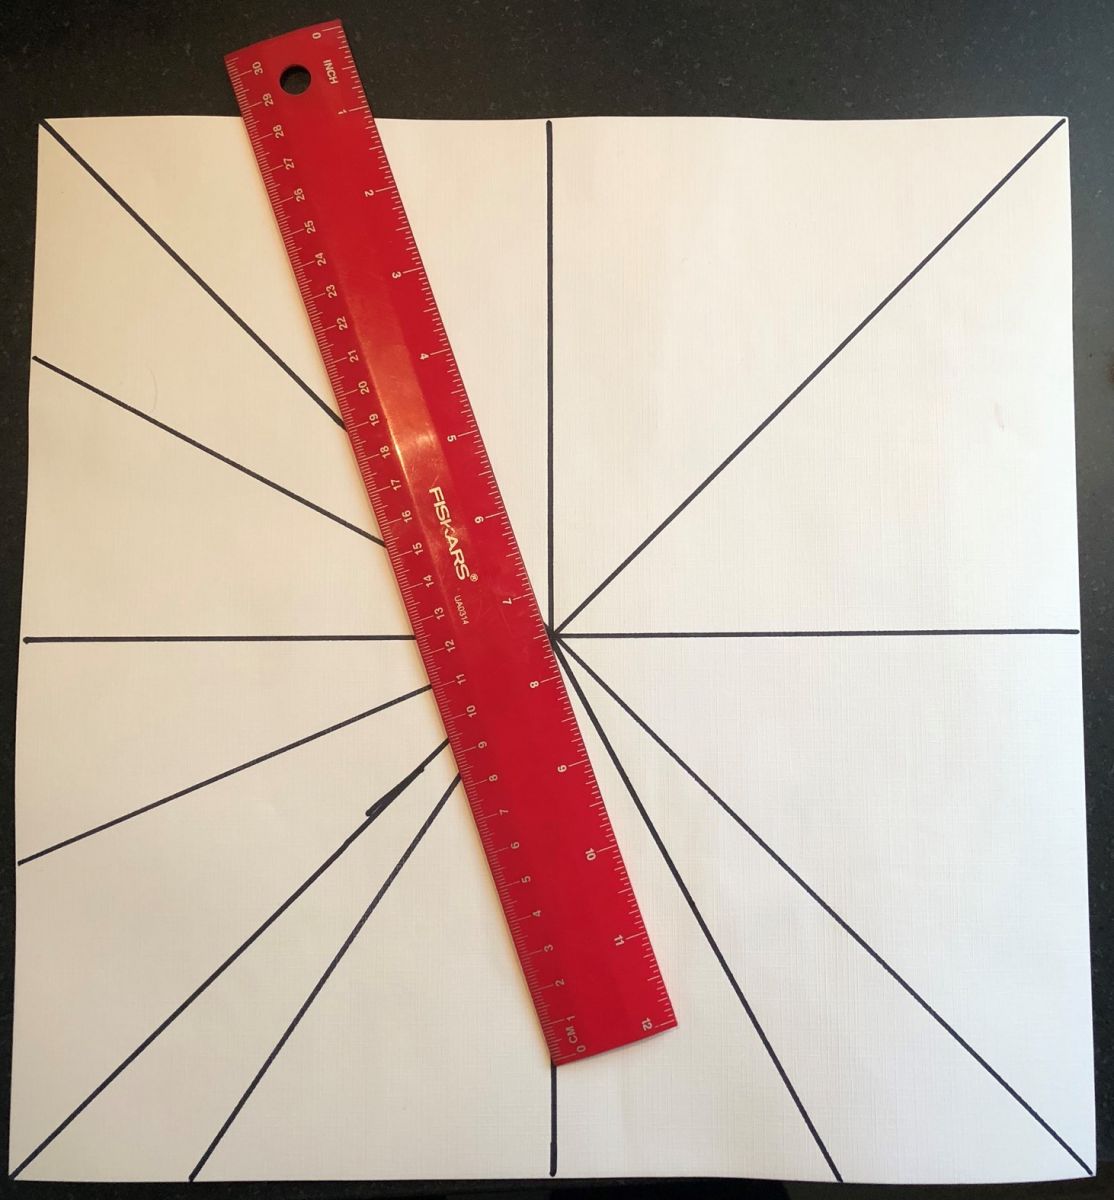
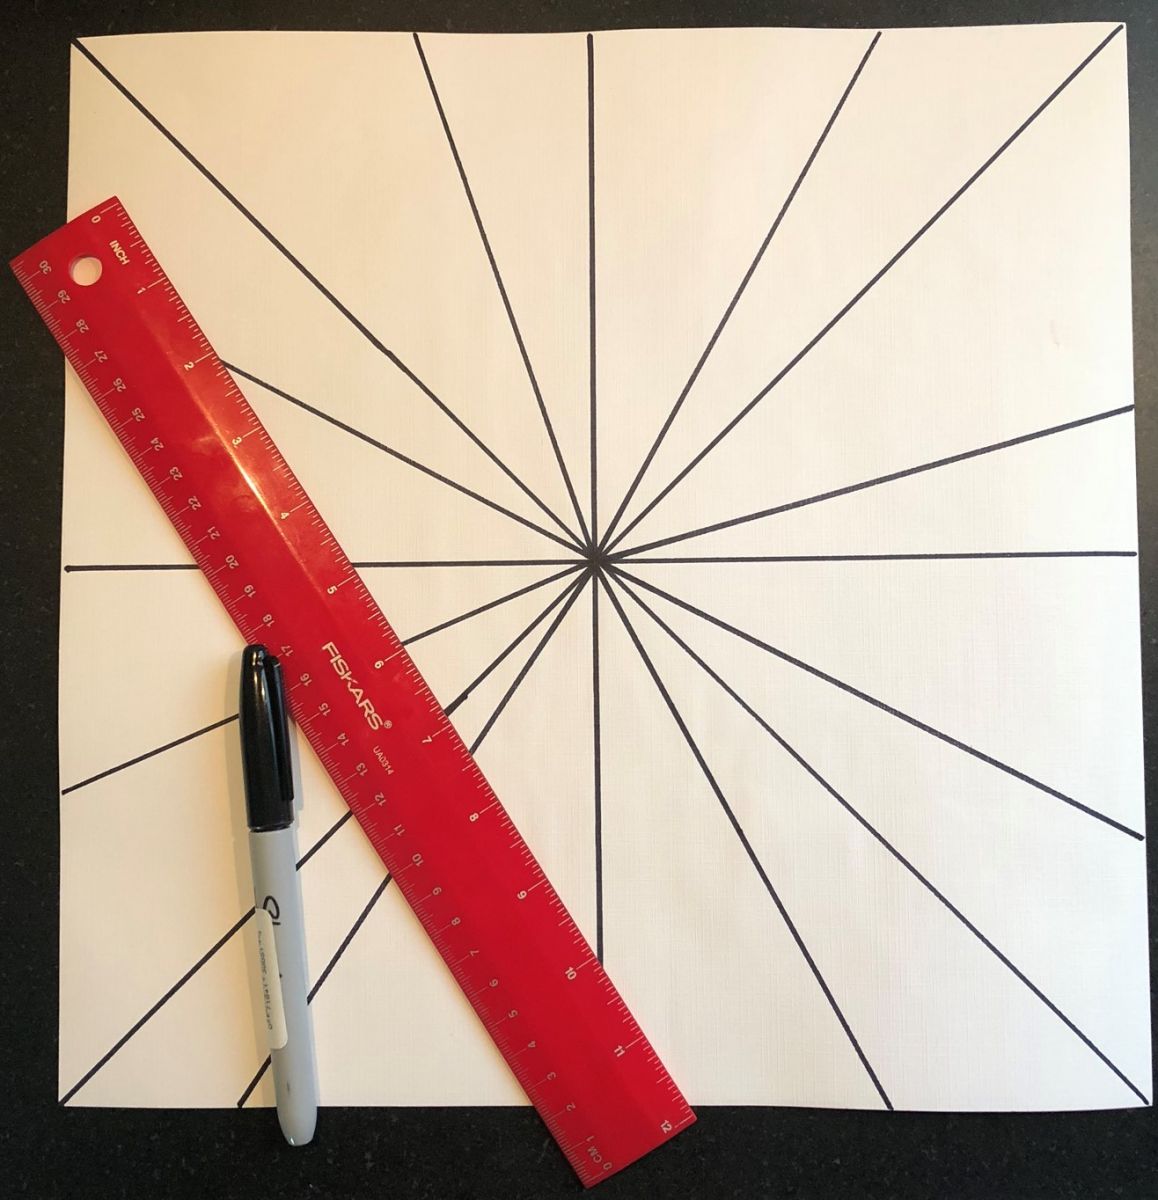
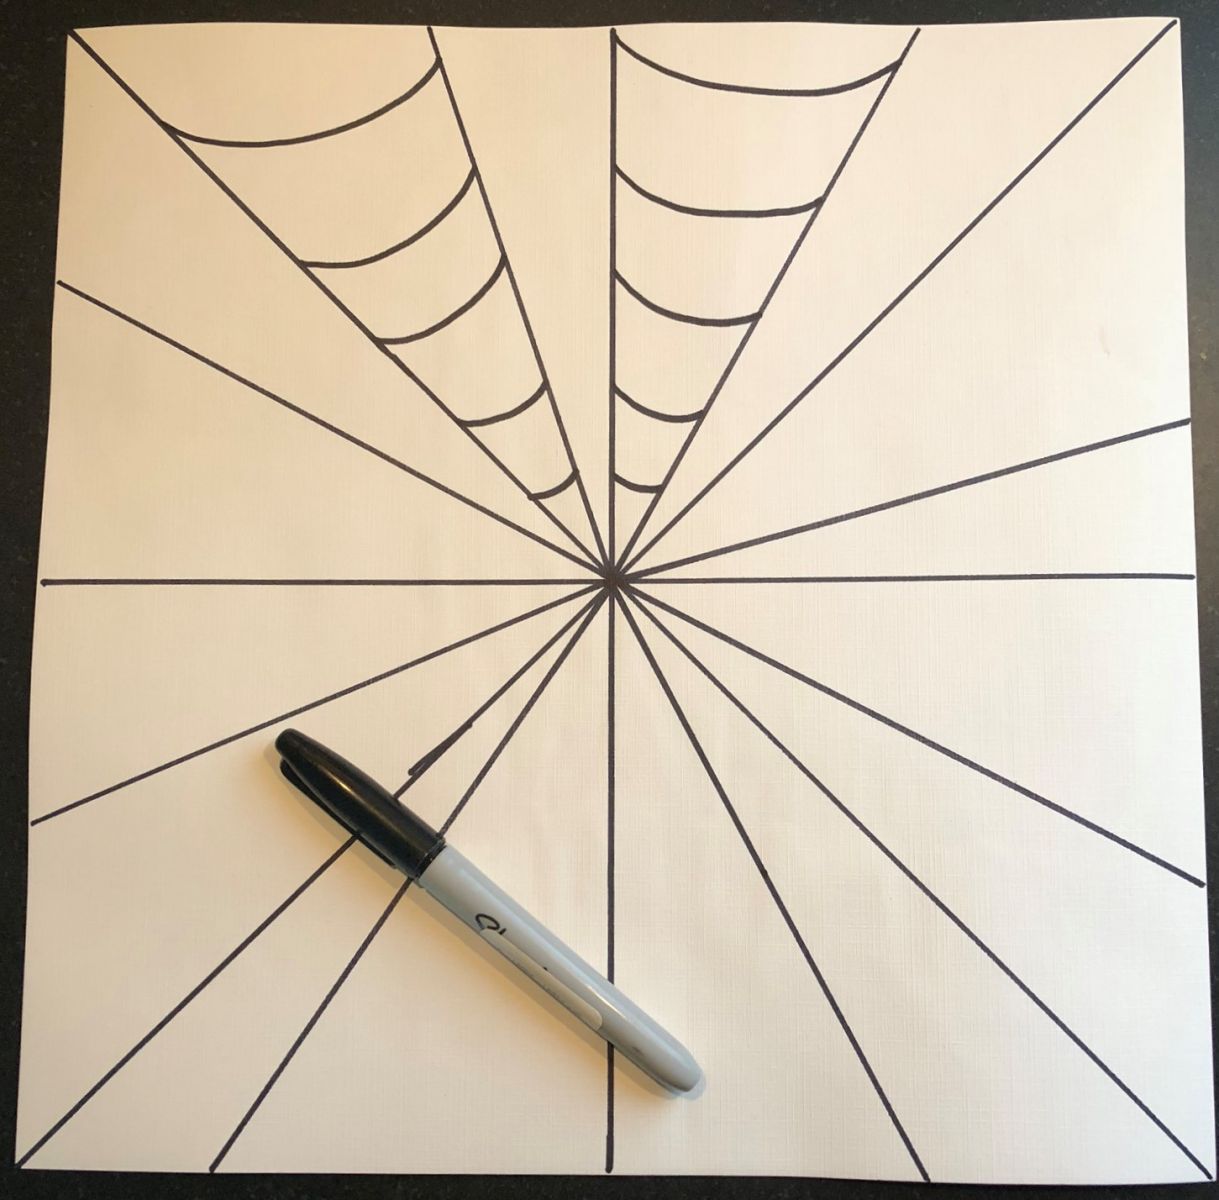
Demonstrate for your students and then have them follow you steps 1 through 6.
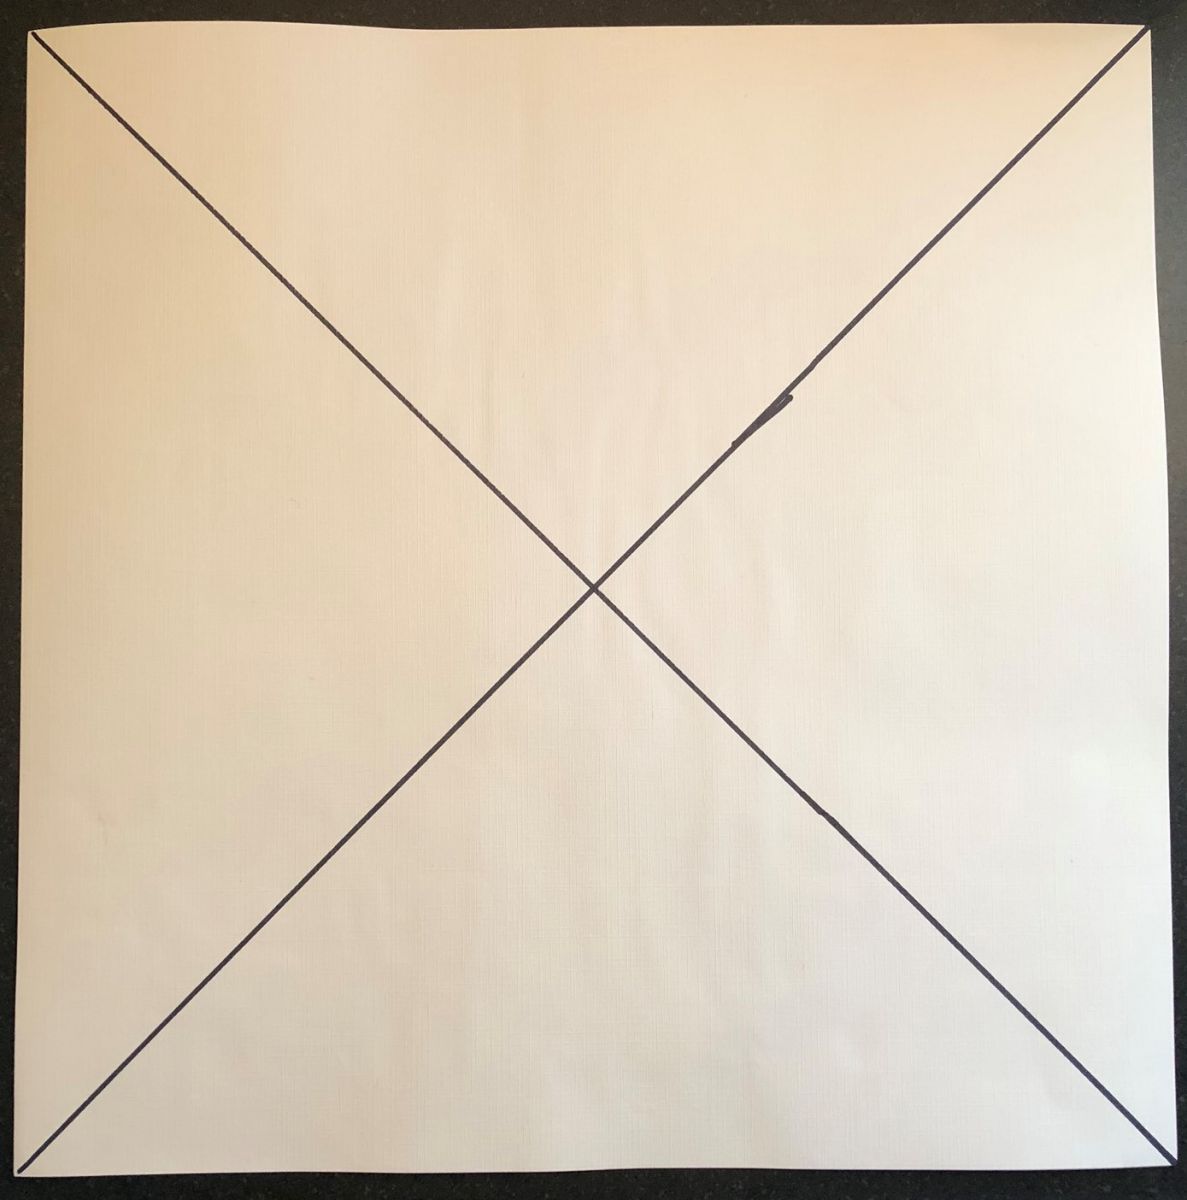

Draw another diagonal line in each triangle that starts at the paper’s edge and ends in the center intersection. These sections maybe different sizes, which is fine. Most importantly the students will have an even number of sections to work with.
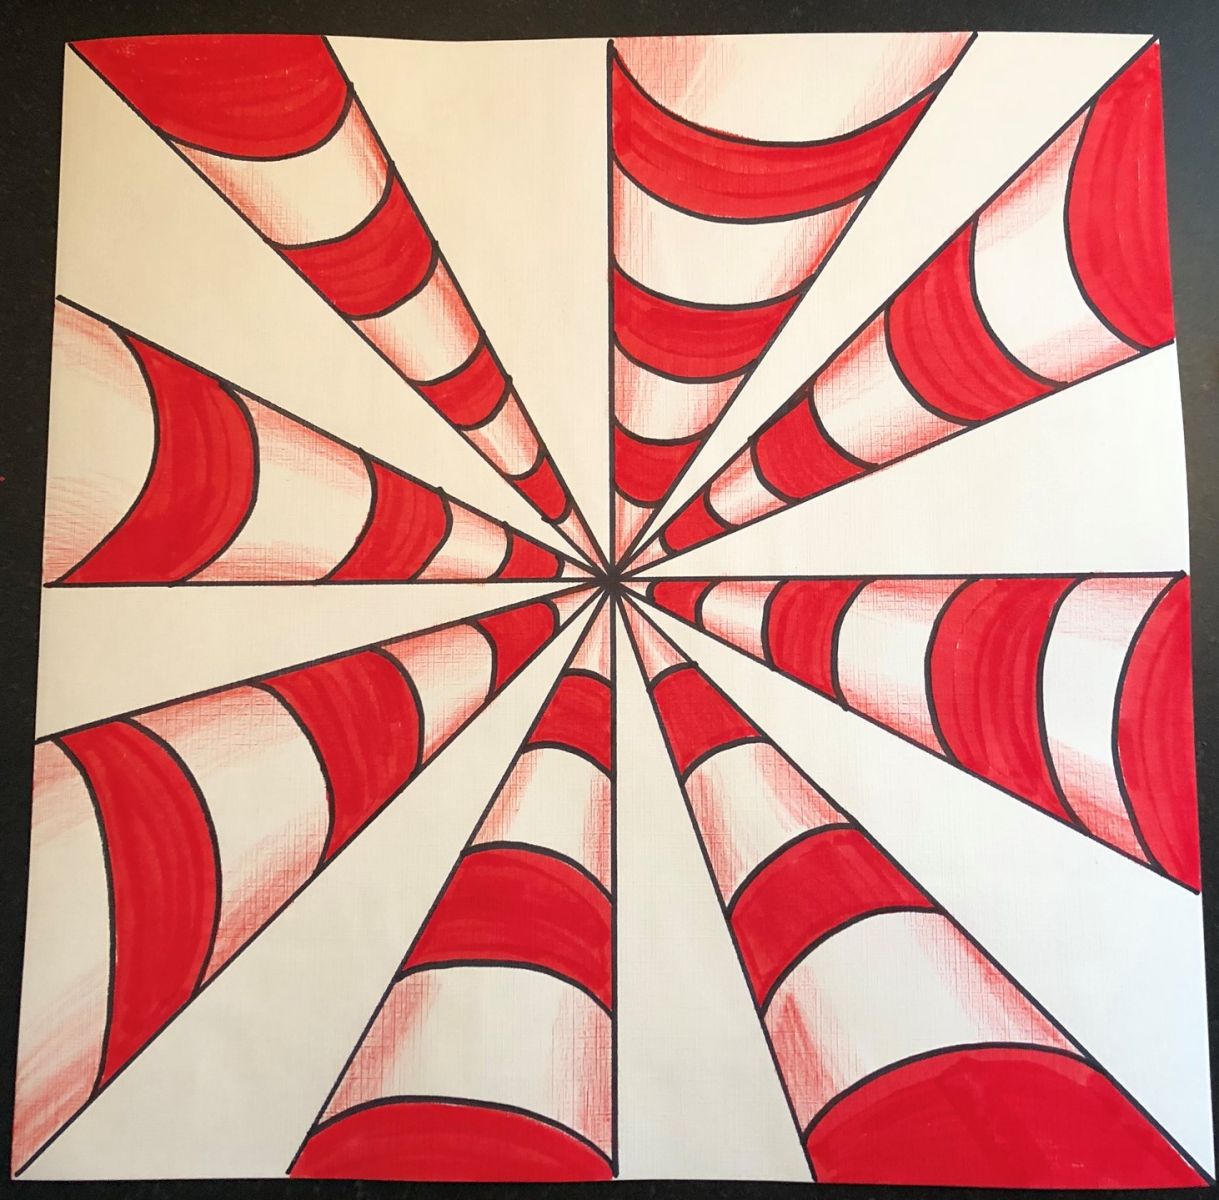
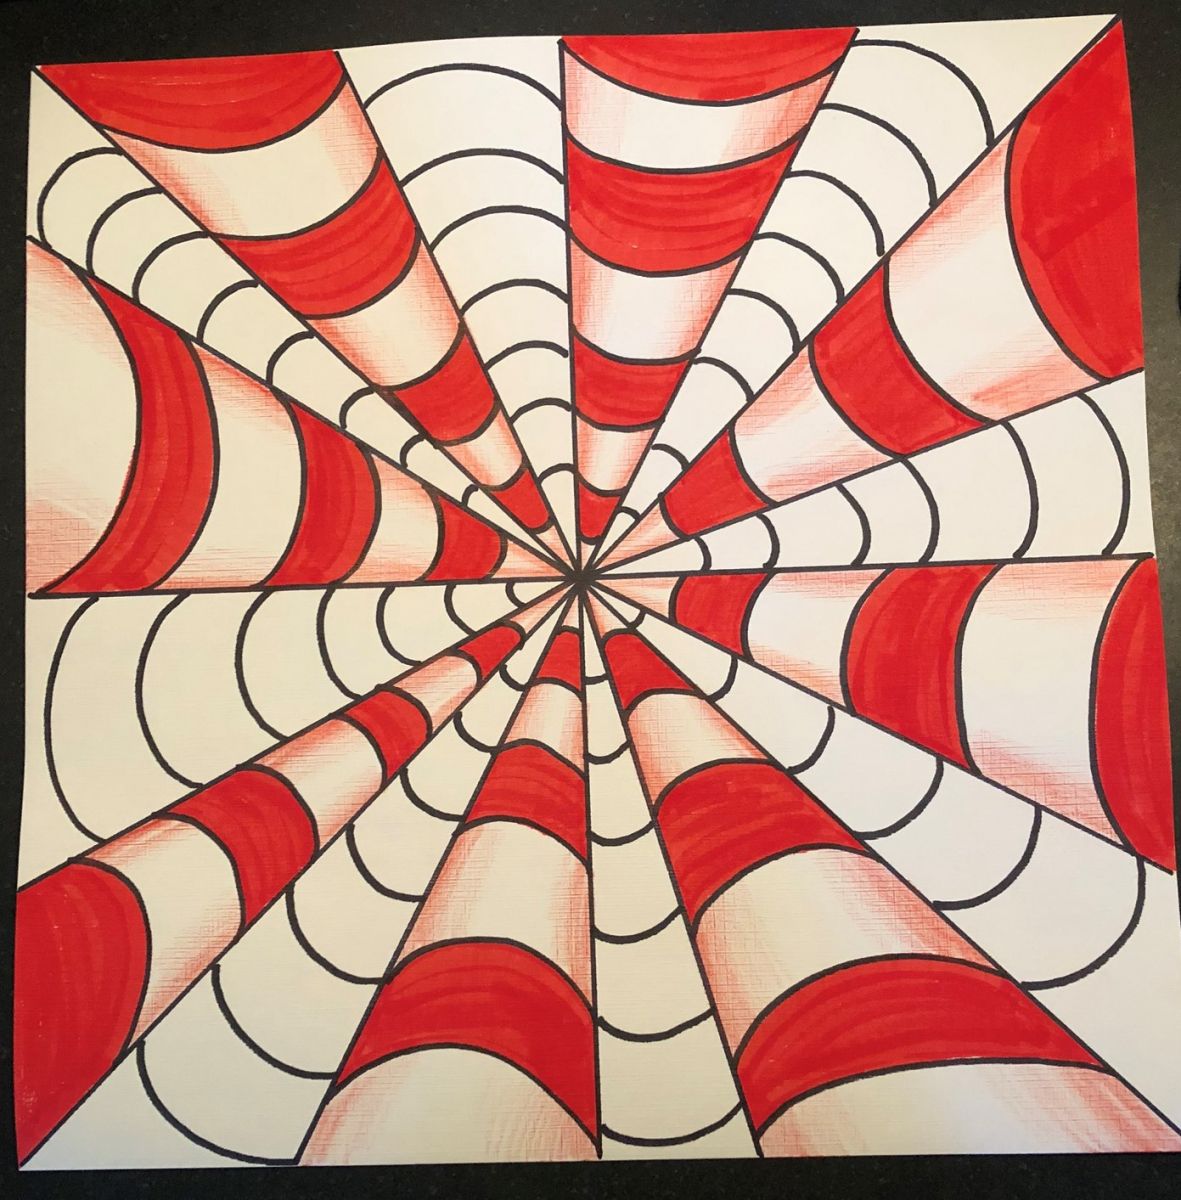
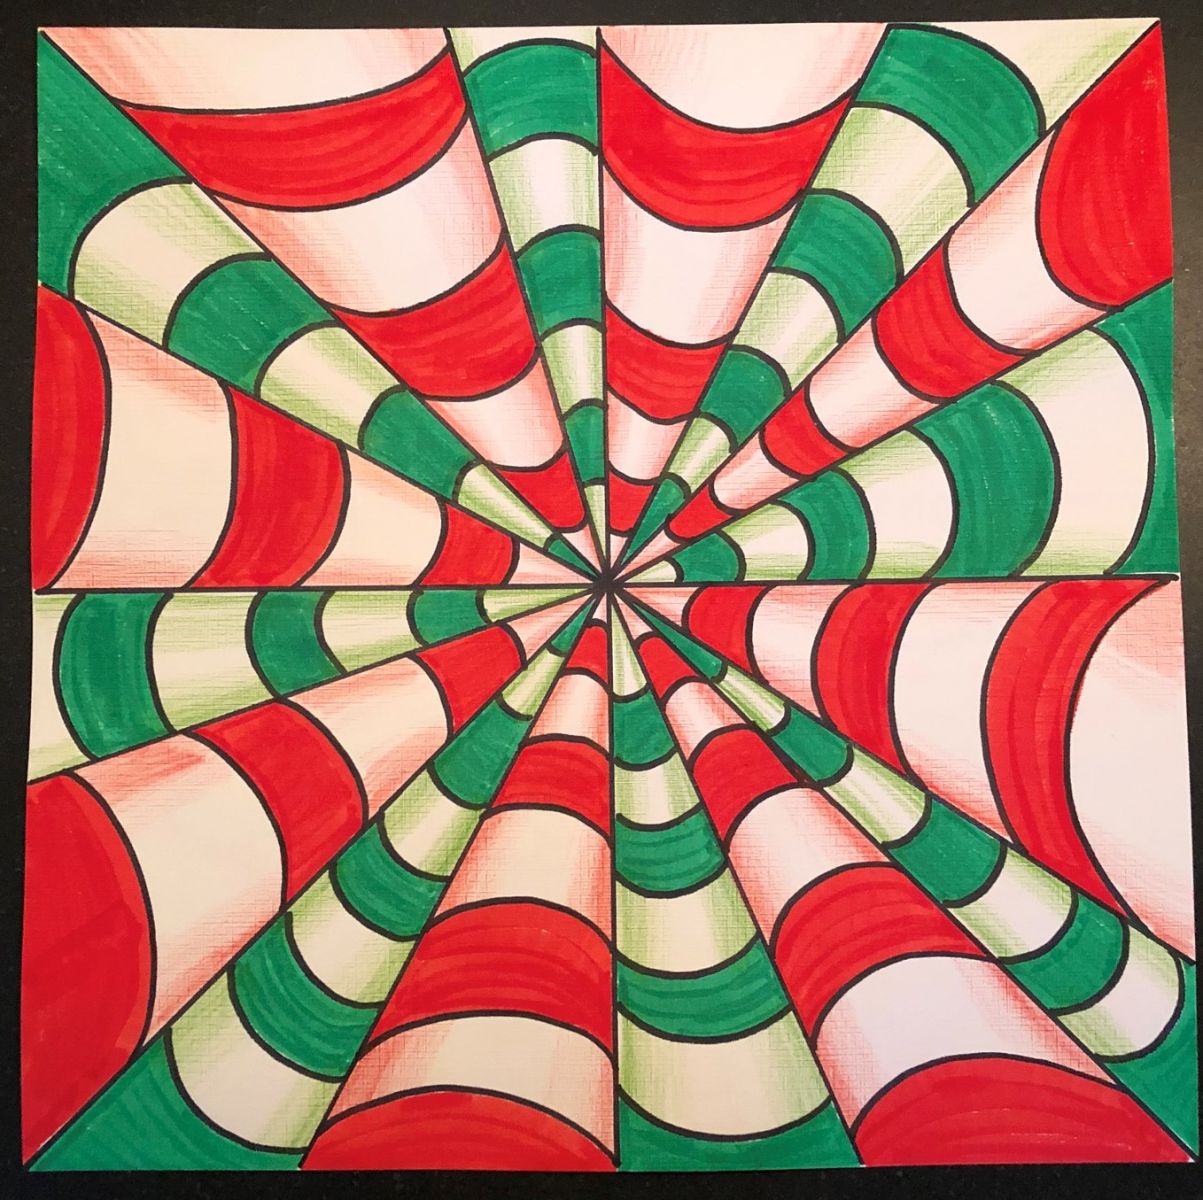
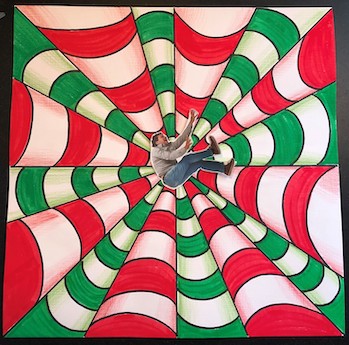
Examples:
Lesson written by Heather McClure-Coleman, Angie Warren. Converging Lines Op Art Lesson examples provided by Issaquah Valley Elementary art docents: Ki Lan Black, Angie Bogaarts, Andrea Hackney, Jamie Rydberg and Rachel Santoy.
Victor Vasarely bio and artwork.
Bridget Riley Slideshare, Tate, Dream Idea Machine.
21st Century Thinking Skills
Abstract thinking, critical thinking.
WA State Learning Standards
Cr2.2.3 Demonstrate an understanding of the safe and proficient use of materials, tools, and equipment for a variety of artistic processes.
Cr3.1.3 Elaborate visual information by adding details in an artwork to enhance emerging meaning.
Re7.1.3 Speculate about processes an artist uses to create a work of art.
Re8.1.3 Interpret art by analyzing use of media to create subject matter, characteristics of form, and mood.
Arts Integration Opportunities
Math lessons on geometric forms such as spheres, cubes, cylinders, cones, and pyramids.
Please note: These lesson plans are intended for non-profit use only. Use of these plans for commercial purposes should give attribution to the Issaquah Schools Foundation and be accompanied by a nominal donation at www.isfdn.org/donate. Thank you.
Fueling Success for Every Student, Every School