Color: the visible range of reflected light. Color has three properties: hue, value, and intensity. In this lesson, colors which are opposite on the color wheel (complimentary) are used to create contrast.
Shape: a two-dimensional (flat) area enclosed by a line. Shapes can be geometric or organic. They are flat and have length and width.
Space: the area above, below, around, and within (negative space) an object (positive space).
Balance: the visual weight of the elements of a composition. In this lesson, asymmetry (not a mirror image) is used to create interest.
Contrast: using difference between the elements of art in a composition can create emphasis and interest.
Emphasis (Focal Point): The area of a composition which is visually dominant.
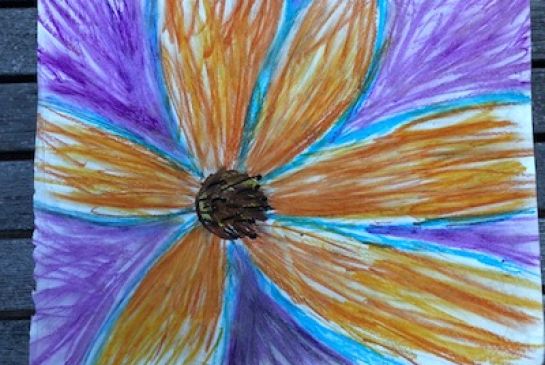
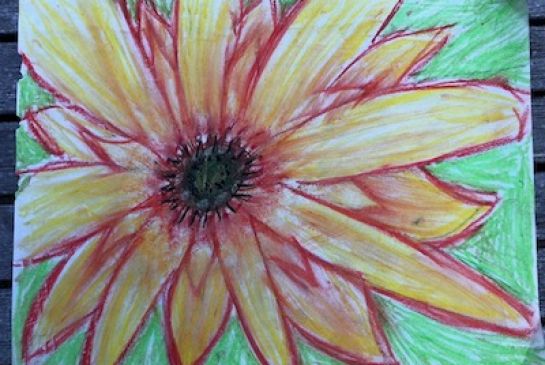
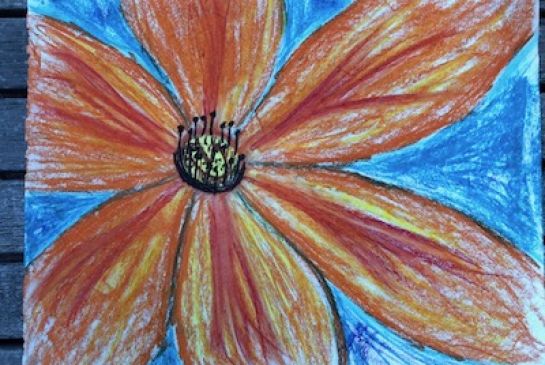
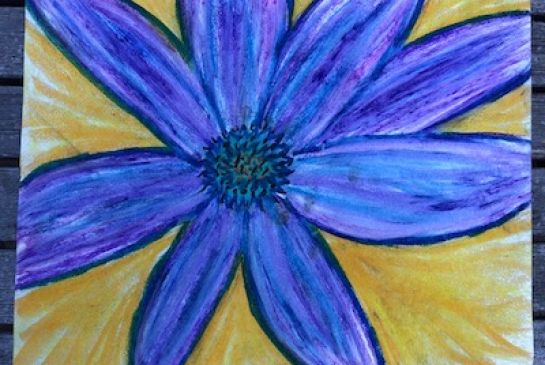
Georgia O’Keeffe was one of the first American artists to practice pure abstraction with work varying between portraits, abstractions and landscapes but she is best known for her iconic flower paintings. In 2014, the Georgia O'Keefe Museum sold a floral painting (Jimson Weed/White Flower No.1, painted in 1932) for $44 million dollars at auction setting the record for artwork sold by a female artist. She used the principles of contrast, value and organic shapes to create interest and bring attention to the natural world.
Gather several samples of O’Keeffe’s flower paintings to show students the wide range of petal shapes and center details they can create in their own artwork.
Display a variety of close-up flower images for inspiration.
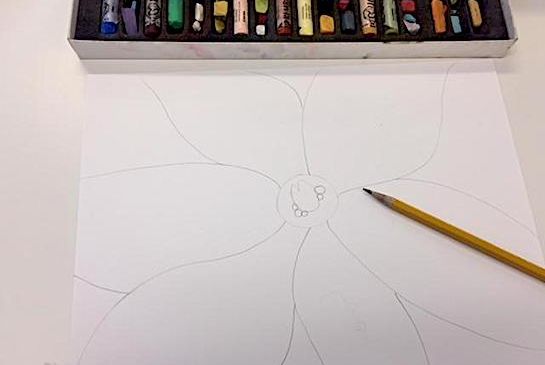
Prior to the lesson, discuss with students the definition of focal point and remind them that they are to utilize the entire surface of their paper when drawing their flower.
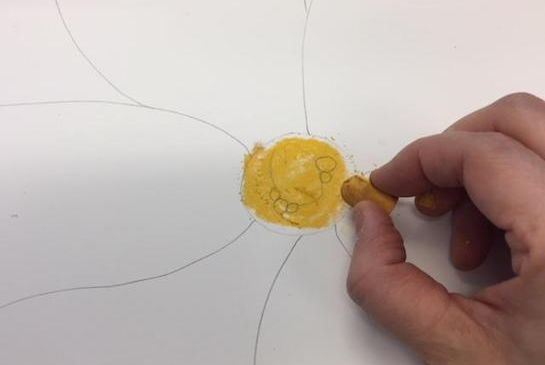
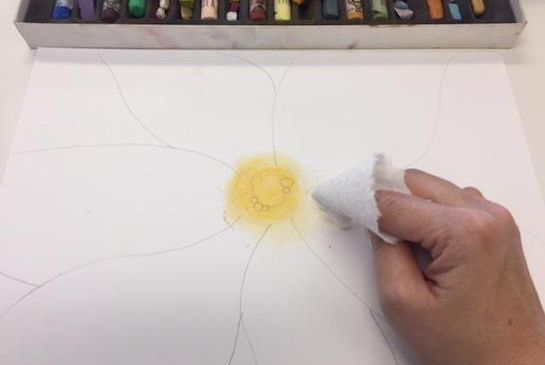
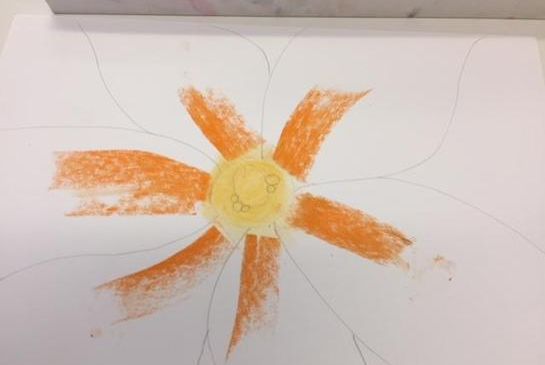
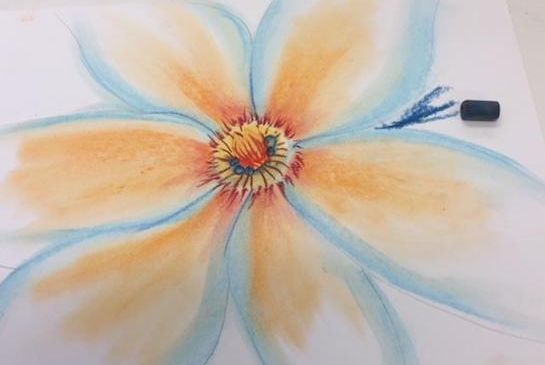
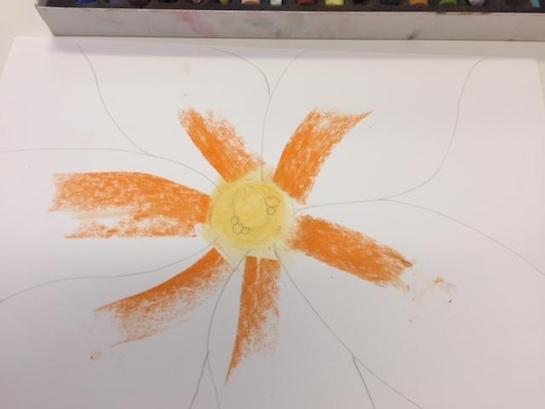
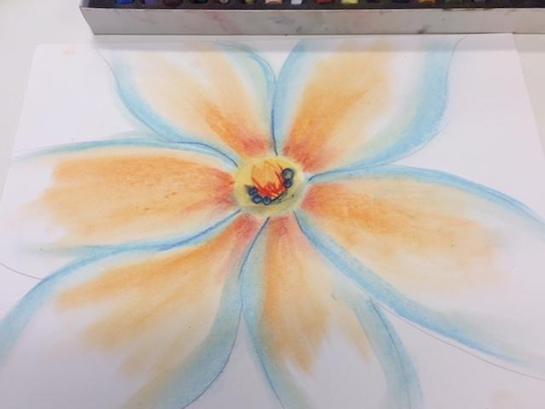
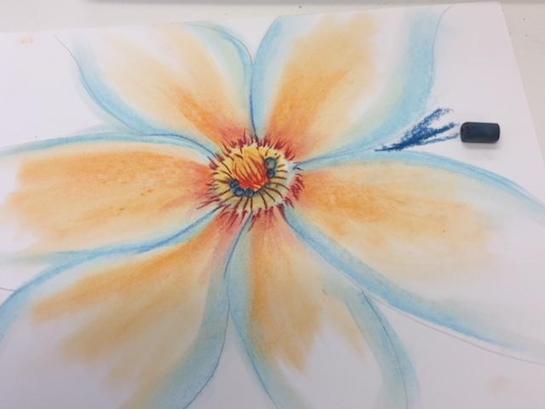
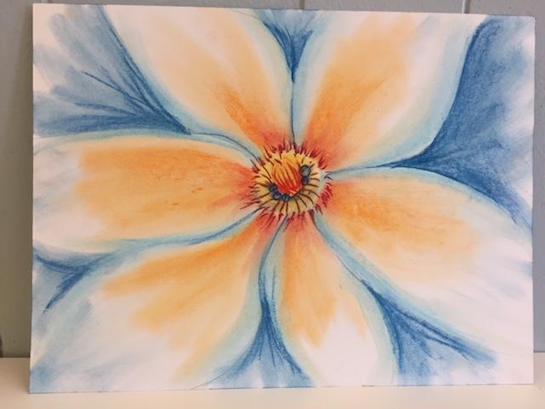
As students begin to color with their pastels, point out that by adding different value of color in specific areas of the petals, it makes the petals look 3-dimensional and creates form. (Value can be created by smudging out across the petal with a warm finger or adding white to the color.)
Warm colors are used for the positive space (the flowers).
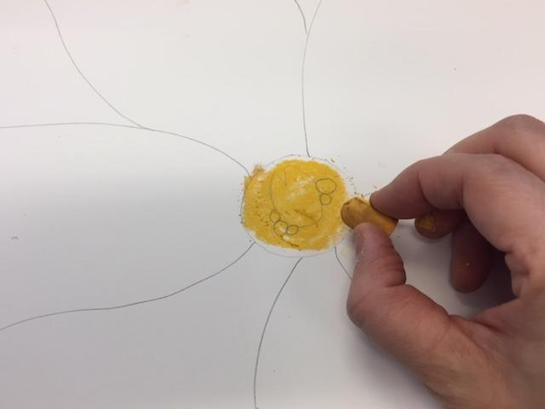
As they begin start to work on the details in the middle area of the focal point, discuss with students that the more variety of lines, colors, patterns, and designs, it will make the drawing more interesting and bring attention to that area.
Students will:
Observe O’Keeffe flower paintings, looking for evidence of the elements and principles listed above.
Use these elements and principles of art to create their own composition similar to O’Keeffe’s.
Use oil pastels to create contrast of color and texture.
Show the O’Keeffe flower paintings, looking for how she used shape, color, space (the elements) and emphasis, contrast and balance (the principles). Hand out the supplies.


www.okeeffemuseum.org; How to Teach Art to Children, Evan-Moor, 2001; www.georgiaokeeffe.net.
Lesson written by Cameron C. Kim.
21st Century Thinking Skills
Thinking Flexibly, persisting, creating, innovating, taking responsible risks, observing, making connections, visualizing, comparing and contrasting, problem solving, decision making, evaluating.
WA State Learning Standards
(VA:Cr2.1.3) Organize and develop artistic ideas and work. Create personally satisfying artwork, using a variety of artistic processes and materials.
(VA:Cr.2.2.3) a. Demonstrate an understanding of the safe and proficient use of materials, tools and equipment for a variety of artistic processes.
Arts Integration Opportunities
Science: study flowers, after drawing the flower identify the parts.
Please note: These lesson plans are intended for non-profit use only. Use of these plans for commercial purposes should give attribution to the Issaquah Schools Foundation and be accompanied by a nominal donation at www.isfdn.org/donate. Thank you.
Fueling Success for Every Student, Every School