Advanced Preparation
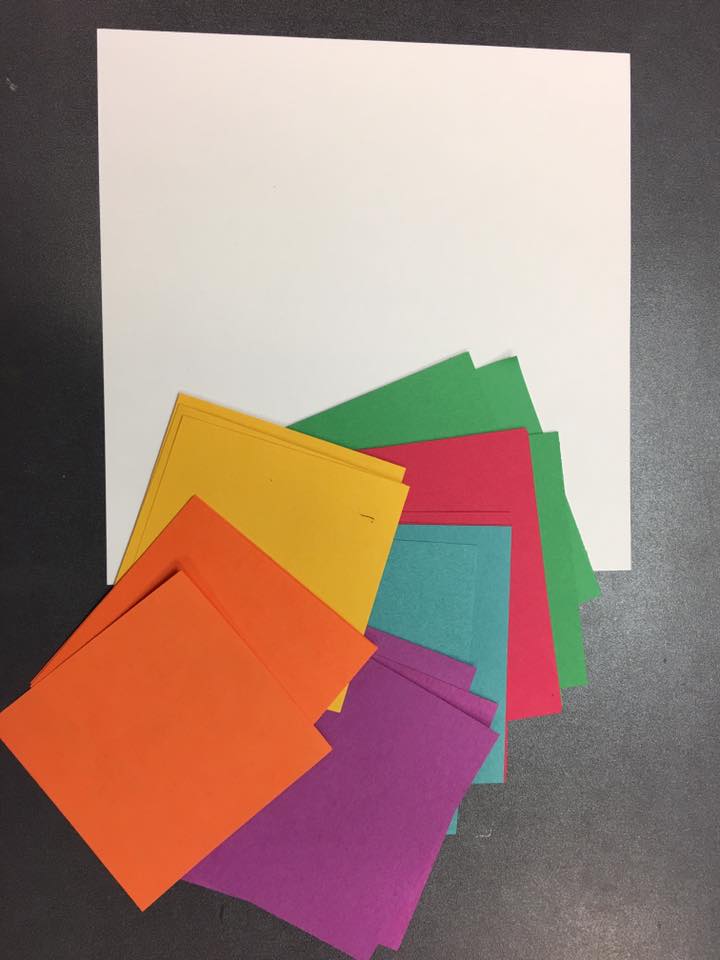
- Precut paper squares to 5 x 5”
- Precut background paper precut to 9 x 9”
- Lay out one tray for each student with materials and supplies.
Tips & Tricks
- To shade: instruct students to hold the charcoal like a pencil, using the tip. Make your shading using hatching method. With the blending stump, blend the hatch marks to soften and gradate shading from light to dark. Short strokes. Light pressure.
- Give students experience practicing with the charcoal and blending stumps on scratch paper. Shade each of three spaces using hatching with the charcoal darkest to lightest. Blend with stump as part of the lesson after you have created the shapes background. Compare each attempt to see what worked the best.
Discussion Points
- Introduce the vocabulary words by defining the three dimensions and look for them in both shapes and forms.
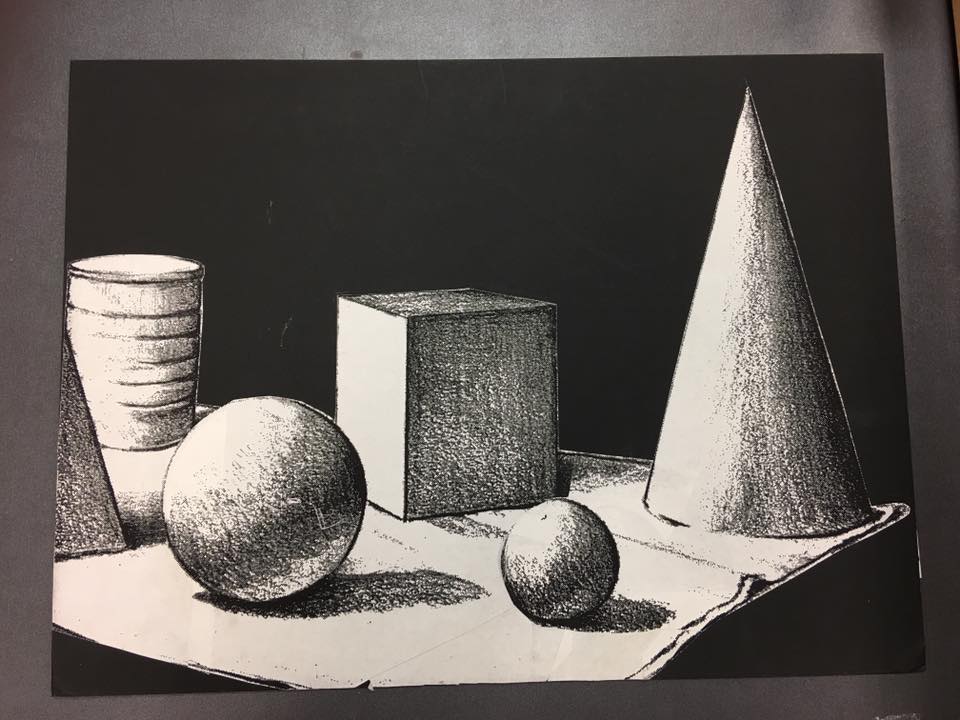
- Demonstrate and show examples of a drawing of a form. Notice what makes it look like it has 3 dimensions.
- Ask where the light source should be to make shadows on the forms (shading, hatch marks, cast shadows, gradation from light to dark).
- Point out that cast shadows are always drawn as if they lie on the surface, not standing upright behind the form and attach to the base of the form. A cast shadow can be much darker.
- As you instruct, introduce the charcoals and stumps as tools that artists use to shade.
Reflection Point (Assessment of Learning Objectives)
- Students will create implied form using charcoal blending techniques.
- They will differentiate between 2D shape and 3D form.
- They will use good craftsmanship.
Instructions for Lesson
PART I: Creating Shapes for the background: 10 – 15 mins
Have students write their name on the lower corner of the white paper.

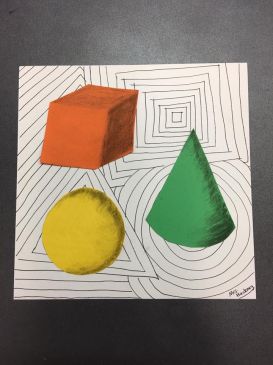
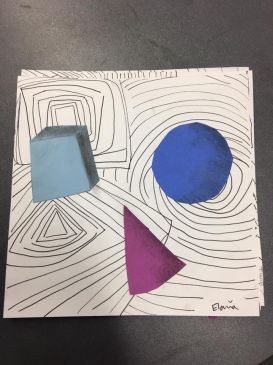
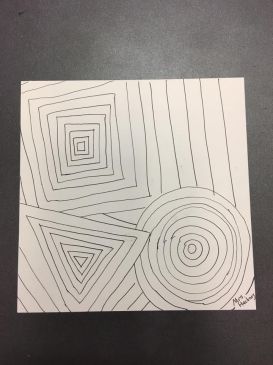
- Demonstrate each step first using the overhead projector. On the white background paper draw 3 shapes: square, circle, triangle in three areas of the paper using the fine black pen. They may want to start in pencil and trace over, however this doubles the time needed and shouldn’t be necessary if students are going slow. A ruler improves the craftsmanship and can help control the distance between lines, except of course, when drawing the circle.
- Choose one of the shapes and begin outlining around it with the pen; copying the original shape. Six lines around each shape to begin with. Instruct students on a “pinky width” between each outline.
- Repeat with the other two shapes. If lines cross, decide which one will ‘overlap’ (eg: the way the triangle overlaps the circle in the above image).
- Choose one shape to focus on and continue to outline until the outline begins to run off the page. Not all sides need to go the edge. The next shape can take up that space, like the way the triangle covers the lower left page of the above image.
- Bring all outlines to the edge of the page.
PART II: Creating Forms for the Foreground: 30 mins
- Demonstrate for the students first:
- Hold the charcoal upright so the tip makes the mark
- Make shading using hatch marks closer together for dark and further apart for lighter
- Use short, soft strokes
- Instruct students to:
- hold the charcoal upright as they practice making marks on their scrap paper.
- Make shading using hatching method with short soft strokes.
- On scratch paper, demonstrate drawing a rectangle and dividing it into three parts with a pencil and then filling it with hatch marks to create three different levels of shading.
- Have the students draw a rectangle using a pencil. Divide into thirds for light, medium, darkest value.
- Use the charcoal with instruction on using very light touch. “Hold it like a feather.” “Make marks using short strokes.” “More strokes, closer together equal darker value.” At one end of the rectangle start by making the darkest value in one square. In the middle square create a medium value. Next, in the end square create an even lighter value. Good craftsmanship will result in a seamless gradation from light to dark.
- Demonstrate using the blending stump to soften the gradation even more.
- Give students the stumps, instructing them to blend the darkest box into the medium value box, then blend the medium value box into the lightest value box. Keep this time short—5- 7 mins
Example of scratch paper: 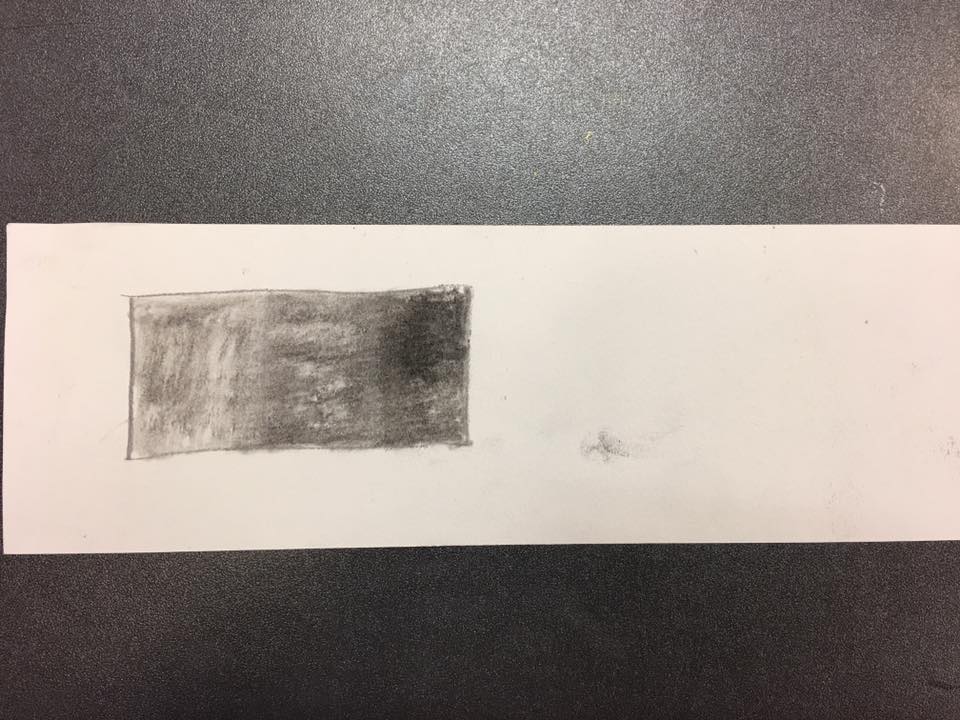
Using the three smaller colored papers: Demonstrate first:
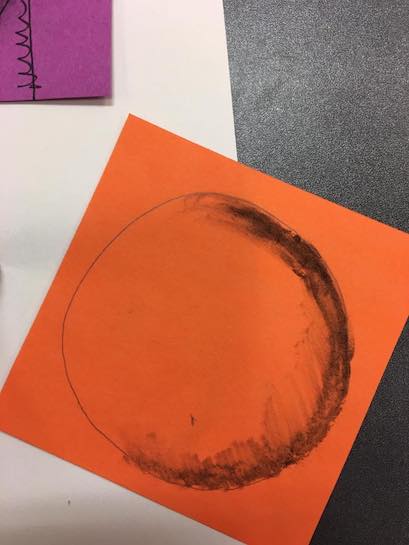
- On one of the colored 5 x 5” papers draw a circle with a pencil. A circle template such as a yogurt lid may speed up this shape. Students tend to labor too long when trying to draw a perfect circle.
- Shade the sphere with the charcoal. Have students help you determine the placement of the shadow with respect to the light source. Start by shading a dark outline on one side of the circle and create a grayscale to the center. Blend with paper stump.
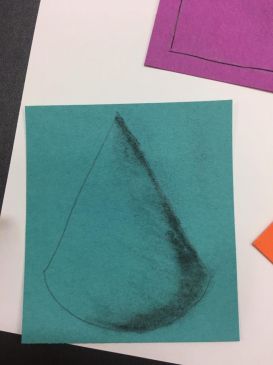
- On a different colored 5 x 5” paper demonstrate drawing a triangle and add a rounded base to create a cone form. Demonstrate shading one side of the triangle to create a cone. Use the stump to smudge the lines created by the charcoal and pull color over towards the center. If you run your strokes in a curved way to match the base, it will create contour lines that suggest a 3-d form. Point this out to students.
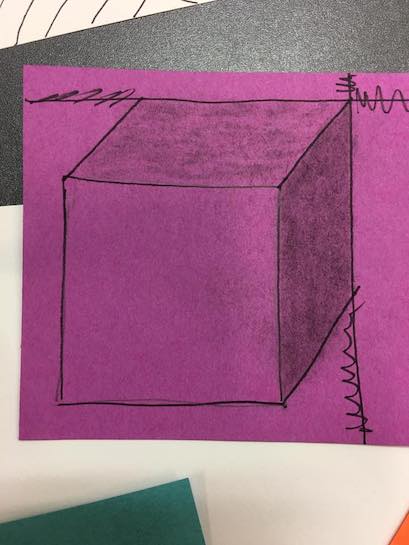
- On a different colored 5 x 5” paper draw a square*. Demonstrate parallel lines that turn a square into a cube. Even if one edge angles back in space, its opposite edge remains parallel. Think of how a road’s edges are diagonal as it travels back in space. (illusion of depth)
- Demonstrate shading to show the top of the cube is a medium value.
- Demonstrate shading to show that the side farthest away from the light source is the darkest value.
- The front of the cube nearest the light source is the lightest value—no shading.
- Cut out each shaded form and glue them onto the “2D Shapes Background”.
*Variation – create a cylinder which is an easier shape to draw and shade.
Examples:

References and Attributions
Lesson created by Andrea Hackney, Art Docent Coordinator, Issaquah Valley Elementary; inspired by Mrs. Taylor’s Artopolis blog.
Notes for Educators
21st Century Thinking Skills
Thinking flexibly, taking responsible risks, observing, making connections, visualizing, comparing/contrasting, finding evidence, determining point of view, evaluating.
WA State Learning Standards
(VA:Cr2.1.4) a. Explore and invent art-making techniques and approaches. This happens when learning how to use shading to suggest form.
(VA:Cr3.1.4) a. Revise artwork in progress on the basis of insights gained through peer discussion. This happens when students compare shading techniques and correct mistakes.
(VA:Re9.1.4) a. Apply one set of criteria to evaluate more than one work of art. This happens when students are all striving to show depth through the technique of shading, using a fixed light source.
Arts Integration Opportunities
Math: geometric shapes and their counterparts in form.
Science: how light travels and affects solid surfaces.
Handwriting dexterity: Fine motor control is required for shading subtleties.
Please note: These lesson plans are intended for non-profit use only. Use of these plans for commercial purposes should give attribution to the Issaquah Schools Foundation and be accompanied by a nominal donation at www.isfdn.org/donate. Thank you.
Donate Now