Context
Historical use of glass in art is vast, global and fun to look at. Artists and famous glass work pictures are easy to find, print out and share during the lesson. We have all seen it but maybe don’t realize what it is. Everyday examples: stained glass in windows, blown drinking glasses, kitchen dishes and art glass we see at museums or shops.
Learn more about the use of glass as an art medium HERE.
Advanced Preparation (Glass Cutting)
- Plan a project meeting with the other docents and classroom volunteers, to choose a project and the glass you want to use. Measure how much glass you need for the number of students.
- Wear safety gear (glasses and gloves) when cutting the base pieces in clear or white!
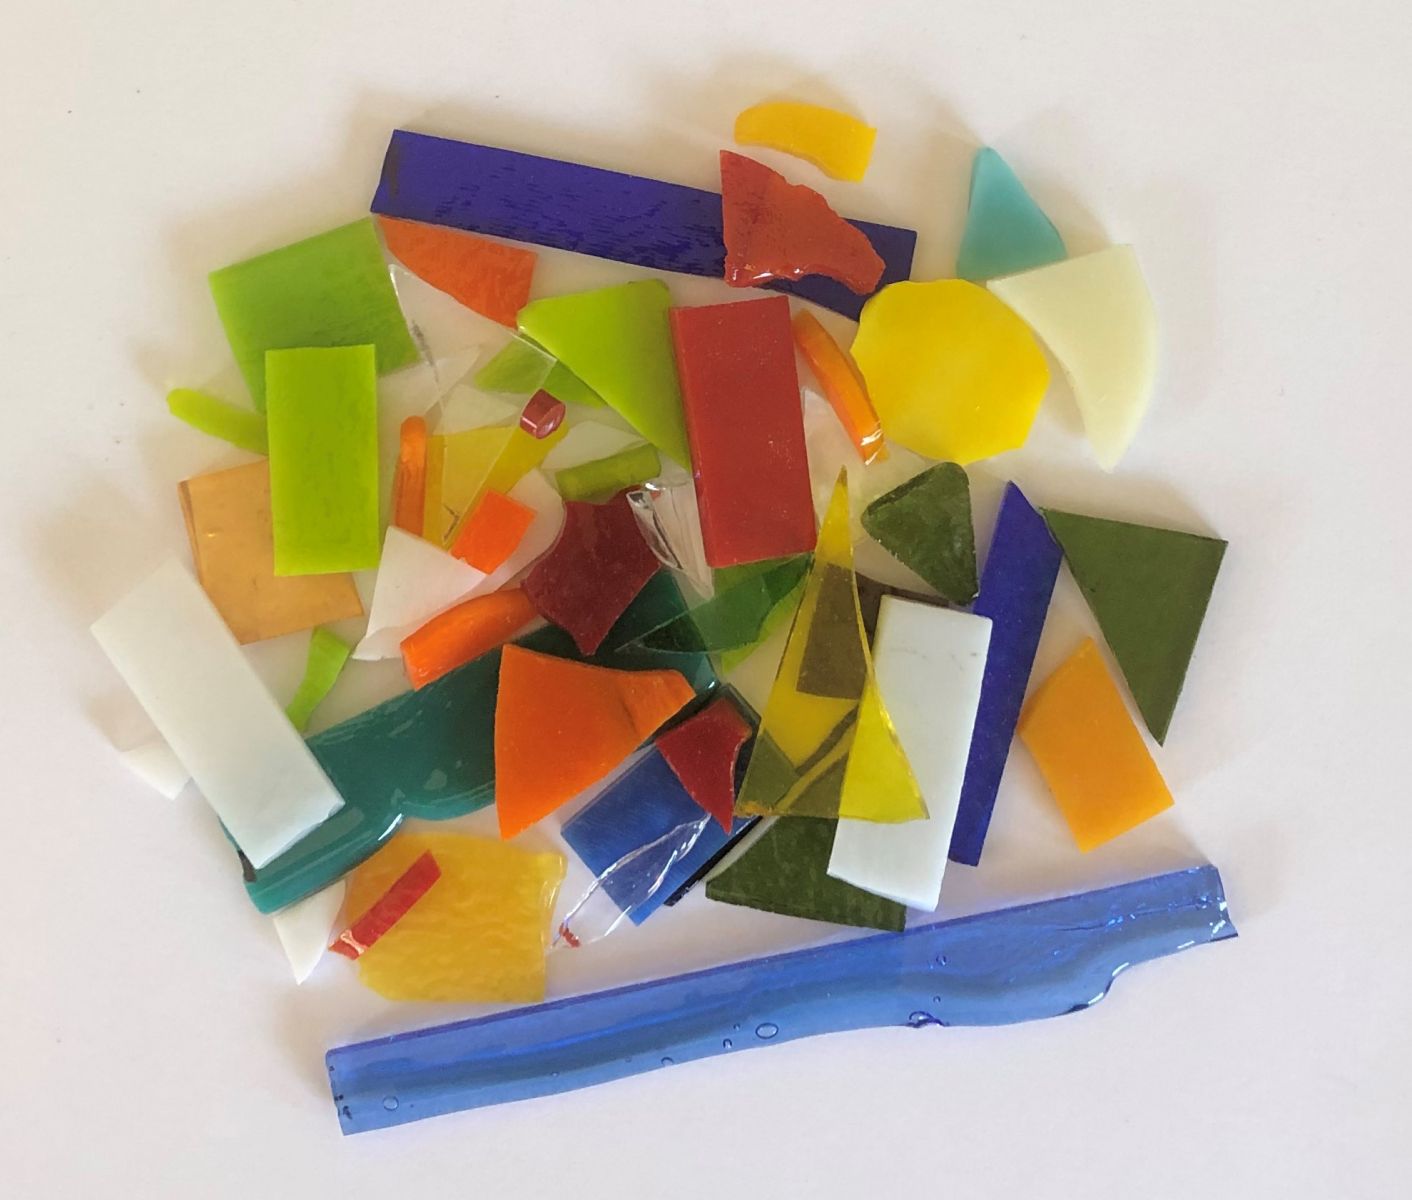
- Precut the colored glass in a variety of smaller sized shapes to fit on the base or use scrap.
- It’s fun to have lots of small random shapes: this uses glass scraps from previous projects. Put in small bins on the tables.
- Wipe all the glass bases down with a soft cloth and rubbing alcohol with clean hands after all the pieces are precut. The cutting oil and the oil from skin can leave a foggy reaction in the fired project that is called “devitrification” and it can’t be removed.
- Don’t forget to precut a few extra bases & pieces for your examples and for accidents.
- When nipping (cutting) rods, for dots, always have a tall container to nip into. The little bits like to fly and can hurt.
- Create wire hangers if necessary, laying onto the glass before fusing.
Tips & Tricks
- Try everything first before the class!
- Build an example and fire it before you take it to the class. Glass can be tricky. It’s good to practice a little first. It’s helpful to have both a completed and an unfired example to show.
- Don’t use transparent under opaque glass because the transparent glass won’t show at all.
- Take a photo of each student’s work on a paper plate with their name on it before it goes into the kiln, for identification later.
- Don’t stack the glass too high; it does best at about 6 millimeters thick. 2 to 3 layers maximum (including the base).
- No overhanging glass pieces. All glass must be stacked on the base.
- Have a safety talk every single time.
- A pencil (instead of fingers) works great to move glass pieces around a bin.
- Get volunteers. For a class of 25 it is nice to have at least 3 adults involved.
- Have a place for the work to dry overnight so that the glue is totally dry before moving them. Large metal cookie sheets work great for transporting many pieces.
- Take a photo of each student’s work on a paper plate with their name on it before it goes into the kiln, for identification later.
Discussion Points
Advanced Preparation (Lesson)
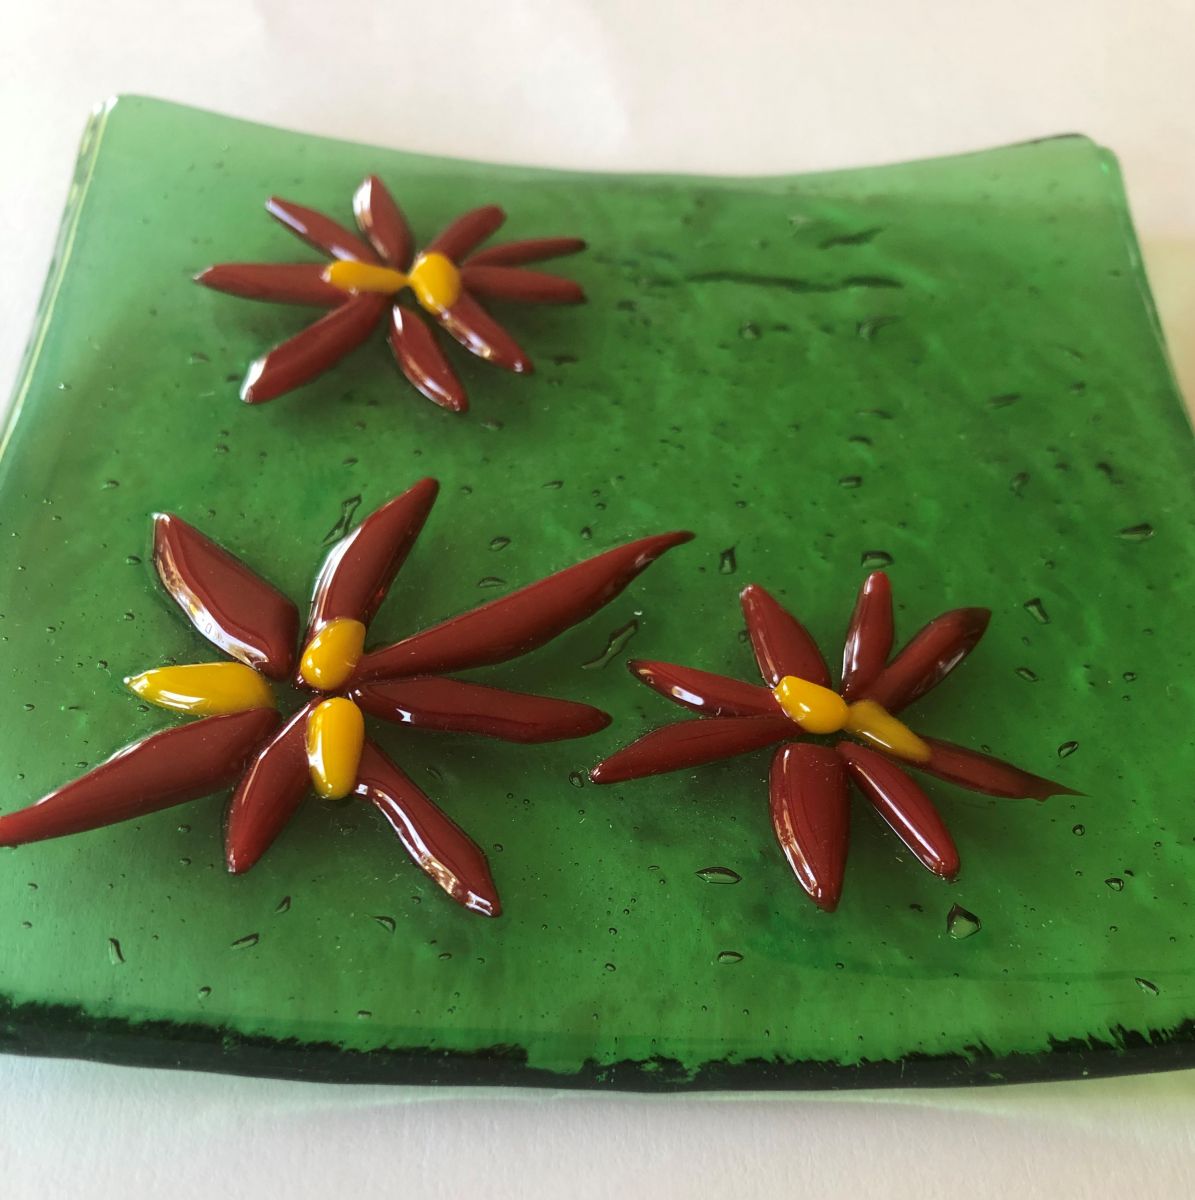
- If possible, make and fire an example to show a finished project during the class.
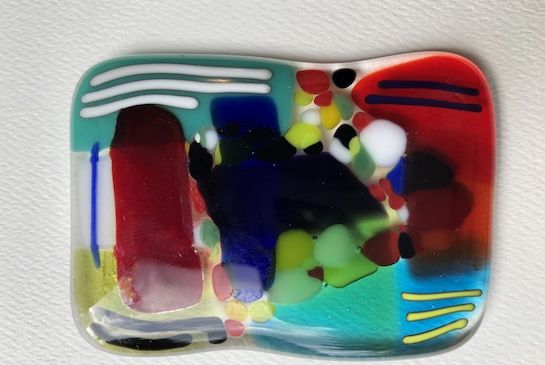
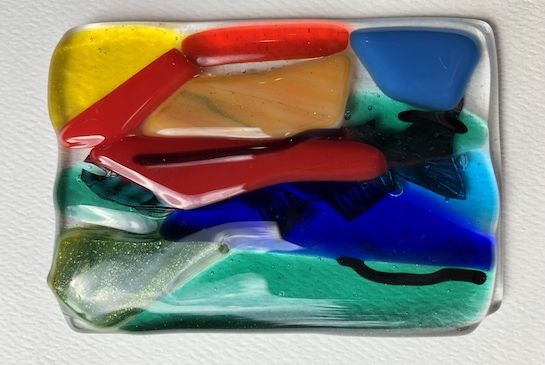
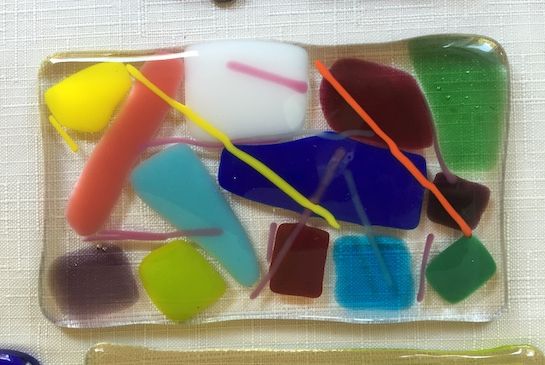
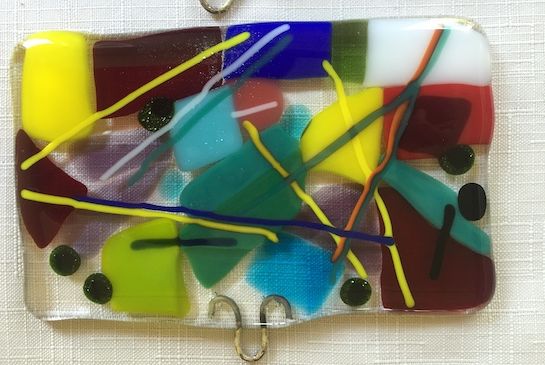
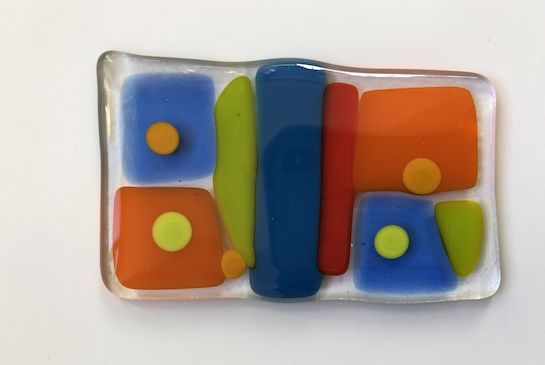
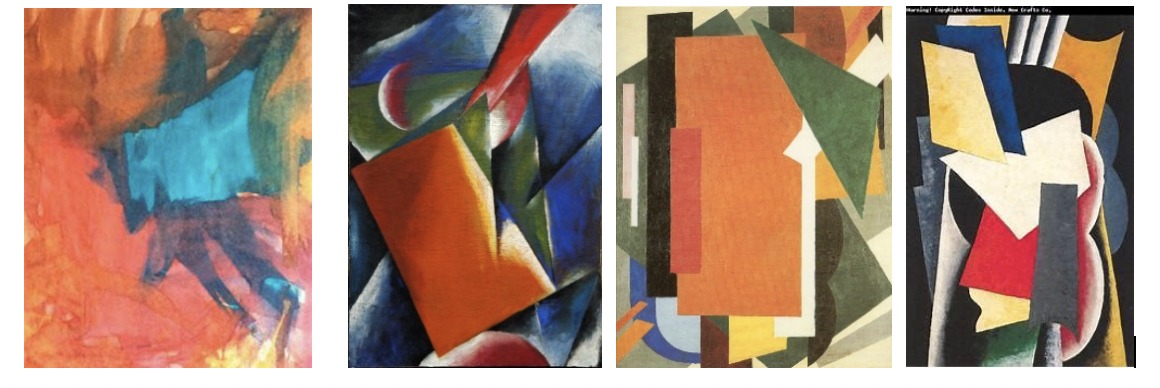
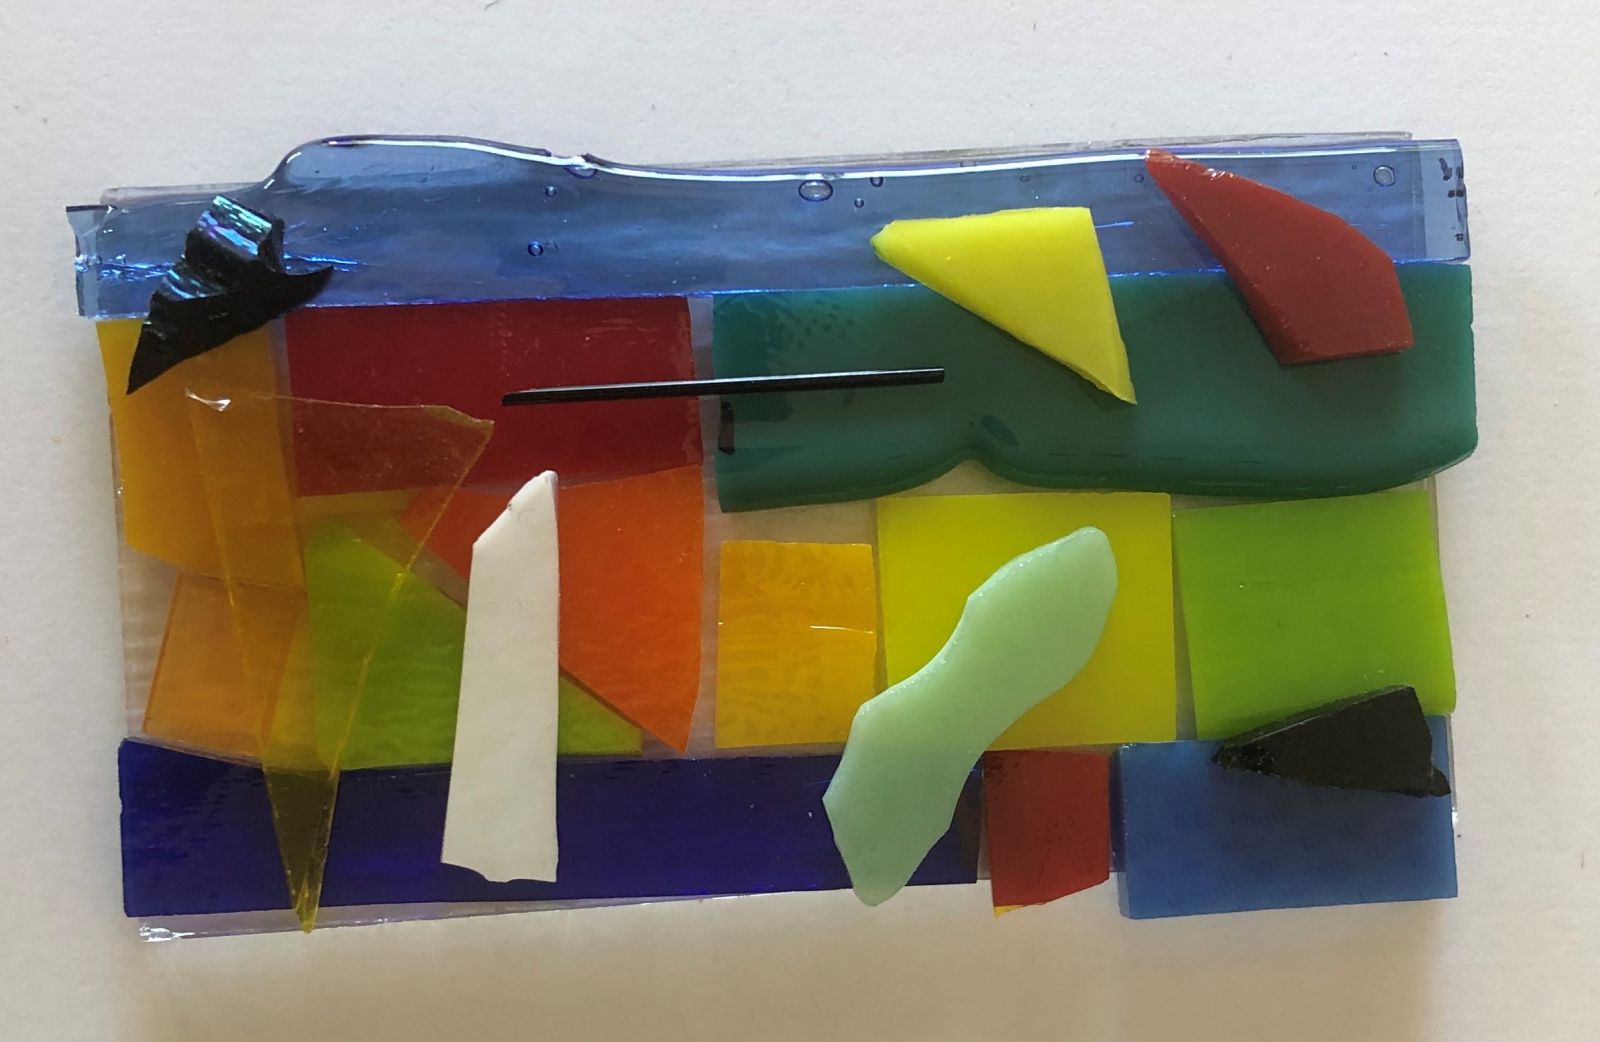
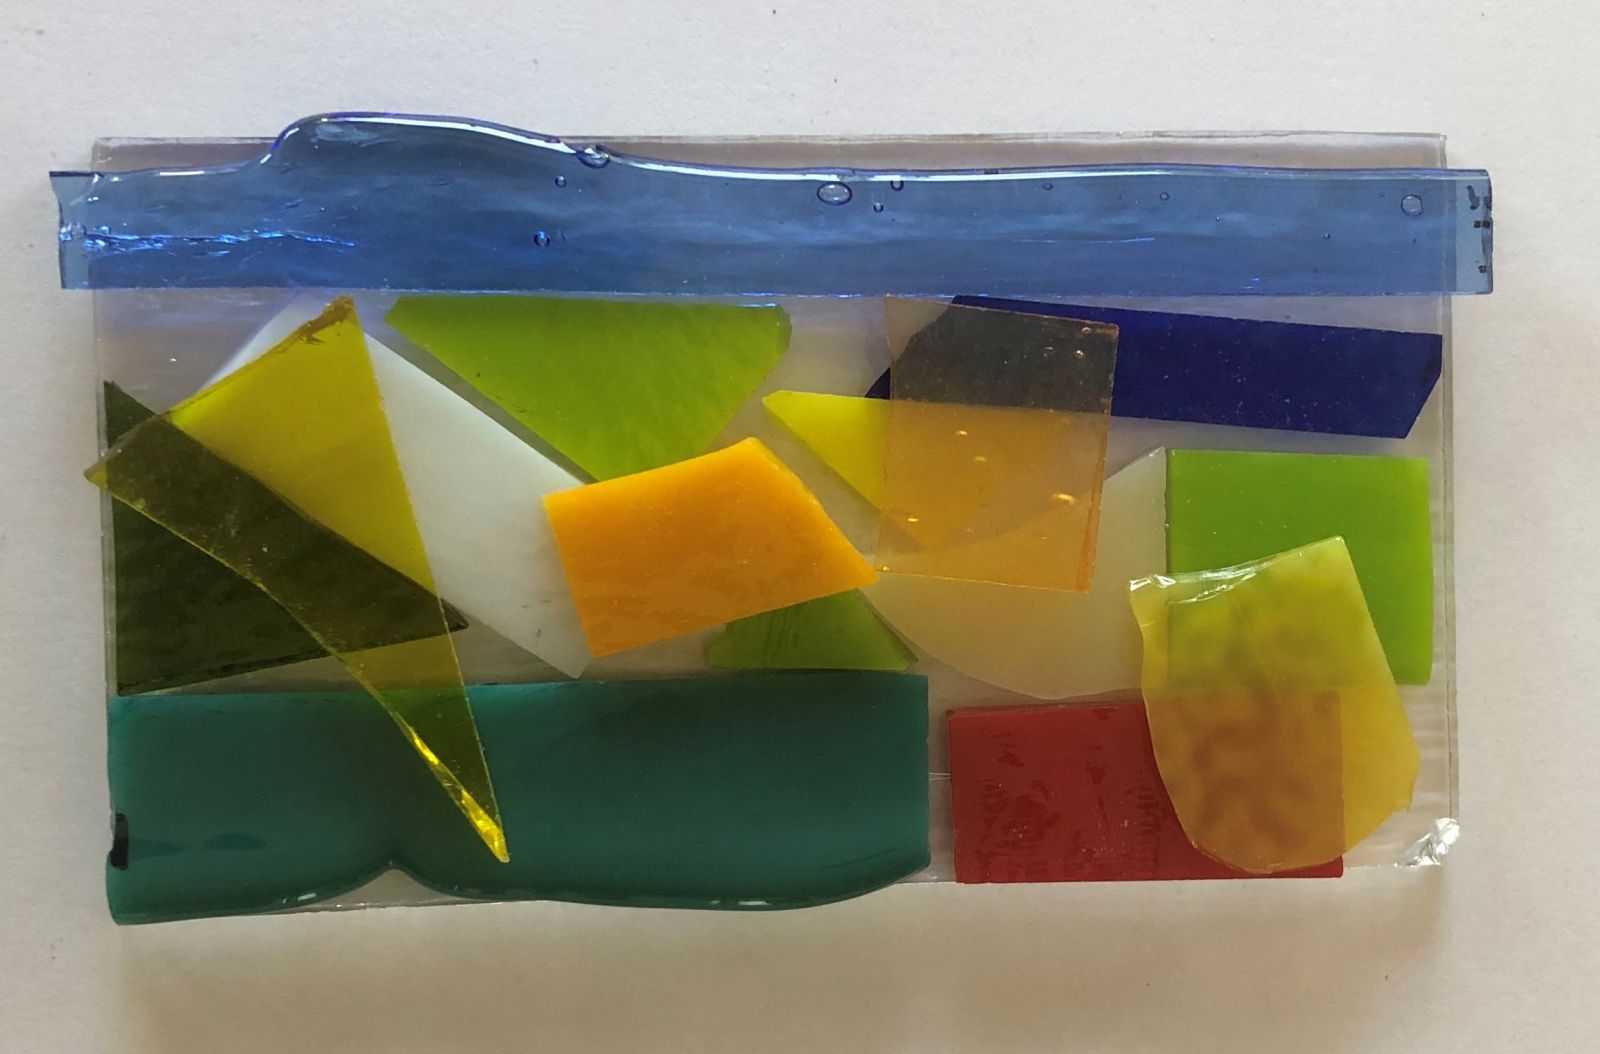
- Find images of Helen Frankenthaler’s or Lyubov Popova’s work or any non-representational abstract paintings that use color and shape to show abstraction.
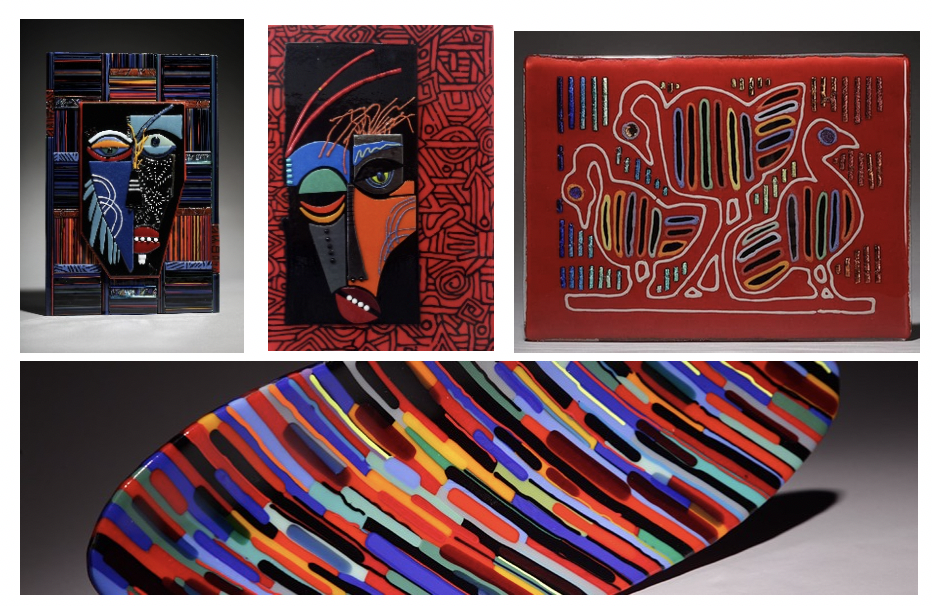
- Show work by contemporary fused glass artists, these are by Di Faria, a Seattle area artist.
- Plan enough time to set up the space you will teach in. 30 minutes is good if you had a chance to pre-prep most of the glass pieces.
- Set up should not include cutting the glass except for some small custom nips done by the adults only into a tall sided container.
- Find three or four volunteers to come help set up, teach and clean up.
Reflection Points (Assessment of Learning Objectives)
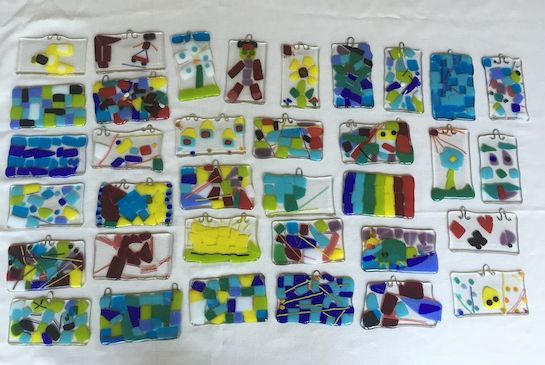
- Did the students create an abstract, visually balanced glass creation using light and dark glass?
- When discussing their artwork, did the students use vocabulary relating to glass?
- Listen for the newly introduced vocabulary words you gave them.
Instructions for Lesson
Additional Advanced Preparation – Just before the lesson:
- Cover tables with newspaper.
- Pre- set a “setting” for each child with the “Base” (building) piece of glass on a small paper plate. The bases should all be the same size and color usually clear or white but can be any color. Have small bins ready to put on the tables with glass bits in a large assortment of colors, shapes and sizes. Use shallow bins and move glass around with pencils to avoid digging for the pieces they want with their fingers.
- Before students sit down have a serious Safety Talk about handling the glass. I always say how lucky we are to get to use adult art supplies and how I know they can be super careful and safe with them, I trust them …wink. They love it.
- Note the importance of:
a. only touching one piece at a time, never holding a handful or more than one piece.
b. Hold the glass with the pads of their clean fingers on the flat part of the glass only, not the sides of the glass. It is nice to have a few pairs of gloves for them if they are worried about touching broken glass. Just be sure to use the school’s glass gloves.
c. Students must stay in their seats and not walk around for more glass.
d. Instruct them to be very careful not to drop the glass on to the floor or non-project surfaces and if something does drop tell an adult asap.
- Have them write their names on the plates with a black marker. Tell them to keep the work on the plate for the entire project because it ensures they get their own work back.
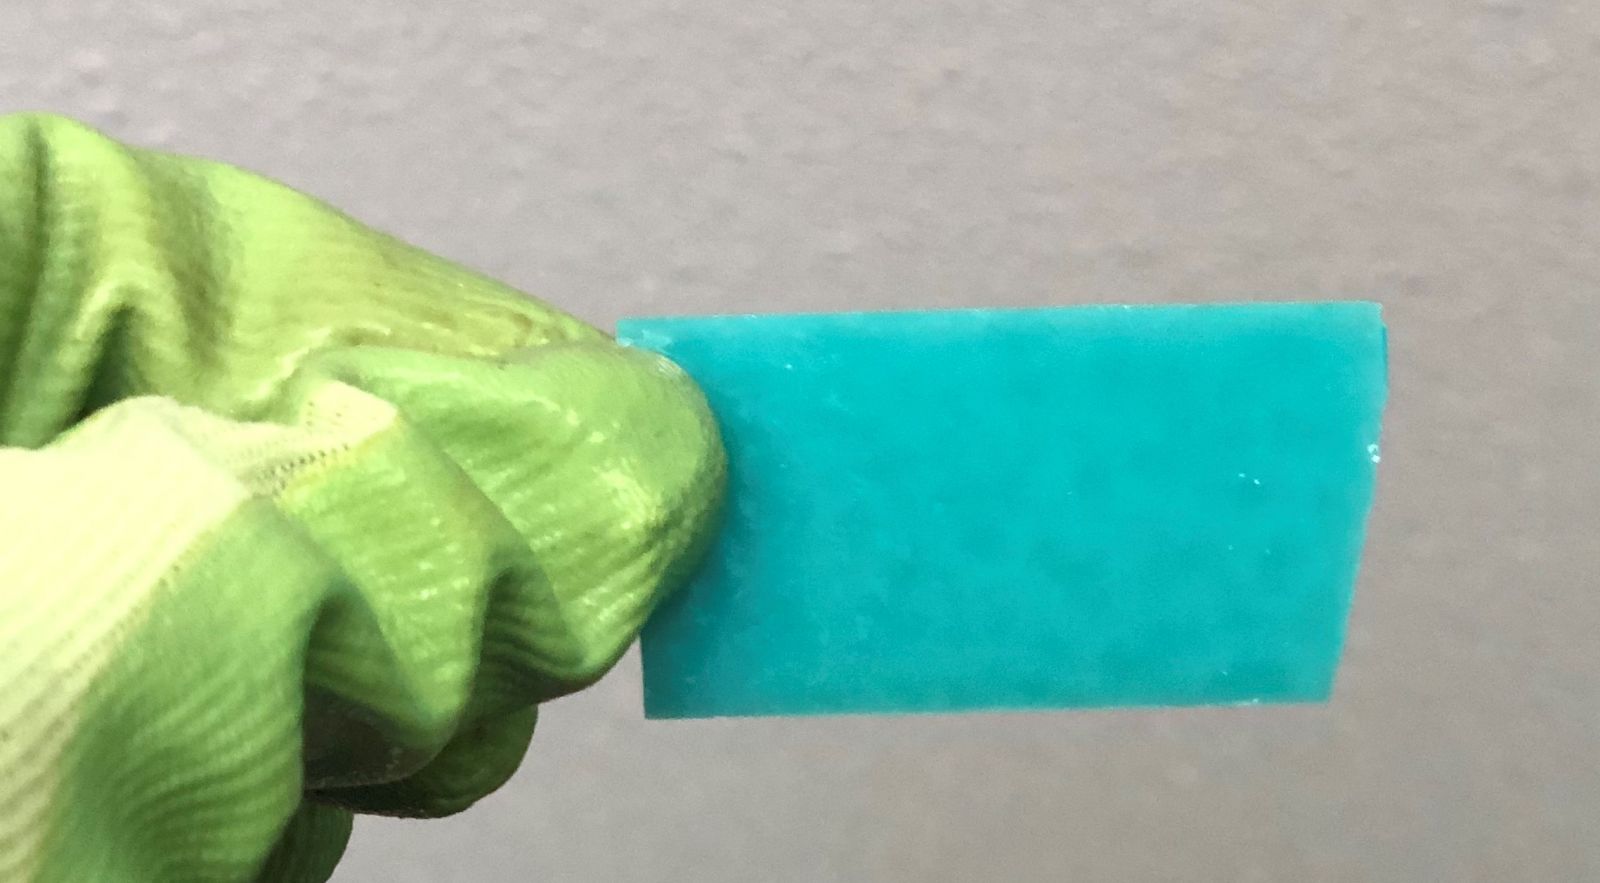
- Hold up pieces of glass to the light to demonstrate the difference between opaque (glass above) and transparent glass (at the below).
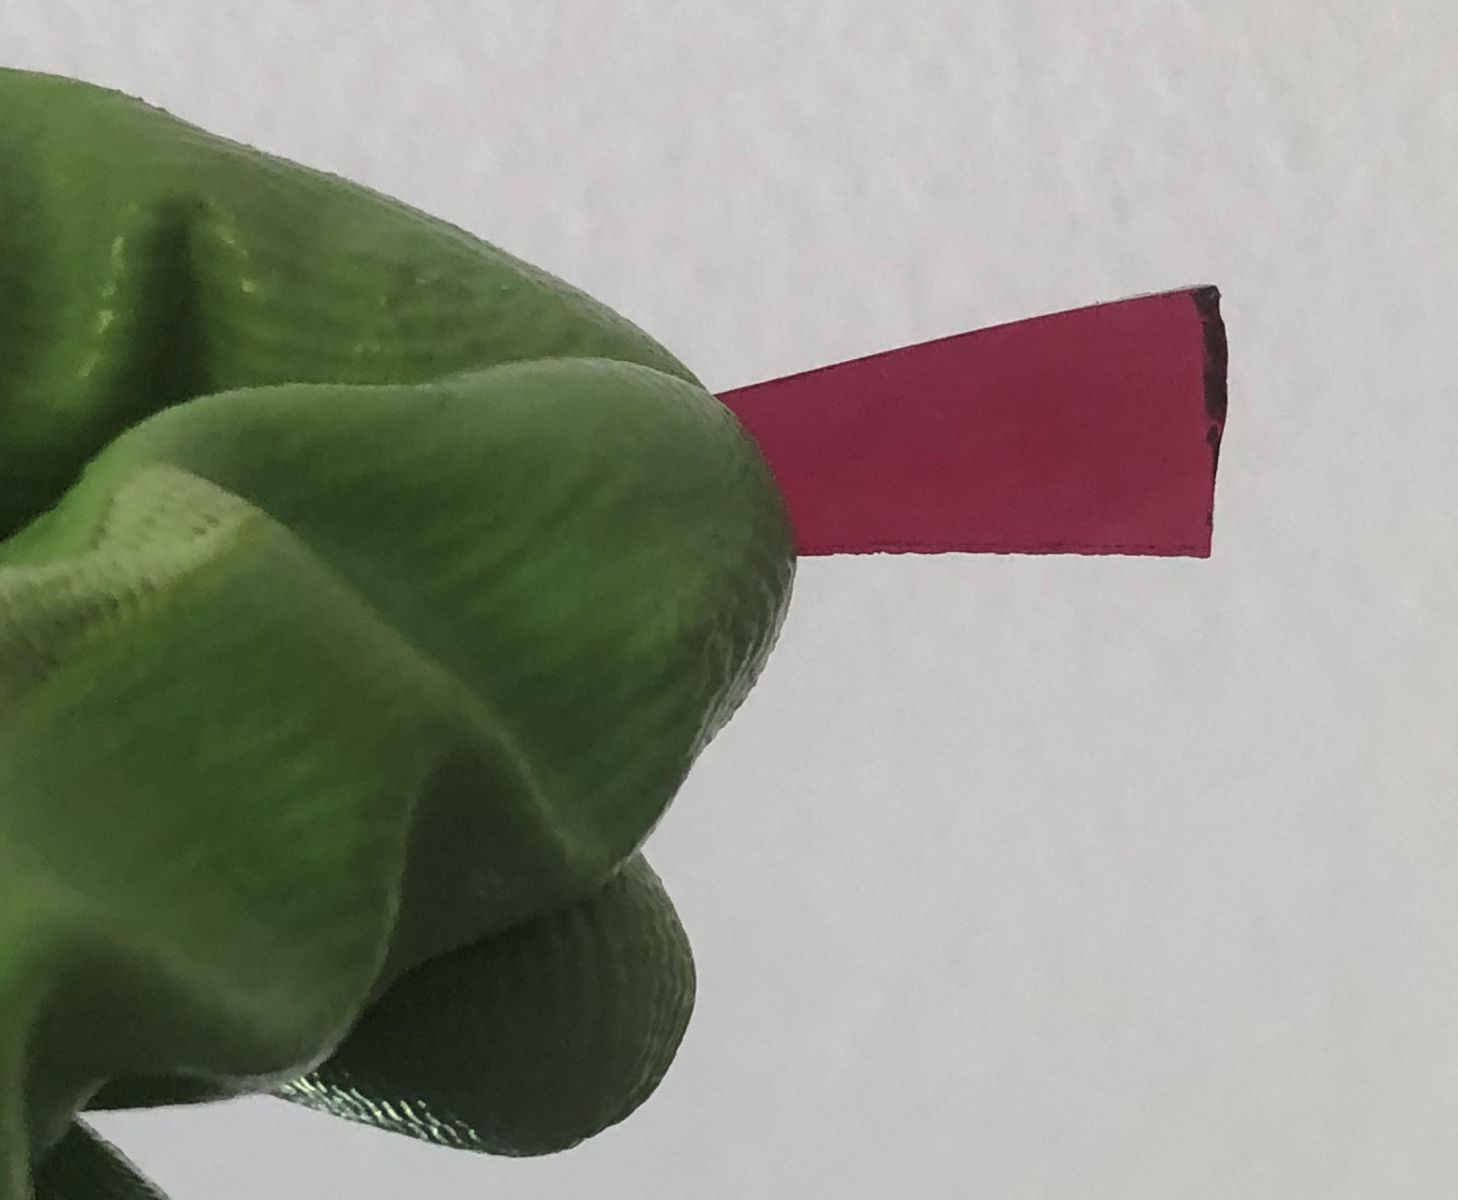
a. What happens when two pieces of transparent glass are layered? Their colors blend.
b. What happens when an opaque piece is on top of a transparent piece? The transparent one won’t show.
c. What happens when a transparent piece is put on top of an opaque piece? Their colors blend.
d. How about two opaque pieces? Only the top piece shows.
- Demonstrate using a pencil to move the glass around in the bins until they find the piece that they want. Then pick it up carefully holding it on the flat sides.
- Have them play around with different small pieces on the base piece or on the side to see what they like and what will fit on the bases, give them several minutes with this step.
- As you walk around check to see that they are creating abstract art, not images of skateboards or cats.
- Ask them to look for areas of light and dark, is it interesting?
- Ask the them to look for visual balance in their work, making sure everything is visually important.
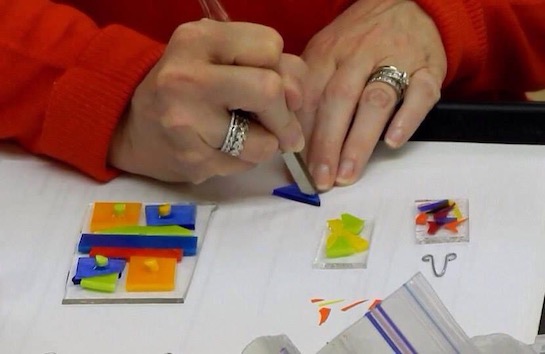
- Now after they kind of know what they want they can use the Glass Tac (glass glue) to secure the small glass onto the base glass.
- Have them use cotton swabs to spread Glass Tac on the base and the pencil erasers to move the glass around on the top.
- Students must not stack more than 3 pieces of glass high anywhere on the piece, including the base.
- After they are all finished spritzing each piece with a pump hair spray to help “set” the design.
- Leave the time to ask questions and discuss what they discovered.
Adults only
- Insert hooks if the work is intended to be hung up.
- Clean any fingerprints with the rubbing alcohol.
- Allow the work to dry for 4 hours or more. The Glass Tac will become quite hard and moving the work won’t cause them to slide apart.
- *Don’t forget to take a picture that shows each student’s piece with their name for identification after firing. This makes it so much easier to get them back to students.
- Full (left) or partial fuse (right) their work.
.jpg)
- Put them back on the plates after they have been cleaned out of the kiln.
References and Attributions
Notes for Educators
21st Century Thinking Skills
Goal setting, observing, making connections, visualizing, sequencing, classifying, problem solving, cause and effect, decision making, evaluating.
WA State Learning Standards
(VA:Cr1.1.4) a. Brainstorm multiple approaches to a creative art or design problem.
(VA:Cr2.1.4) a. Explore and invent art-making techniques and approaches.
(VA:Cr2.2.4) a. When making works of art, utilize and care for materials, tools, and equipment in a manner that prevents danger to oneself and others.
(VA:Cr2.3.4) a. Document, describe, and represent regional constructed environments.
(VA:Re9.1.4) a. Apply one set of criteria to evaluate more than one work of art.
Arts Integration Opportunities
Materials Science: Students will understand the difference between a crystalline solid and an amorphous solid. They will learn the effects of heat on certain types of solids.
Color/light theory: Students will learn how colors combine to make new colors. They will learn how light passes through opaque vs transparent objects.
Please note: These lesson plans are intended for non-profit use only. Use of these plans for commercial purposes should give attribution to the Issaquah Schools Foundation and be accompanied by a nominal donation at www.isfdn.org/donate. Thank you.
Donate Now