Line: a long narrow mark or stroke made on or in a surface to control the viewer’s eye movement, define edges, texture and value gradations.
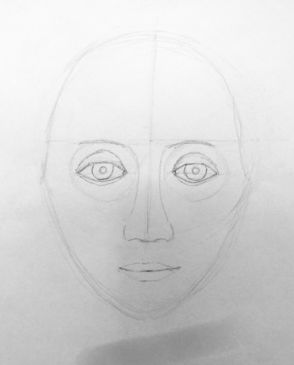
Balance: visual weight of a composition, in this lesson symmetrical balance: both sides of the face are the same, as in a mirror image.
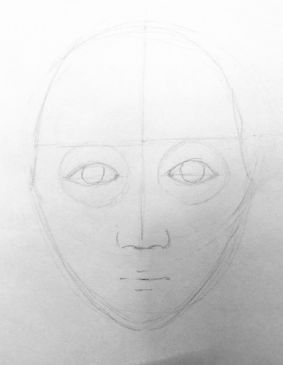
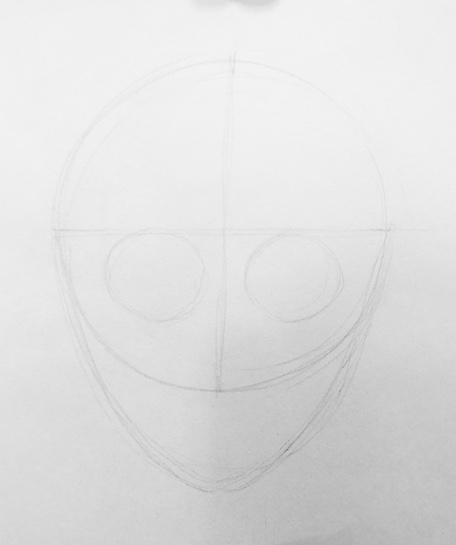
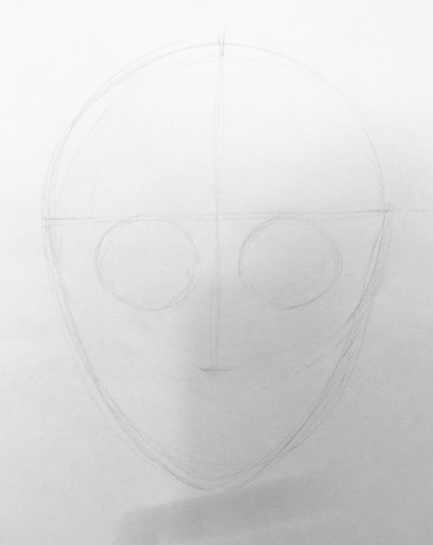
Proportion: the relationship of objects within the whole to each other as well as to the whole. In this lesson the facial features should be in proportion to each other and to the face.
Detail: additional visual information that informs the viewer about the person portrayed.
Facial features: eyes, nose, mouth, ears, eyebrows, hair.
Portrait: a depiction of the human face, head and shoulders.
• Pencils, Erasers (1 per student)
• Clip Boards, (1 per student, optional)
In every era and culture there are portraits. Learn more about the history of portraiture HERE. Artists have devised a template that human facial features align with, in respect to placement on the face, even though details such as eye shape, hair texture, nose size etc. may vary.
This lesson guides students towards moving from formulaic symbols for faces (smiley face circles and lines) and rely on observation to render realistically.
Observation is the true method of recording what something really looks like. “Draw what you see!”
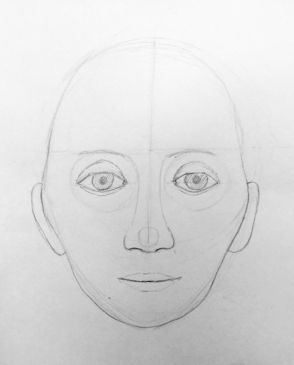
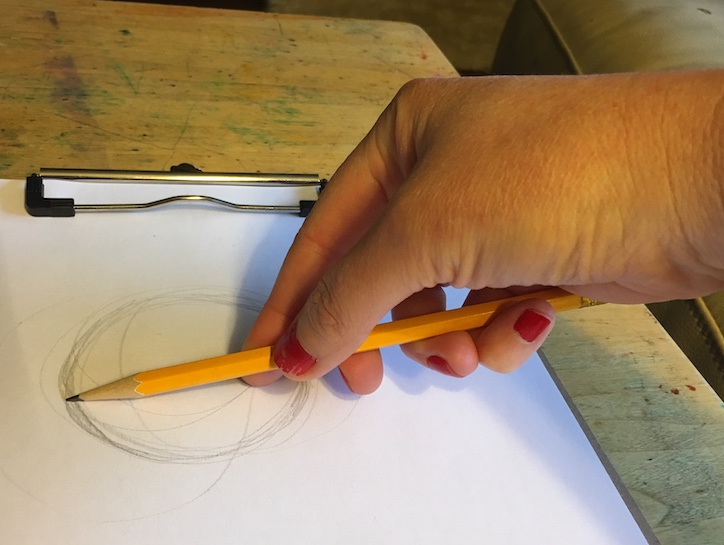
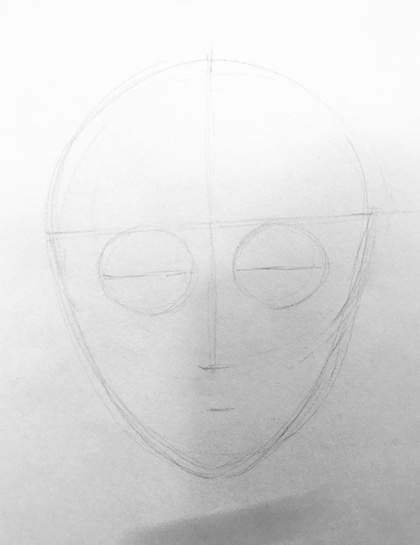
The art docent will lead a guided drawing with the students: some practice in advance is recommended. Such drawing can either be done on large paper, or on an overhead projector.
For this activity, each student will need copy paper and a pencil. If clipboards are used, paper can be set up on each clip-board ahead of time.
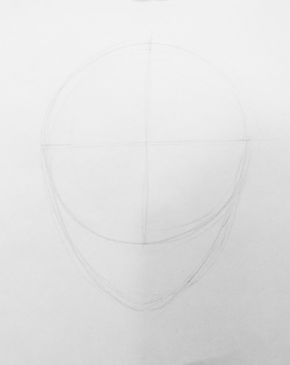
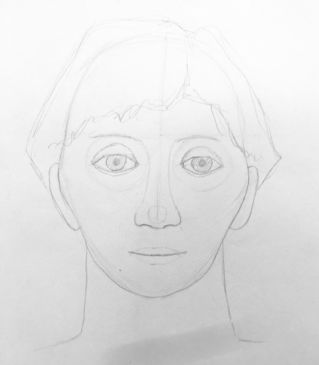
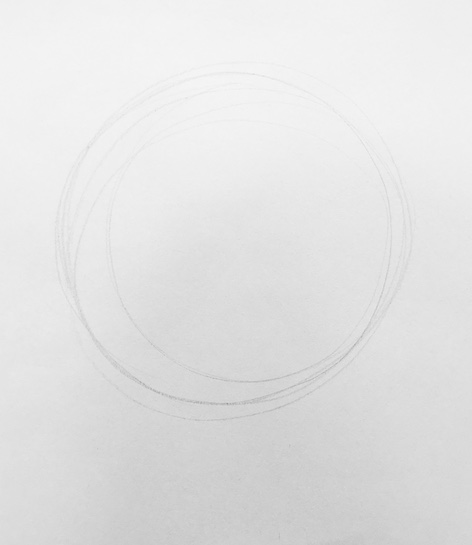
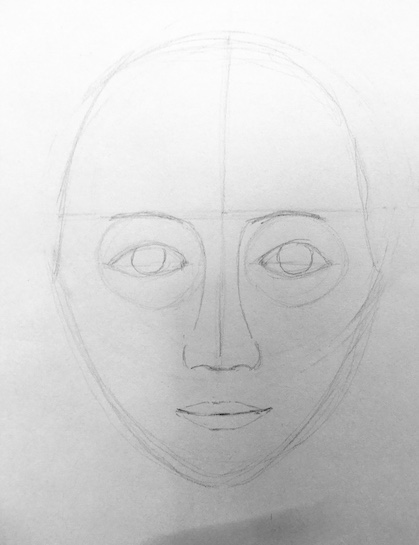
This method of drawing from observation is like using an outer scaffolding when erecting a building. Eventually the scaffolding is taken down and the building remains. In this process, some of the drawing will ultimately be erased. That doesn't make the erased parts of the drawing less important as the drawing is being ‘built’. Drawing should be lightly done until the final lines are chosen to keep. The finished drawing will be darkened with final pencil lines.
Note: there aren’t separate instructions for drawing a male vs. a female face. Faces are surprisingly neutral! How do we tell who is a boy and who is a girl, if not by our faces? (Details like eyelashes, hair, clothing.)
When we show emotions our face changes. What facial features express emotion the most? (Eyebrows and mouth.) What other features also change to express emotion? (Eyelids, cheeks, forehead, exposed teeth.) How would you change the shape of the eyebrows in your drawing to express happiness/anger/etc.? A smile/frown is just a big curve. How about a diagonal mouth? How would you draw a face that was scrunched up with emotion? Quickly sketch simple ‘faces’ with eyebrows, mouths and eyelids in different positions, while asking what emotions students see: sadness, fear, happiness, anger, surprise etc. Have students practice this quickly on scratch paper.
Students will:
The goal of this activity is to have students consciously move from drawing symbolically (i.e. happy faces, stick figures) to drawing with more realism. “Draw what you see!” Success shouldn’t be measured by how perfect the results are, but by the effort that a student puts into following the steps. Stepping out of your ‘comfort zone’ is required to make the leap from childhood drawing techniques to adult drawing techniques. Adult drawers engage in quite a bit of trial and error.
Success can also be measured by the layers of lines that a student has accumulated on the drawing. There should be a scaffolding of light lines, including obvious mistakes, with a few darker lines built up indicating that the student has investigated different line-placements and made a decision about which lines to keep.
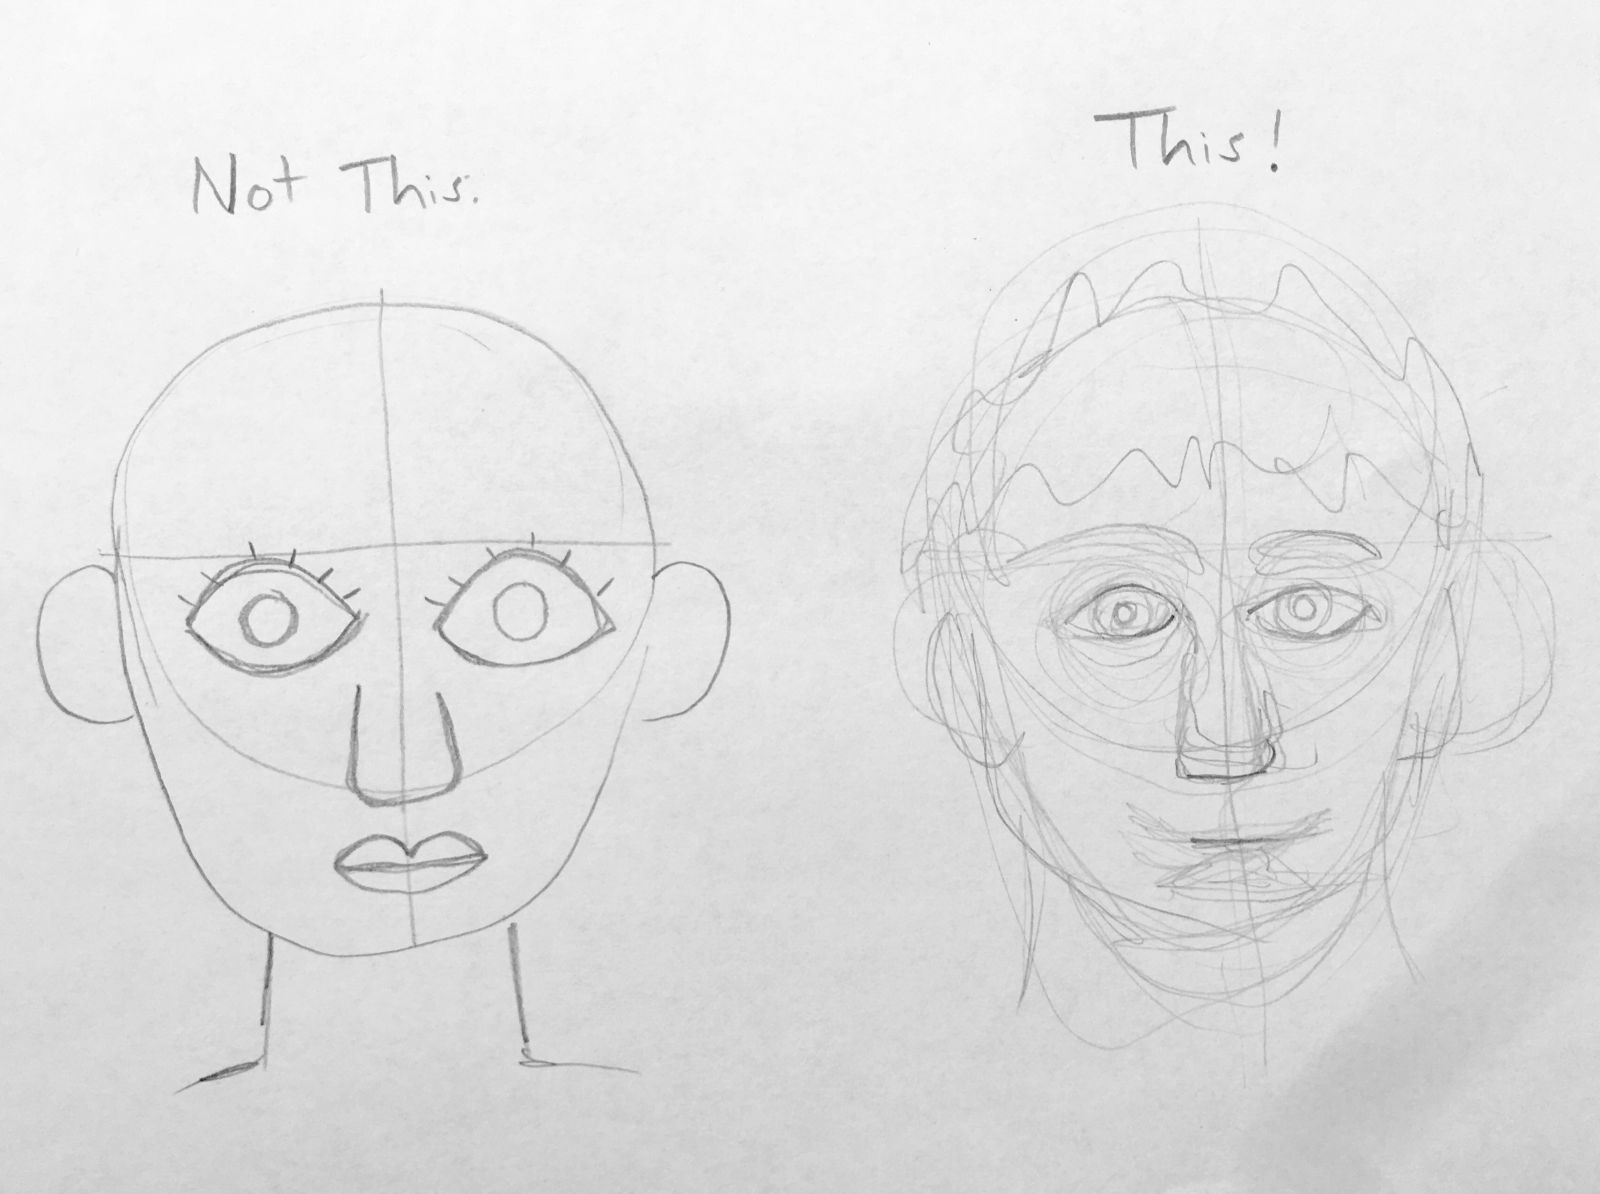
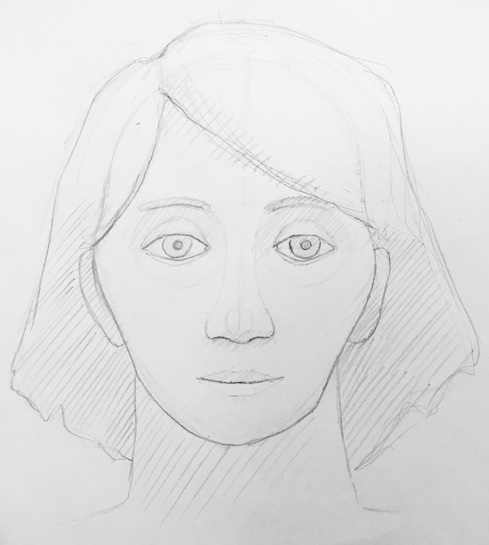
Below is a drawing that shows a successful drawing and an unsuccessful one. The unsuccessful one on the left is highly symbolic. The student spent time darkening the same lines instead of exploring different line placements that might ‘mess up’ or change the drawing. This reveals that the student wasn’t truly observing a face.
The successful drawing, on the other hand, is a mess of exploratory lines. The student has taken the risk of messing up in order to do that exploration. It’s always easier to add lines to ‘mistakes’ and then erase the mistakes late, than to erase first and re draw with no guideline of what not to do.

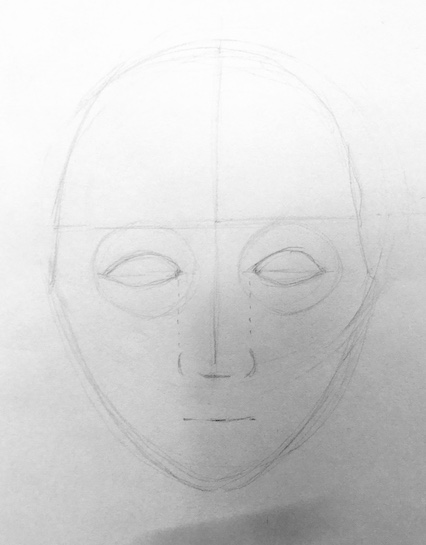

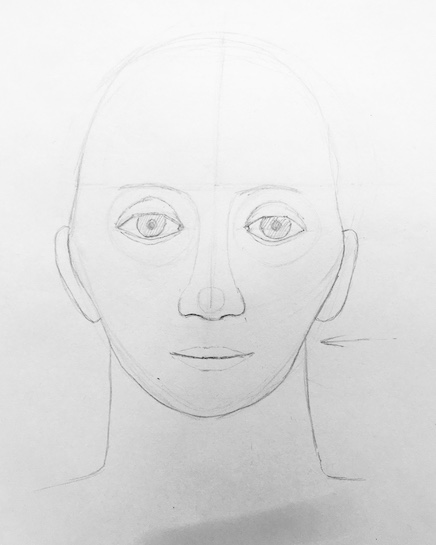

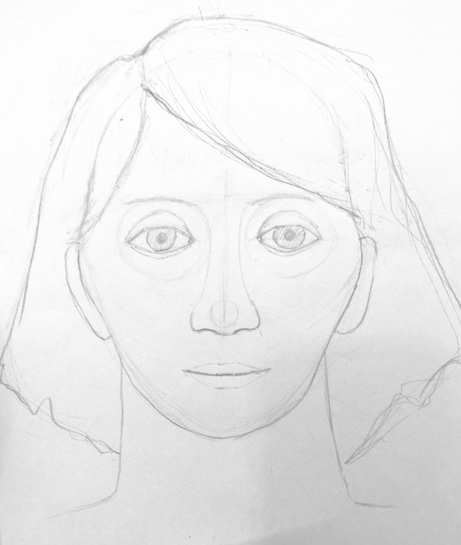
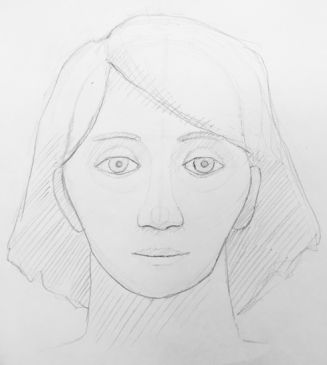
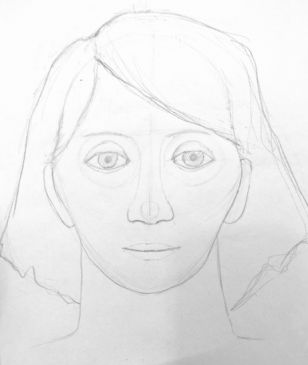
To finish, darken the most important features: eyes, underside of the nose, the line between the lips, and the edges of the face and hair. Light hatching can be used to add some shading, which shows that the face has volume. Where the shadows go depends on where the light is, but in general you will want to shade the eye-sockets between the eye and eyebrow, under the nose, upper lip, the space directly below the lower lip, the neck and underside of the hair.
Lesson and drawings by Michelle Clay. Special thanks to Nicholas Palermo at the Rhode Island School of Design. YouTube: Basics #60-Anyone can draw from observations with these steps (charcoal drawing).
21st Century Thinking Skills
Thinking flexibly, persisting, listening with empathy, taking responsible risks, reflecting, observing, making connections, visualizing, sequencing, comparing/contrasting, determining main idea, finding evidence, determining point of view, decision making, evaluating.
WA State Learning Standards
(VA:Cr1.2.5) a. Identify and demonstrate diverse methods of artistic investigation to choose an approach for beginning a work of art. This happens when the discussing the 2 methods of drawing: the child’s method of using simplified symbols of the subject vs the adult’s method of observing the subject and drawing what is seen.
(VA:Cr2.1.5) a. Experiment and develop skills in multiple art-making techniques and approaches through practice.
(VA:Cr2.2.5) a. Demonstrate quality craftsmanship through care for and use of materials, tools, and equipment.
(VA:Cr2.3.5) a. Identify, describe, and visually document places and/or objects of personal significance.
(VA:Cr3.1.5) a. Create artist statements using art vocabulary to describe personal choices in art-making.
(VA:Re7.1.5) a. Compare one's own interpretation of a work of art with the interpretation of others.
(VA:Re8.1.5) a. Interpret art by analyzing characteristics of form and structure, contextual information, subject matter, visual elements, and use of media to identify ideas and mood conveyed.
Arts Integration Opportunities
Science: When observing examples from science, record drawings in a notebook along with observable facts, like a naturalist’s logbook or diary.
Writing: Write a biography of the subject of the portrait. Write a personal response to the act of changing drawing methods from using symbolism to relying on observation.
Spelling: All vocabulary words used.
Math: find relationships between the measurements used when placing facial features within a face shape.
Please note: These lesson plans are intended for non-profit use only. Use of these plans for commercial purposes should give attribution to the Issaquah Schools Foundation and be accompanied by a nominal donation at www.isfdn.org/donate. Thank you.
Fueling Success for Every Student, Every School