loading Skip to Main Content

Keith Haring Art as Social Commentary

Students will observe the artwork and social commentary of artist and muralist Keith Haring then use printmaking materials to create art that conveys a message in a similar style. Recommended for 5th Graders.

Elements of Art

Line: the flat path of a dot through space used by artists to control the viewer’s eye movement; a long narrow mark or stroke made on or in a surface. The repetition of lines can create texture, pattern, and gradations of value.
Shape: a two-dimensional (flat) area enclosed by a line.

Principles of Design

Contrastcan create variety by showing differences within the elements in an artwork, such as smooth/rough textures, light/dark colors, or thick/thin lines.
Emphasiswhere the eye travels to in a work of art. Also described as the focal point, focus or center of interest. It creates variety and is usually unique in size, color, texture or shape.
Pattern: repeated elements in an organized way, creates unity.

Additional Vocabulary

Composition: the use of the principles of design to arrange the elements of visual arts to create a piece of artwork; the way individual design elements are combined to express a particular idea.
Symbol: an image that represents something else.
Variety/UnityComponents that make an interesting composition.
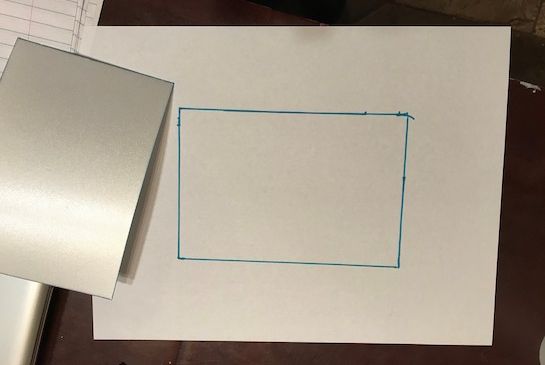
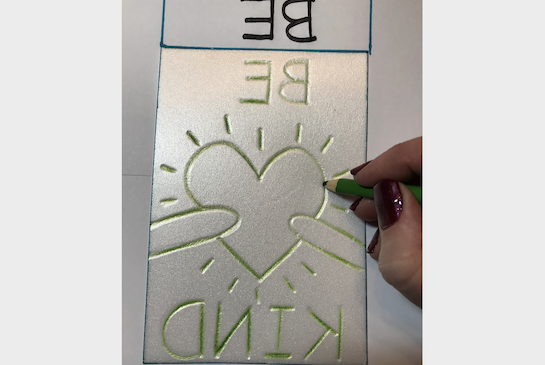
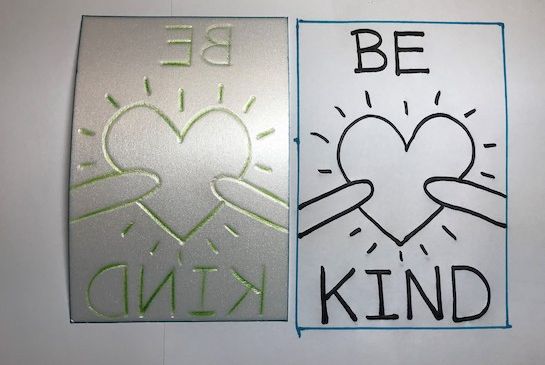
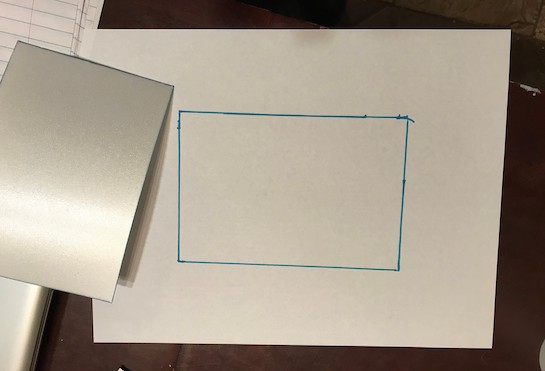
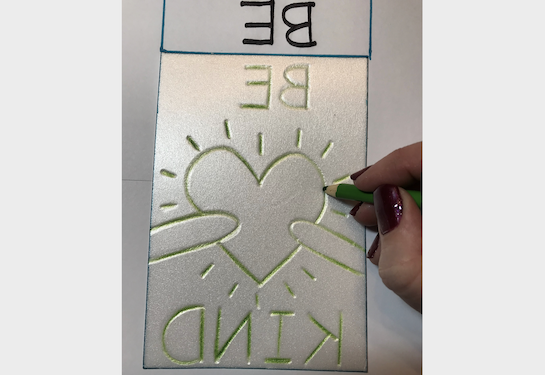
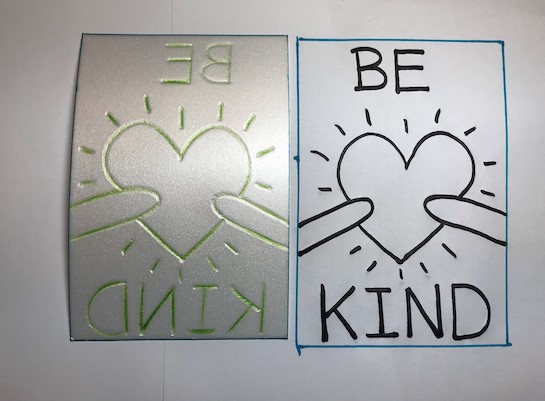
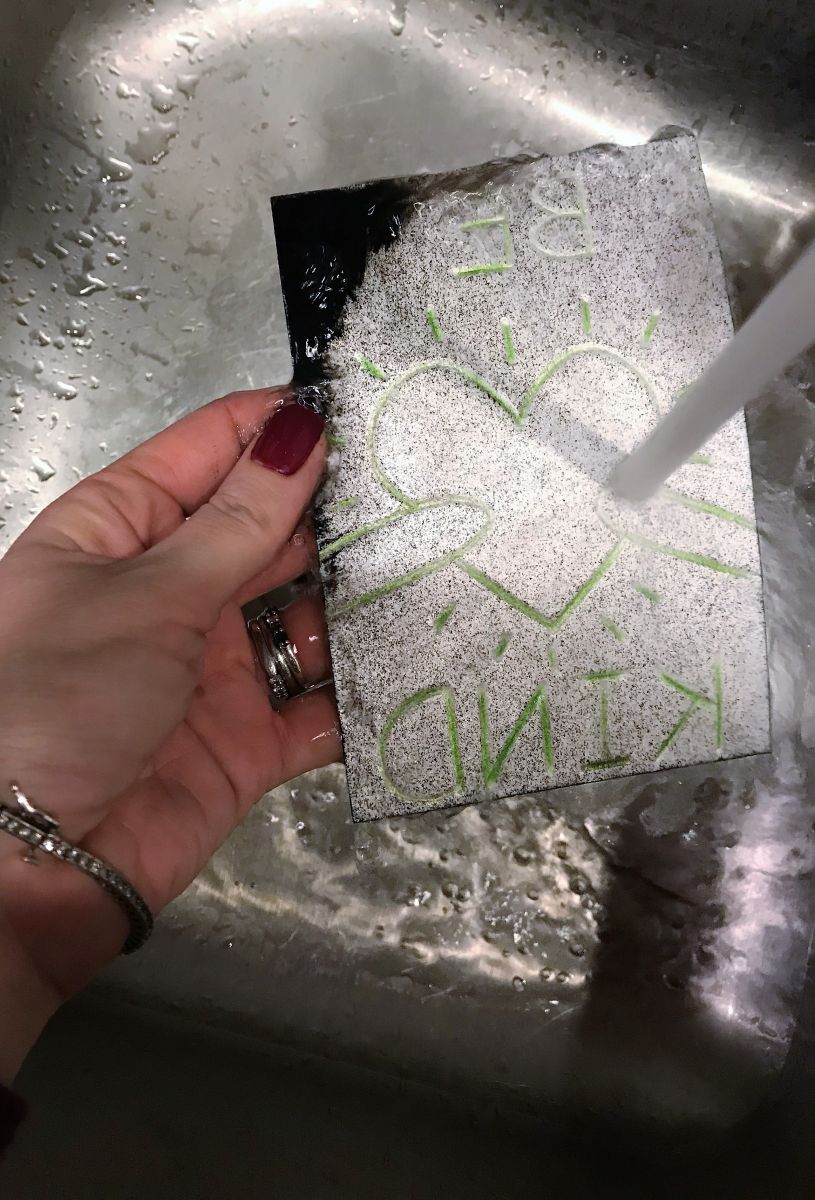
Master: In printmaking, the master is the original image that is reprinted. In this lesson it’s the Styrofoam plate. It could also be a stamp, a woodcut, an etching etc.

Materials & Supplies

  • Printmaking Paper
  • Brayer 
  • Printmaking Inks
  • Styrofoam Printing Plates
  • Non-porous Plexiglas Surface or Paper Plate
  • Oil Pastels
  • Copy Paper (white and color) 
  • Permanent Marker
  • Colored Pencils

Context (History and/or Artists)

Keith Haring was a prolific American Pop artist and muralist in the 1980s. He was born in Reading, Pennsylvania on May 4, 1958. He showed an interest in art from a very early age and his family has said all he ever did was draw. He was influenced and inspired by Dr. Seuss and Walt Disney but his father also drew cartoons for a living. After high school, Keith went to school in Pittsburgh for commercial graphic arts. He quickly decided this wasn’t for him and moved to New York. It was in New York that Keith found a thriving art community. 

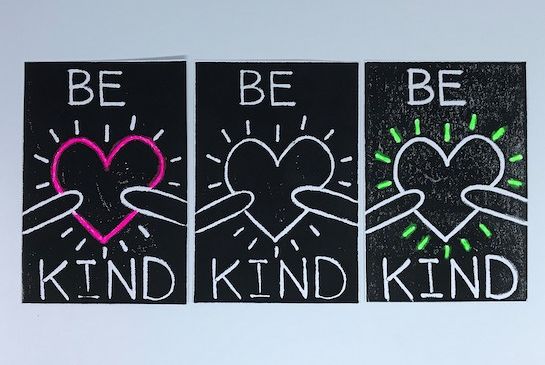
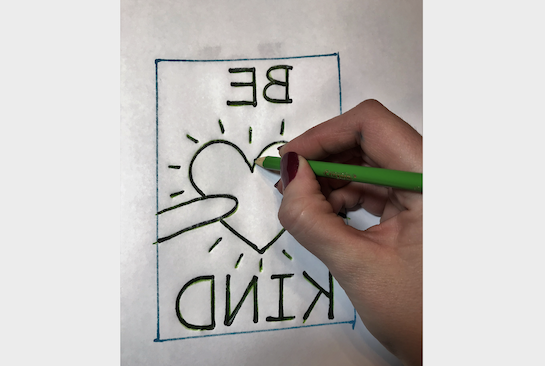
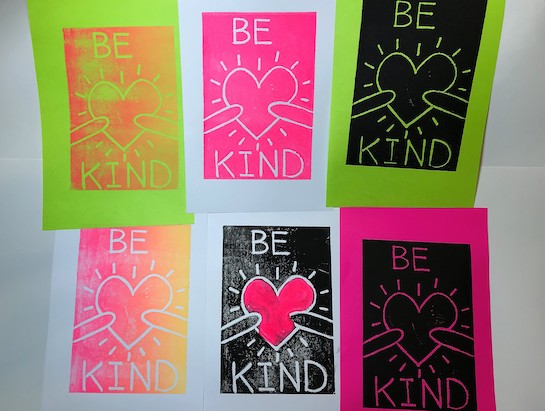
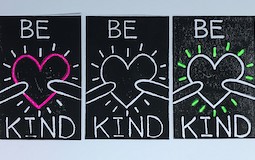
In 1980, Keith noticed unused advertising panels in the New York City subway systems. He was inspired by the unused space and bought a box of white chalk. Haring knew that whatever he drew would have to be able to be understood by the quickly passing subway passengers. He used bold lines, easily recognizable designs, and simple stories to convey a message on each panel. Much of his work spoke about social issues. The subway passengers took notice and soon Haring became a celebrity. Then the entire city and art world took notice. Haring now had international recognition.

People responded to his art, but Haring’s beliefs were contradictory to most of the art world. Haring believed that art belonged to the people and everyone deserved art. Often, if his art was in a museum, Keith insisted on having a piece outside of the museum, so people could enjoy his art without paying to see it. Eventually Keith opened a store called the Pop Shop with the goal of bringing his art to the masses.He believed in the power of art and working collaboratively. Much of his career was spent working with children and charities. 

Haring was diagnosed with AIDS in 1988. He established the Keith Haring Foundation which exists today with the purpose of providing funding and imagery to AIDS organizations and children’s programs. Haring donated much of his time and work towards his charitable work and loved working with children. The impact of this philanthropy is seen today. Haring passed away at the age of 31 on February 16, 1990. Although his life was short, he had a truly prolific career.

Advanced Preparation

Become familiar with Keith Haring by visiting haringkids.com and Haring.com. Have examples of Haring’s work available to show students.

Tips & Tricks

  • Use permanent marker to draw design on the copy paper. It can be easily seen through the paper and eliminates the need for tracing paper.
  • Only use bright, highly pigmented colored pencils. This makes it easier for the students to see which lines they have already traced.
  • When writing a word, plan letter size so as to fit evenly within the space.
  • Tape the foam printing plate to copy paper while tracing.
  • Have students create their artwork with a marker. The lines need to be bold. A thick marker will ensure bold, thick lines.
  • Set up multiple printing stations around the room with different color options.

Discussion Points

  • Keith Haring often used “tags” and repeating symbols and lines in his artwork.What do these tags represent?
  • What do the lines around the figures represent? Do they express an emotion? Would the artwork feel the same without them?
  • Does adding color to only one shape change the feeling of the artwork?
  • Does accenting one symbol with another color make an impact? Would the piece feel different if it was all one color?
  • What are some worthwhile causes or issues that are important to you?
  • How can you convey your message in your own miniature poster? 
  • Find evidence of the elements of art and principles of design listed above, when observing Haring’s work.

Reflection Point (Assessment of Learning Objectives)

Students will: observe the artwork and social commentary of artist and muralist Keith Haring; articulate their ideas and opinions while listening and responding to others; create art that conveys a message in a similar style; use art vocabulary.

Instructions for Lesson

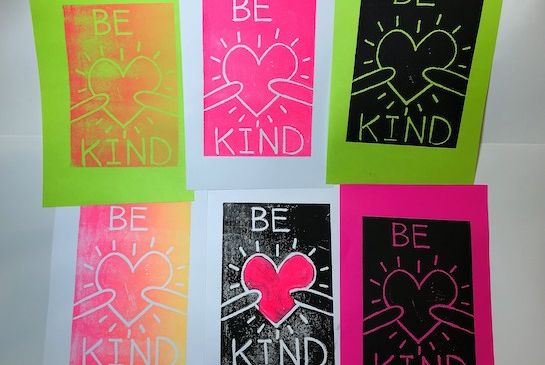
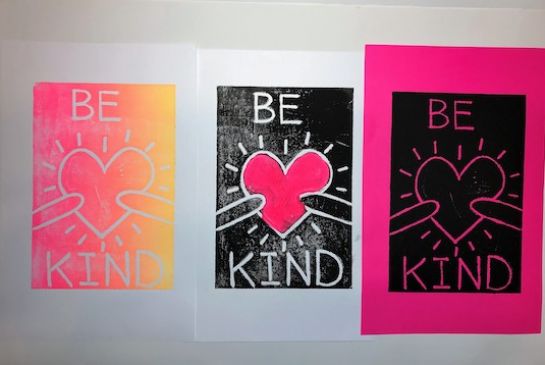
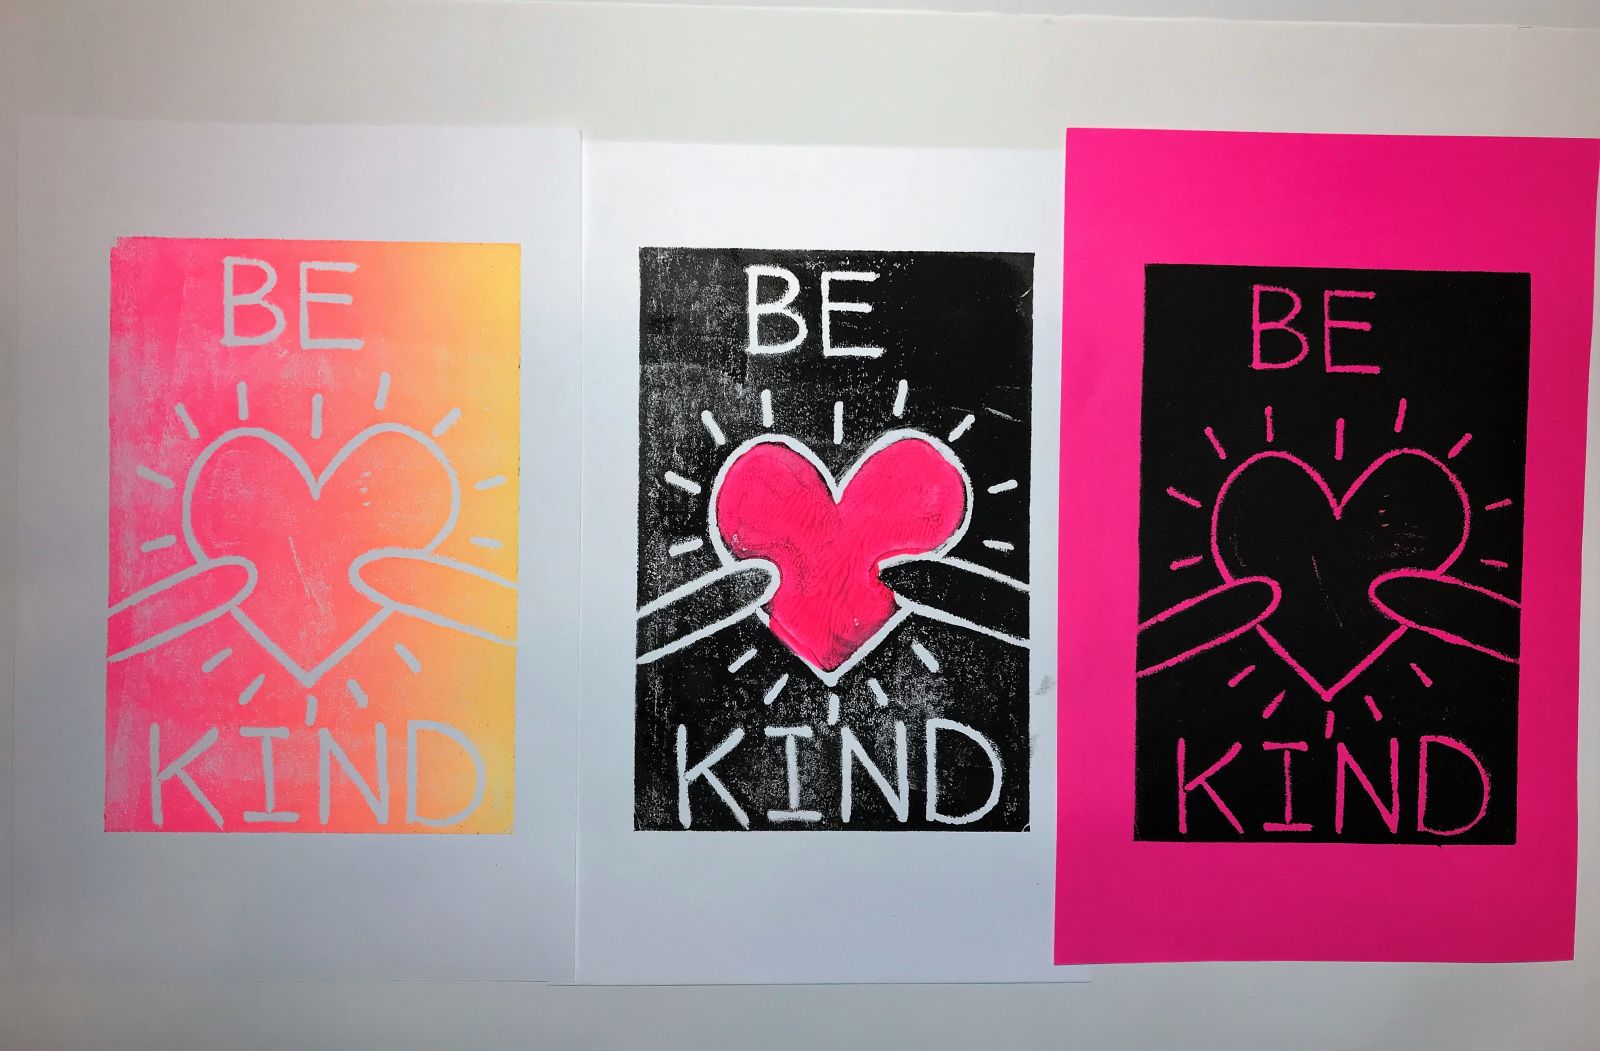
While discussing his biography, show works by Keith Haring by visiting haringkids.com and Haring.com. Specifically focus on the artwork with black and white backgrounds and one accent color. Also study the charity poster section briefly. Have students settle on a word that conveys their personal message.

  1. Demonstrate how to trace the outline of the foam printing plate onto the copy paper. This is the space for the composition. Inform students that their design must stay within this so as to fit onto the printing plate. Remind them to use bold, thick lines and few words. Haring’s work was impactful because its simplicity meant that it could quickly be understood by people passing by on the subway. Bold, simple shapes and short words will work best. 
  2. Model planning a design so that it fits the space. Draw lightly and measure the width each letter will occupy before adding it. Make a few examples, using words volunteered by students earlier, so they see how different length words will be ‘squeezed’ into the space evenly.
  3. Students will make an erasable design on their paper, adjusting it until it looks right, with enough variety and unity to create interest. Have them go over their design with markers to ensure there are no tiny details missing.
  4. To transfer the design onto the printing plate (the master), turn the page over so the original drawing is now face down on the printing plate. Since this is typography, the text must be inscribed backwards on the master (printing plate) so that it appears properly in the finished print. Trace over all of the lines with a dull colored pencil. If the pencil is sharp, it will puncture the material. The colored pencil allows the students to see which lines they have already traced and the wax allows it to glide smoothly without getting caught on the printing plate. They can tape each side to the edge of the plate so they don’t lift the paper until the entire design has been transferred. It is difficult to realign the paper and plate once moved. 
  5. Once the design has been transferred, have the students retrace their lines directly on the plate, to ensure a thick, deep, bold line. Students can trace over their lines multiple times until the desired effect is achieved. Remind them that the color from the pencil will not show in the finished artwork.
         
  6. The plates are now ready to be printed. The instructor will squirt a 2” line of ink onto the non-porous surface and demonstrate how to roll the brayer left-to-right and up and down to load with an even layer of ink. She will then roll it across the printing plate to make an even layer. If the ink layer is too thin it won’t cover evenly. If it’s too thick it will have small ripples throughout. This will affect the print. 
  7. Demonstrate how to carefully lay down the printmaking paper or smooth cardstock and burnish (hand rub all sections) their design to press ink into all lines. It is important to take time and really make sure to burnish all areas of the design.
  8. Gently pull the paper away from the Styrofoam plate, so that students see the result. Set aside to dry. Have students make a print.
  9. Remind them that they can make multiple prints with the same color ink without having to do any additional work with the printing plate, at least until the ink is used up. When you want to change the color, carefully wash the plate off in the sink. The plates wash off very easily. They need to be handled carefully because any creases will show up in later printings. No soap is needed. Simply run under lukewarm water and pat very dry, since any drips will dilute the ink. The plate is now ready to print a new color. If you don’t want to wash, you can squeeze a new color into the same non-porous surface which will mix with the old.
  10. Print as many copies as possible in the allotted time, reserving time for clean-up. The artist should sign and number each ‘keeper’ (successful print). Some can be printed on different colors of paper. Some can be printed in different colors of ink. Some can be printed with a rainbow roll of two colors of ink combined.
      
  11. Prints dry quickly. Take some of the dry finished prints in black ink on white paper and accent just one or two areas with a bold, bright color using oil pastel, similar to Keith Haring’s style. Try accenting a different part on each print to see which one is more impactful.
  12. Discuss the impact of the different prints as a class.
  13. Display one of each student’s prints. Take the remaining prints and have the students trade with other students. Haring believed that art was for the people and should be accessible to all. One of the reasons he always loves creating in the subways was so that everyone could enjoy the artwork for free. Encourage the students to share their artwork with as many people as possible.

References and Attributions

Lesson written by Laurelle Graves.
HaringKids, Keith Haring Foundation.
Keith Haring: The Boy Who Just Kept Drawing by Kay Haring, Penguin Young Readers Group, 2017.
“In His Own Words.” Beginnings | Keith Haring.

Notes for Educators

21st Century Thinking Skills
Observing, Making Connections, Visualizing, Sequencing, Comparing/Contrasting, Summarizing, Determining Main Idea, Decision Making, Evaluating.

WA State Learning Standards
(VA:Cr1.1.5) a. Combine ideas to generate an innovative idea for art-making.
(VA:Cr1.2.5) a. Identify and demonstrate diverse methods of artistic investigation to choose an approach for beginning a work of art. This happens when exploring Haring’s approach to communicating a message.
(VA:Cr2.1.5) a. Experiment and develop skills in multiple art-making techniques and approaches through practice.
(VA:Cr2.2.5) a. Demonstrate quality craftsmanship through care for and use of materials, tools, and equipment.
(VA:Cr3.1.5) a. Create artist statements using art vocabulary to describe personal choices in art-making. This happens when using vocabulary during group discussions.
(VA:Re7.1.5) a. Compare one's own interpretation of a work of art with the interpretation of others. This happens when sharing opinions and prints.
(VA:Re7.2.5) a. Identify and analyze cultural associations suggested by visual imagery. This happens when exploring symbolism.
(VA:Re8.1.5) a. Interpret art by analyzing characteristics of form and structure, contextual information, subject matter, visual elements, and use of media to identify ideas and mood conveyed.
(VA:Cn11.1.5) a. Identify how art is used to inform or change beliefs, values, or behaviors of an individual or society.

Arts Integration Opportunities
Social studies: research current events, common public symbols. Opinion writing.

Please note:  These lesson plans are intended for non-profit use only. Use of these plans for commercial purposes should give attribution to the Issaquah Schools Foundation and be accompanied by a nominal donation at www.isfdn.org/donate. Thank you.

Donate Now

Artistic Support Reference Materials

Loading...
Loading

Fueling Success for Every Student, Every School