loading Skip to Main Content

Recycled Cubist Sculpture

Students will build a sturdy Cubist sculpture using recycled materials. Recommended for 5th Graders.

Elements of Art

Form: a 3-dimensional figure that exists in space instead of flat on paper. This lesson uses geometric forms, instead of natural or organic. 
Shape is two-dimensional (flat), limited to height and width. A two-dimensional (flat) area enclosed by a line. This lesson uses geometric shapes: symmetrical, straight edged.
Textureactual texture is how something feels when touched; visual texture (also called simulated texture) is how something appears to feel.

Principles of Design

Asymmetrical Balance: a form or shape in which neither side is the same as the other but they still make a whole, with equally important sides.
Contrast: A technique that shows differences in the elements of visual arts in an artwork. In this lesson it is heart against the complimentary-colored background.
Focal Point: the part of an artwork that is emphasized in some way and attracts the eye and attention of the viewer; also called the center of interest.
Movement: How the artist makes the viewer’s eye move around the composition.
Unity: the connecting of parts of a work of art, creating a feeling of peace and a sense of completeness. All parts should work together. Not enough unity is chaotic to the viewer, while too much unity is boring.

Additional Vocabulary

Abstractan artwork that uses color, line, shape or form to create a composition which may or may not have any visual reference to the world.
Composition: using principles of design to arrange elements of art to create art; the way elements are combined to express a particular idea.
Cubism: a style of painting and sculpture developed in the early 20th century characterized by a reduction of natural forms to their geometrical equivalents. Also, planes of a represented object aren’t always where they would be in nature. Created principally by Pablo Picasso and Georges Braque. 
Details: Smaller things that inform the information conveyed.
Sculptors make sculpture.
Sculpture: the art of making 3-dimensional forms.

Materials & Supplies

  • Approx. 8” x 8” cardboard, class set
  • Pre-cut cardboard squares, rectangles and triangles, random sizes.
  • Toilet paper rolls if available.
  • Masking tape
  • Scissors, class set
  • Tempera paint, multiple colors
  • Large and small paintbrushes
  • Optional: images of cubist sculptures, especially assemblages.
  • Markers, multiple colors
  • Oil Pastels
  • Optional: yarn, beads, feathers, puzzle pieces, shells, etc for details      
  •  

Context (History and/or Artists)

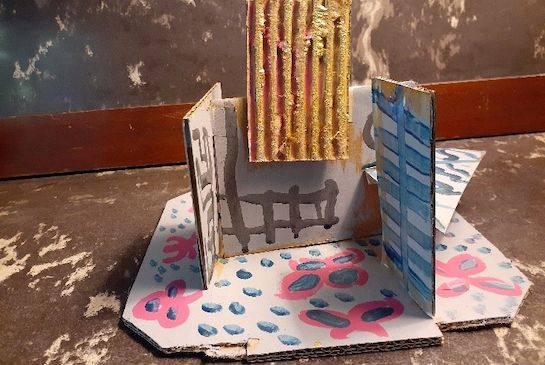
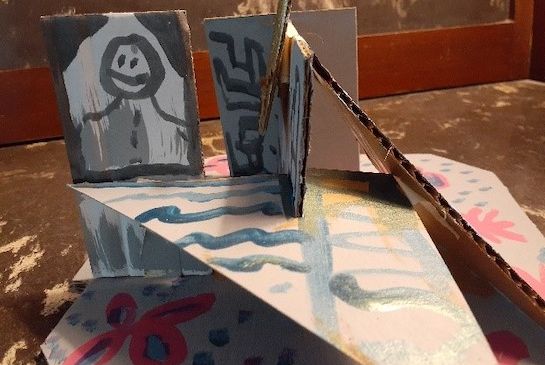
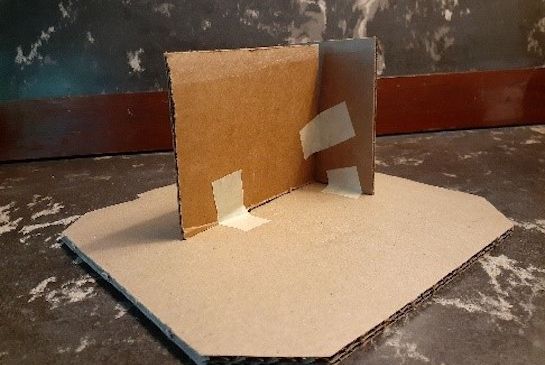
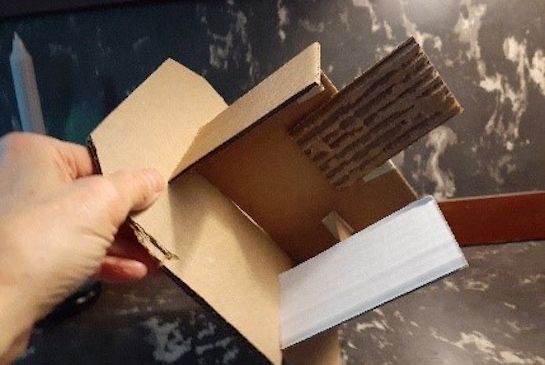
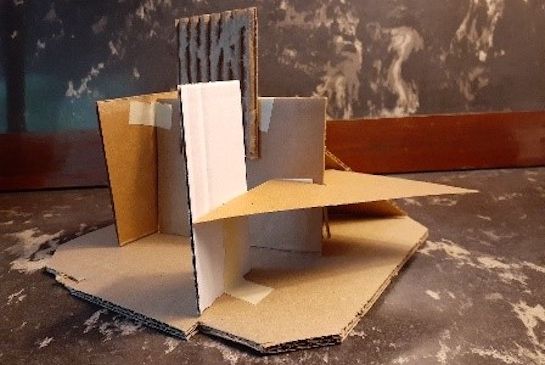
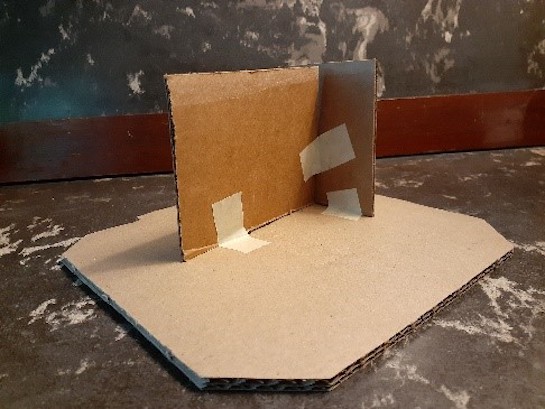
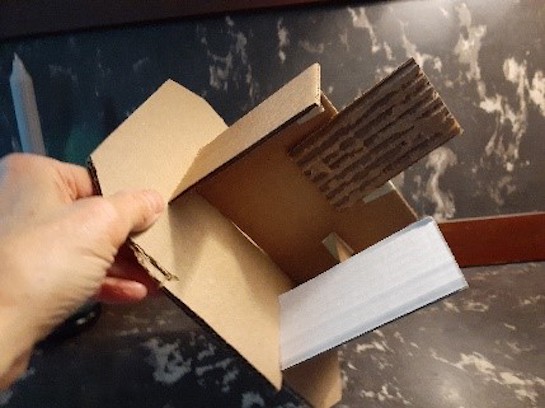
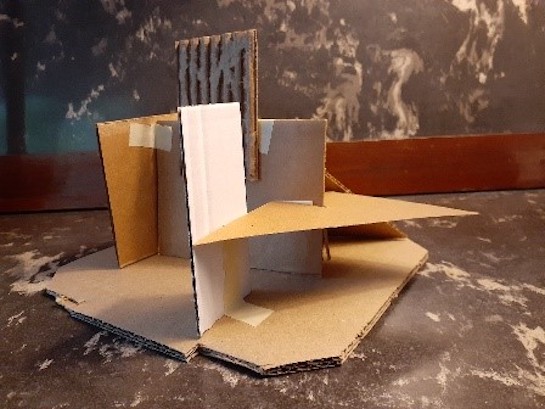
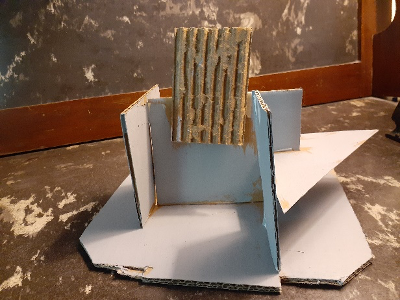
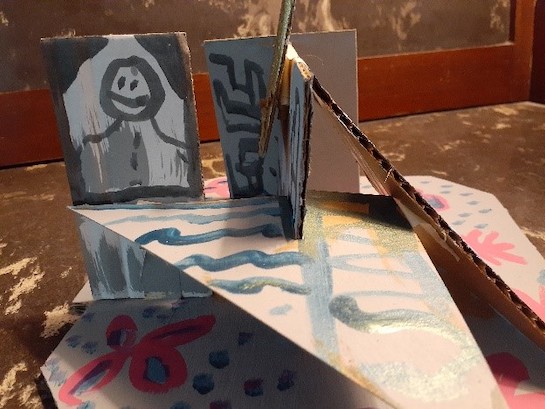
Sculpture is made by sculptors in many different ways. They can carve or chisel, as in wood or stone, by modeling, as in clay, casting, as in metal and assembling, or building by adding pieces together in a unified, interesting composition. It can represent something from life or not. This lesson is about assembling a sculpture using found objects in a meaningful way. 

Developed in the early 20th century by Picasso, Braque and other cutting-edge artists, Cubist sculpture freed them to strive for new ways to represent the human experience. It’s no accident that abstract art gained popularity soon after the advances of photography took over the job of representing real life accurately and innovation in ways to see the world was now enticing a new generation.  Cubism was originally considered ‘scandalous’ because it didn’t represent reality, but eventually triggered an avalanche of experimentation and new, visually interesting styles.

Advanced Preparation

  • Pre-cut plenty of cardboard pieces. 
  • If possible, ask students to bring in some found objects from home that are small enough to be glued to their sculpture.
  • Have paint already poured in palettes with brushes assigned to each color.
  • Have a few images of Cubist sculptures.

Tips & Tricks

  • Pull long pieces of masking tape and hang off students’ desks. They can cut their pieces to size as they need them.
  • Have the students pass The Earthquake Test before they start painting.
  • Be sure all tape is completely pressed into the cardboard. Otherwise paint gets under it.
  • Monitor the clock: about halfway through the class start collecting the unused cardboard and put out the paint.
  • Some students will definitely be more interested in the building than the painting. If a student is adamant about adding more pieces at the expense of painting time, this should be allowed. 
  • Never let students pour their own paint. They tend to waste it. Offer less than you think they’ll need. As students finish painting, pass their unused paint onto those still working.
  • Don’t over paint. Too much water will damage cardboard.

Discussion Points

  • Post all vocabulary words and go over them briefly with the class. Use the vocabulary often during the lesson.
  • Go over the context mentioned above. When viewing Cubist sculpture, look for evidence of geometric forms, simplified or abstracted details and multiple perspectives.
  • This type of sculpture is an assemblage. It’s made from thin pieces of cardboard that can’t stand up alone and require bracing with other pieces.

Reflection Point (Assessment of Learning Objectives)

Students will:

  • Become familiar with art vocabulary
  • Build a sturdy sculpture
  • Use detail to create interest
  • Use good craftsmanship

Instructions for Lesson

  1. After you go over the discussion points, demonstrate how one piece of cardboard butted up against another will brace them both. Show them how you fold a small piece of masking tape at right angles (like the letter “L”) and press completely down on the cardboard. It doesn’t have to be a big piece of tape. It just has to touch both pieces of cardboard to be braced together and then smoothed down so paint can’t get under it later. Both pieces should be taped to the base piece (the largest that acts as the ‘floor’)
  2. Add more pieces at odd angles, always carefully placing the tape in place. All pieces MUST be within the base, not hanging off. When using cardboard, you can change up the texture by peeling off the top layer of brown paper to reveal the corrugation underneath.
  3. After a few pieces (move them around a few times before deciding on their ultimate locations—this models for students that they can change their minds before taping—hold it by the base and give it a gentle upside down shake: “The Earthquake Test.”
      
  4. Now the students can begin building their own. Circulate the room making sure everyone has a long piece of tape and is applying it correctly.
  5. When most students are finishing, or when the class is almost halfway over, have everyone stop and watch your painting demonstration.
  6. Write your name on the underside of the base. Using a single coat of paint and a larger paint brush, paint the whole sculpture, except one piece, which will be the focal point. Demonstrate how to pull the loaded brush across the edge of the container to flush excess paint. Pull the brush in even, smooth strokes and remove all blobs.
      
  7. Have students do this and when most of them are finished, stop the class to watch you add details. With the small brushes paint lines, dots and small repeated images on all dry/semi dry surfaces. If things are too wet, paint in the focal point shape first with a different color.
  8. Now students may paint details. As they finish, suggest to the class that markers can also be used for the tiniest details. Discourage writing words, unless you or another adult approves.
  9. If time permits, students can now add their dry details, such as buttons, yarn, stickers, etc.

References and Attributions

Lesson written by Cynthia Moring.

Notes for Educators

21st Century Thinking Skills
Thinking flexibly, persisting, creating, innovating, taking responsible risks, reflecting, observing, making connections sequencing, problem solving, decision making, analyzing.

WA State Learning Standards
(VA:Cr2.1.5) a. Experiment and develop skills in multiple art-making techniques and approaches through practice.
(VA:Cr2.2.5) a. Demonstrate quality craftsmanship through care for and use of materials, tools, and equipment.
(VA:Cr2.3.5) a. Identify, describe, and visually document places and/or objects of personal significance. This happens if students bringing personal objects.
(VA:Cr3.1.5) a. Create artist statements using art vocabulary to describe personal choices in art-making. This happens if students write or verbalize about their art.
(VA:Cn10.1.5) a. Apply formal and conceptual vocabularies of art and design to view surroundings in new ways through art making.

Arts Integration Opportunities
Procedural writing: describe the process of making the sculpture.
Narrative writing: describe the sculpture as a place and write about an encounter that happens there.

Please note:  These lesson plans are intended for non-profit use only. Use of these plans for commercial purposes should give attribution to the Issaquah Schools Foundation and be accompanied by a nominal donation at www.isfdn.org/donate. Thank you.

Donate Now

Artistic Support Reference Materials

Loading...
Loading

Fueling Success for Every Student, Every School