loading Skip to Main Content

Drawing a Paper Ball

Drawing from observation, students will sketch a paper ball using contour and shading techniques. Recommended for 5th Graders.

Elements of Art

Form: 3-dimensional (height, width and depth) figure that encloses volume.
Shape: a 2-dimensional (height and width) figure created with joined lines.
Value (Hue/Shade/Tint): a measure of relative lightness and darkness. In this lesson light and shadowed areas create the illusion of depth which makes the object appear more realistic.

Principles of Design

Proportion: the relationship between the parts of a single object to its whole. In this lesson it’s the parts of the paper ball compared to the whole ball.

Additional Vocabulary

Hatch Marks: using short lines, close together to make an area darker.
Observation: the action of carefully noticing things. In this lesson students will draw what they see.

Materials & Supplies

  • Plain white copy paper (3-4 sheets per student)

•    Pencils, erasers (1 per student)

• Clip boards, (1 per student, optional)

Context

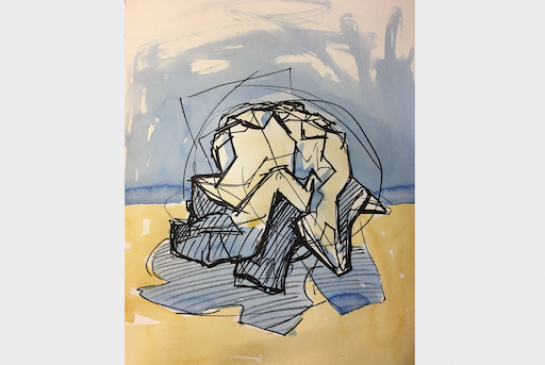
“Drawing from observation” means looking at real 3-dimensional objects and using the illusion of depth (the missing 3rd dimension) to turn those forms into 2-dimensional shapes. When drawing from observation, the artist records visual information as it’s seen and expresses creativity by choosing which details to include, exaggerate, or leave out. This method of drawing depends on the artist’s ability to copy what is actually seen.

Drawing from observation became more important during the Renaissance, as European artists and scientists became interested in observing and recording objects and people in the world in order to understand them. Learn more about drawing HERE.

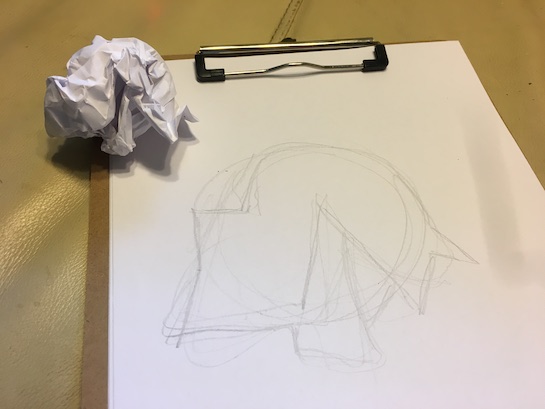
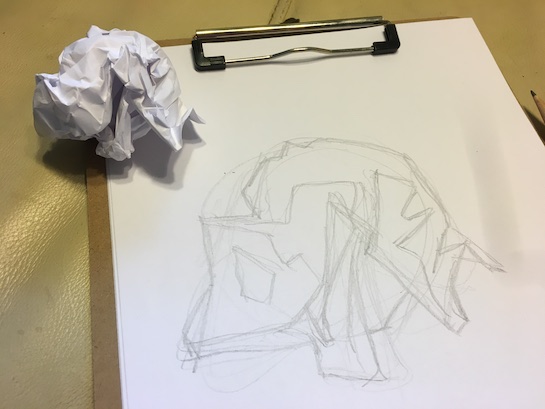
This activity is critical in bringing students to a more advanced level of drawing. Children naturally draw symbolically – for example, by drawing smiley faces instead or realistic faces. A ball of paper can't be reduced to a symbol; therefore, students can’t easily default to a more natural way of drawing it, and must rise to the challenge of drawing what they actually see. There will be a learning curve, it won’t come easily. Remind them of how hard it was to learn how to hold their breath under water when learning to swim, or how to write the alphabet when first learning to write. It improves with practice. Find out who the best drawer is in the class and ask them if they practice. They usually say yes.

Advanced Preparation

  • For this activity, each student will need three to four sheets of copy paper and a pencil. If clipboards are used, a stack of paper can be set up on each clip-board ahead of time.

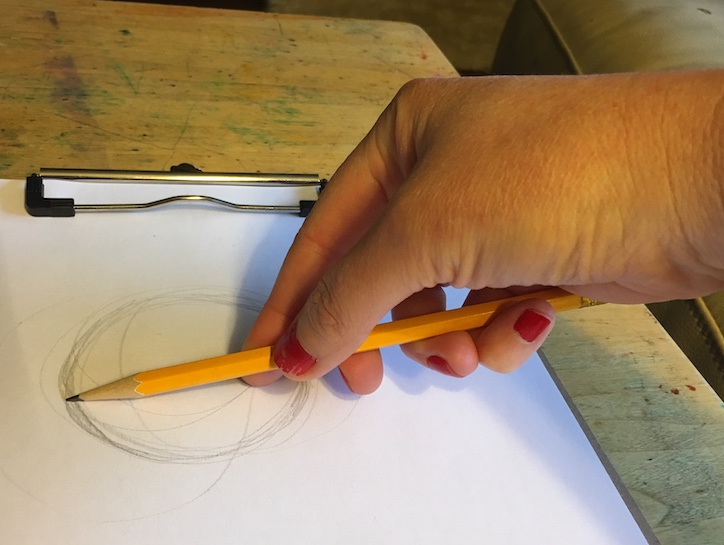
  • The Art Docent will be drawing in front of the students for this activity. Some practice in advance is recommended. Such drawing can either be done on large paper, or on a white board or active board.

Tips & Tricks

  • Advise the students to close one eye when observing the paper ball, so as not to be seeing it through binocular vision. Have them view through one eye and then the other to see how the view of the object is different through each eye. Explain how picking one eye simplifies the process of drawing.
  • Each part of the drawing must be measured against the next part to correct proportion changes.
  • Students often start drawing too small and with a tiny detail. Encourage them to instead, start by filling the entire paper with lightly drawn large shapes that can be changed often until they look realistic.
  • Tell students that as they observe the paper ball, they are making hundreds of decisions about what to include in their drawing, and what to leave out. Their eyes should go back and forth from the ball to their paper constantly.
  • Students who are new to observational drawing may ask “am I doing this right?” It helps to circle through the room as they draw, pointing out how students are approaching the exercise. (“John just drew the whole shape very lightly and is now refining the edges” or “Katie redid the outline 3 times and is erasing the first outline that didn’t look right.”). Remind students that even so-called “failures” are a good thing because that’s how we learn. Drawing from observation is an adult skill that will be quite rewarding throughout their lives if they stick with it.
  • Students can become “stuck” redrawing the same lines over and over because they are afraid of messing up what they already drew, or don't know what to do next. Encourage students to lightly draw new lines near the old ones and keep the best, erase the worst, while also adding smaller details.
  • Sometimes it’s easier to ‘restart’ or ‘start fresh’ than to correct a lot of mistakes. Use your best judgment with regard to time before you advise. Usually in the first 5 minutes you can announce that it’s ok to start fresh on the other side. Don’t waste time erasing the whole thing. Keep it low pressure if students try to save a first draft that they are unhappy with. “The first is the worst, and the rest are the best!"
  • Reassure students that nobody is expecting “perfect” copies of paper balls.

Discussion Points

  • What's so important about drawing from observation? (So that the artist can mentally record the image.) 
  • Why wouldn’t an artist want to draw everything from imagination all the time? (Because an artist doesn’t record perfect images in their imagination at first.)
  • Would you want to draw every line that you see on your wadded ball of paper? (No, just enough to make it look more realistic.)
  • Is a drawing less realistic if details are left out? (Not necessarily. Some details can ‘suggest,’ like the leaves on a tree, bricks in a wall or hair: you don’t need to draw every single one.)
  • How do you decide what details to include? (You include what’s most visually important.)
  • How is observation important to science? (It tells us exactly what’s there.)
  • Can mistakes be useful in a drawing? (Yes, they teach us what to add and what to subtract.)
  • What about in science? (Yes, it tells us what’s true and what was a wrong assumption.)

Reflection Point (Assessment of Learning Objectives)

The goal of this activity is to have students consciously move from drawing symbolically (i.e. happy faces, stick figures) to drawing with more realism. “Draw what you see!”  Success shouldn’t be measured by how perfect the results are, but by the effort that a student puts into following the steps. Stepping out of your ‘comfort zone’ is required to make the leap from childhood drawing techniques to adult drawing techniques. Adult drawers engage in quite a bit of trial and error.

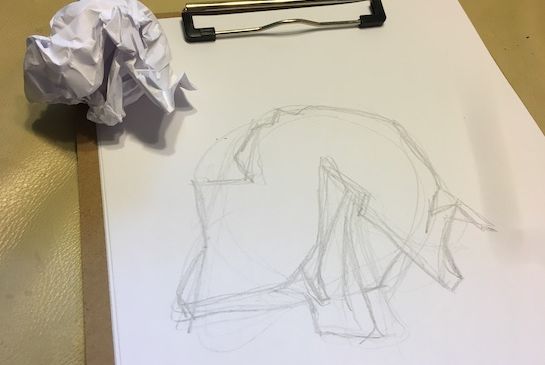
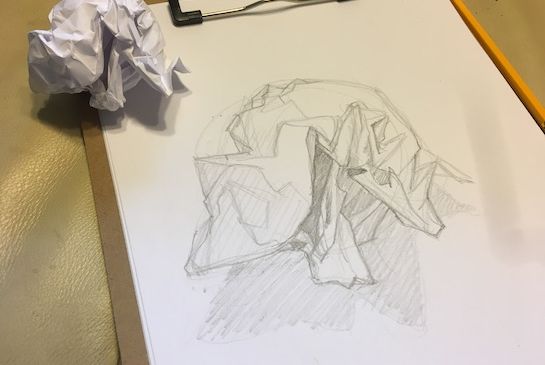
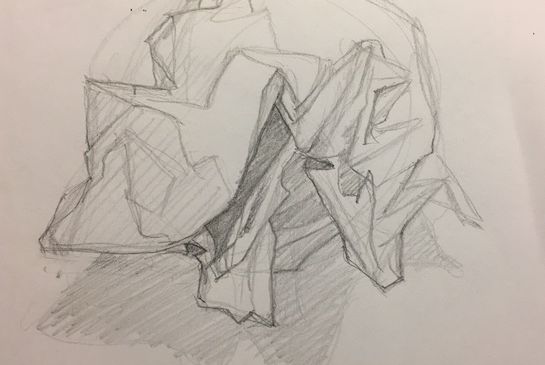
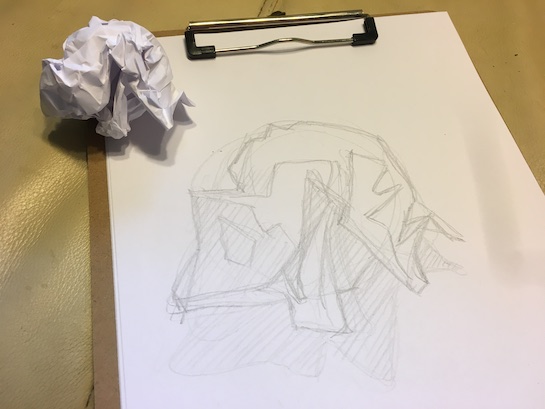
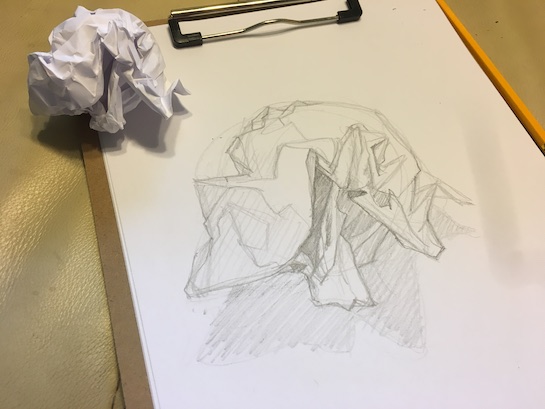
Here are examples of successful and unsuccessful observational drawings:

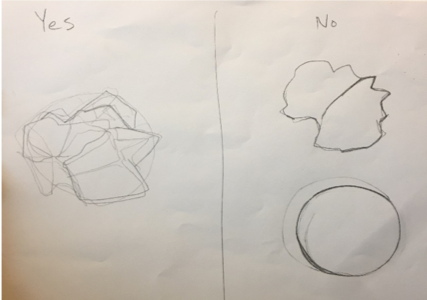
The drawing on the left appears messy, but the extra lines indicate that the student is searching for the correct shapes, including shapes within other shapes. This student has left the “mistakes” visible, which shows that he/she isn't letting perfectionism keep the artist from finding the “correct“ lines. This accomplishes the goal of the lesson. 

On the right, the student drew what they think they saw (not truly observing) and is stuck erasing and redrawing lines. The drawings don’t show much exploration because of the fear of making mistakes. This student may benefit by starting over.

Instructions for Lesson

Post the vocabulary words on the board and explain them carefully. Refer to them often during the lesson.

Each student should have several sheets of white unlined paper and a pencil. The paper can also be on a clipboard and they can sit where ever. Don’t allow them to work on a group drawing or to sit with friends who want to talk. Discourage talking: “You can’t draw and talk at the same time!”

  1. Instruct the students to quickly draw a wadded-up ball of paper, as they imagine it. Give them only one minute to do so.
  2. Have them examine what they drew. Point out that what they tried to do was extremely difficult, because a ball of paper can't be turned into a recognizable symbol – like a human face that can be drawn as a happy-face. Also, no one can record the perfect image of it just with one look. Explain that today's lesson is how to draw from observation, rather than drawing what's already in their minds. Tell them that with this method, they will be able to draw anything in the world they can see.
  3. Tell the class that in order to draw well, they'll learn a new way to hold a pencil.  Under the overhead projector demonstrate the new pencil-grip by setting a pencil down and picking it up from the side. Explain that this loose grip prevents us from bearing down too hard. Practice drawing a simple circle by going around and around until it looks good. Have students repeat.
  4. Have the students lightly wad a piece of paper into a ball. Allow them to wad up the previous drawing if they wish. (By letting them choose to destroy a drawing, you are giving them agency over this process, which helps them to overcome the fear of making mistakes.) Have them place the wadded paper on the desk where they can observe it.
  5. Have them observe the overall form of their paper ball. That 3D form is similar to a sphere, which translates onto paper as a circle. Have the students loosely and lightly draw that circle as large as their paper allows.
        
  6. Look for smaller shapes within and around the circle of the paper ball.  There will likely be a few large triangles, lines or other shapes that stand out. Without erasing any previous lines, lightly sketch those shapes into the drawing. As long as all lines are drawn lightly, there should be no need to erase. “Keeper” lines can be darkened a little more.
  7. Observe the paper ball again, this time looking for smaller shapes within and around the shapes that you’ve already drawn.  Draw them.
  8. The paper ball is made up of shadows as well as shapes. Look for shapes that are in shadow. Fill those shapes with softly-drawn parallel lines, called “hatch marks.”
  9. There’s a shadow being cast onto the table as well. Draw that just like drawing any other shape. It will ‘attach’ to the ball shape but lay horizontally to suggest a table surface. The cast shadow can be very dark if desired.
        
  10. Continue to look for shapes to draw. Some of the lines are more important than others. Decide which of the lines to keep. Refine (go back over them) and darken the important lines – but not all of them!
  11. Additional hatch marks can be added to show that some of the shadows are darker (deeper pockets) than others
  12. There is no obvious completed state with this sort of drawing. It's either when time runs out or the artist decides it is done.
        
    This exercise can be used as the basis for a finished piece, for example by drawing the image on watercolor paper and finishing it with waterproof marker and watercolors.
     

References & Attributions

Drawings by Michelle Clay. Special thanks to Nicholas Palermo at the Rhode Island School of Design. YouTube: Basics #60-Anyone can draw from observations with these steps (charcoal drawing).

Notes for Educators

21st Century Thinking Skills
Thinking flexibly, persisting, creating, innovating, listening with empathy, taking responsible risks, reflecting, observing, making connections, visualizing, sequencing, comparing/contrasting, determining main idea, finding evidence, problem solving, determining point of view, cause and effect, fact and opinion, decision making, analyzing, evaluating.

WA State Learning Standards
(VA:Cr1.2.5) a. Identify and demonstrate diverse methods of artistic investigation to choose an approach for beginning a work of art.
(VA:Cr2.1.5) a. Experiment and develop skills in multiple art-making techniques and approaches through practice.
(VA:Cr2.2.5) a. Demonstrate quality craftsmanship through care for and use of materials, tools, and equipment.
(VA:Cr2.3.5) a. Identify, describe, and visually document places and/or objects of personal significance.
(VA:Re7.1.5) a. Compare one's own interpretation of a work of art with the interpretation of others.
(VA:Re8.1.5) a. Interpret art by analyzing characteristics of form and structure, contextual information, subject matter, visual elements, and use of media to identify ideas and mood conveyed.
(VA:Cn10.1.5) a. Apply formal and conceptual vocabularies of art and design to view surroundings in new ways through art-making.

Arts Integration Opportunities
Science: Record visual and factual date in journals when studying plants, trees, rocks etc.
Language Arts: Describe how perseverance helped the student overcome a new challenge and become proficient in a new skill.
Spelling: the vocabulary words.

Please note:  These lesson plans are intended for non-profit use only. Use of these plans for commercial purposes should give attribution to the Issaquah Schools Foundation and be accompanied by a nominal donation at www.isfdn.org/donate. Thank you.

Donate Now

Artistic Support Reference Materials

Loading...
Loading

Fueling Success for Every Student, Every School