Context (History and/or Artists)
The indigenous people of Australia are known as Aboriginal people. Their dialect has never had a written language so to share their stories they would paint it on the bark from trees, cave walls, and rocks. This is known as Aboriginal art. Aboriginal art uses dots, lines and symbols to tell the story of the past. Aboriginal people would use crushed up natural materials such as berries, shells, clay and charcoal to paint stories of their journeys (also known as Dreamtime stories). Symbols were also used in order to show the presence of different things or objects that existed around them. Aboriginal artists created their works based on how the land was created. Their subject matter was patterns and animals. Sometimes these were not long stories but more like road signs, like the ones we have to remind us that there are deer nearby; however, it was not deer they were warning others of, it was snakes, spiders, crocodiles and kangaroos. Over time, the stories of other people’s journeys have been passed down through the generations as they were told by the elders.
To learn more about the arts of indigenous peoples, please visit the Issaquah Schools Foundations Indigenous Arts Reference Page.
Advanced Preparation
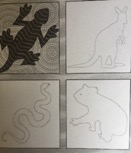
- Prepare animal templates. Choose 4-6 Australian animals. Cut templates out in tag board. Have about 10 -20 templates in different sizes prepared for students to use.
- Order a few books from the library on Australian Aboriginal art and storytelling.Some recommendations are: Possum and Wattleby Bronwyn Bancroft (good for Australian animal ideas), Dreamtime Aboriginal Stories by Oodgerog, Sun Mother Wakes Up the Earth by Diane Wolkstein, and Original Art of Austrailia by Carol Finley.
Tips & Tricks
- Paper sizes can vary but should not be too big. The dot-painting part of the project can be tedious for some students. Having a smaller sized paper can be easier. Another option is to order brown sulfite paper in a medium weight.
- This lesson works best in this order. It is designed so the background for the art has an opportunity to dry before they glue the animal to the background.
- First, generally discuss Australian Aboriginal art and show examples using a library book or pictures.Tell the kids about animals that are native to Australia. Have kids think about an animal they may want to choose.They should choose an animal that is meaningful to them and consider how that animal will fit onto their tag board.
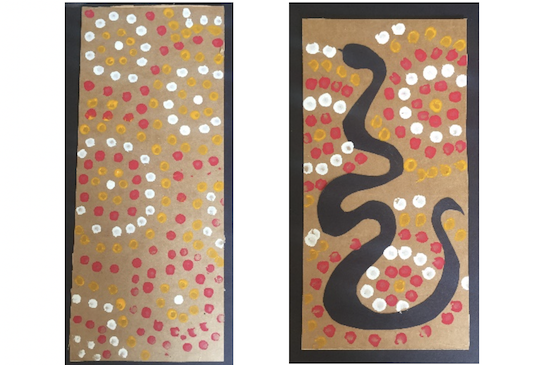
- Then create background with painting dots.Remind them that their dots will tell a symbolic story. The dots represent symbols and have meaning.
- Next read an Australian Aboriginal story (again, this is so their background can dry).
- Then have kids choose animal they want to add to their background. Trace on black paper and cut out. Glue on background.
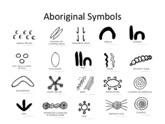
- Finally, if time allows, choose a symbol to add on their animal with the Q-tips and paint.
Discussion Points
- Symbolism: Aboriginals used designs and symbols to share information. Symbols in their work have meaning. Dreamtime stories were a cultural way of storytelling.
- Cultural differences: Aboriginals used the natural environmental to create their artwork. They used bark and cave walls as surfaces to draw on. They used berries, charcoal and other environmental materials to create color in their art.
Reflection Point (Assessment of Learning Objectives)
- Can the student tell me about Australian Aboriginal art? Students will explore and describe how specific attributes of visual artworks reflect their cultural and historical contexts.
- Did the students use a variety of designs, patterns, and symbols to create meaning in their artwork?
- Did the students use a color palate that reflects the knowledge of Australian Aboriginal art? Can they explain where the colors came from and why the color palate of Australian Aboriginals is yellow, red, black, brown, white?
Instructions for Lesson
- Introduce the lesson - locate Australia on a globe or map. Discuss the native people in the Pacific Northwest and compare them to Australian Aborigines.
- Show an example of the art the class will be doing. The concepts are symbolism, design, color, storytelling and animals.
- Tell the class the overall plan for the lesson. First, they will create the background, let it dry while you read a book, next create or trace an animal then add the animal to the background. Last, they’ll put a special symbol on their animal. Show examples of symbols. Ask students to think about the animal they want to use and design they want to create.
- Show them the book. Just show the pictures. Invite curiosity and ask them questions: What do they notice about the designs? What colors do they see? What do they think the designs represent?
- Teach the lesson. First show how to make the background. Have them use white to make 4 or 5 dots on their page. They will be making concentric circles around the dot and if they make too many dots the background looks a bit random.
- Next, around the white dot, choose a different color and make a painted dot-circle around the initial white dot. Go around each of the white dot making a complete circle.
- Choose a different color and make a circle again around the last color. Soon the circles get larger and you will bump into another circle. Then make your dots follow the random design. Keep the color the same until you go off the paper. Then, switch colors. Fill up the entire background with the dot design.
- After most of the class is finished, have the kids come to a reading spot (or stay at their desks) to read the book. Read the book and discuss the story. Discuss the concept of Dreamtime stories. While reading, students should not touch their artwork (so it can dry).
- Have the kids choose an animal. Trace the animal on black paper. Cut it out and glue on the dot background.
- Decorate the animal with a different dot pattern a special symbol, or they can leave it black.
- If they are done early they can read a book or create another background with dots.
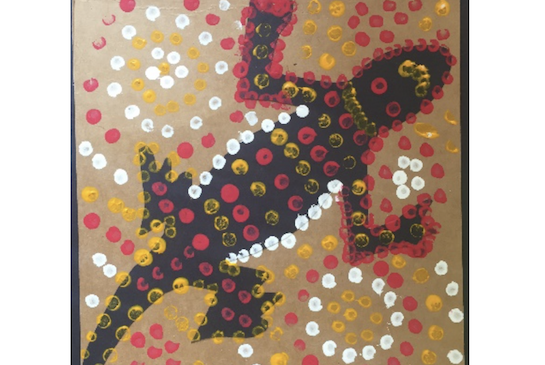
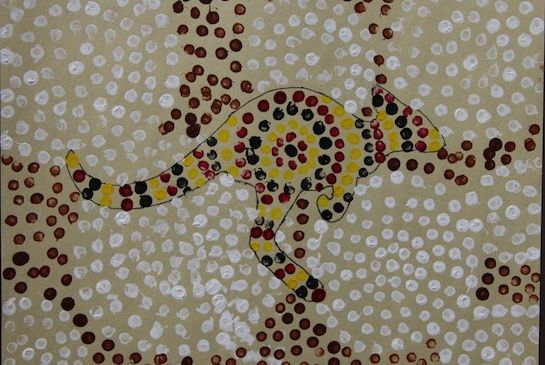
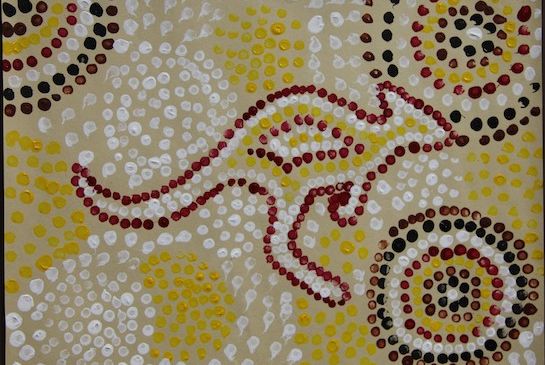
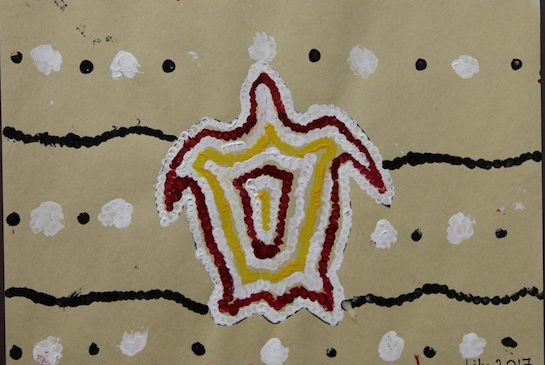
Examples

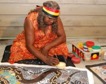
Aboriginal woman creating artwork.
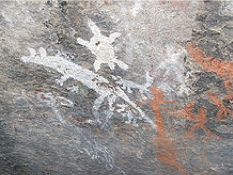 Aboriginal Namadgi National Park featuring a Kangaroo, Dingoes, Echidna or Turtles.
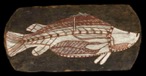 Bark painting of a barramundi. Western Arnhem Land, about 1961.
References and Attributions
Lesson written by Shelly Vollstedt, adapted from Kate Owen Gallery website.
Notes for Educators
21st Century Thinking Skills
Decision Making: choosing from alternatives. Students make personal choices of which designs, symbols, and animal they will choose for their individual art work.
Making Connections: Connecting to new information with schema. Connecting the knowledge from studying Northwest Native Americans to Australian Aboriginals.
Observing: Using your senses to learn about something in detail. Looking at Aboriginal art and listening to an Aboriginal story to find meaning and connect to the student’s own artwork.
WA State Learning Standards
(VA:Cr1.2.3) a. Apply knowledge of available resources, tools, and technologies to investigate personal ideas through the artmaking process.
(VA:Cr2.1.3) a. Create personally satisfying artwork, using a variety of artistic processes and materials.
(VA:Pr6.1.3) a. Identify and explain how and where different cultures record and illustrate stories and history of life through art. Relate artistic ideas and works with societal, cultural and historical context to deepen understanding —develop a work of art based on observations of Australian Aboriginal art.
Arts Integration Opportunities
Writing: Students can write a Dreamtime story based on the symbols and animal they chose for their artwork.
Please note: These lesson plans are intended for non-profit use only. Use of these plans for commercial purposes should give attribution to the Issaquah Schools Foundation and be accompanied by a nominal donation at www.isfdn.org/donate. Thank you.
Donate Now