Context (History and/or Artists)
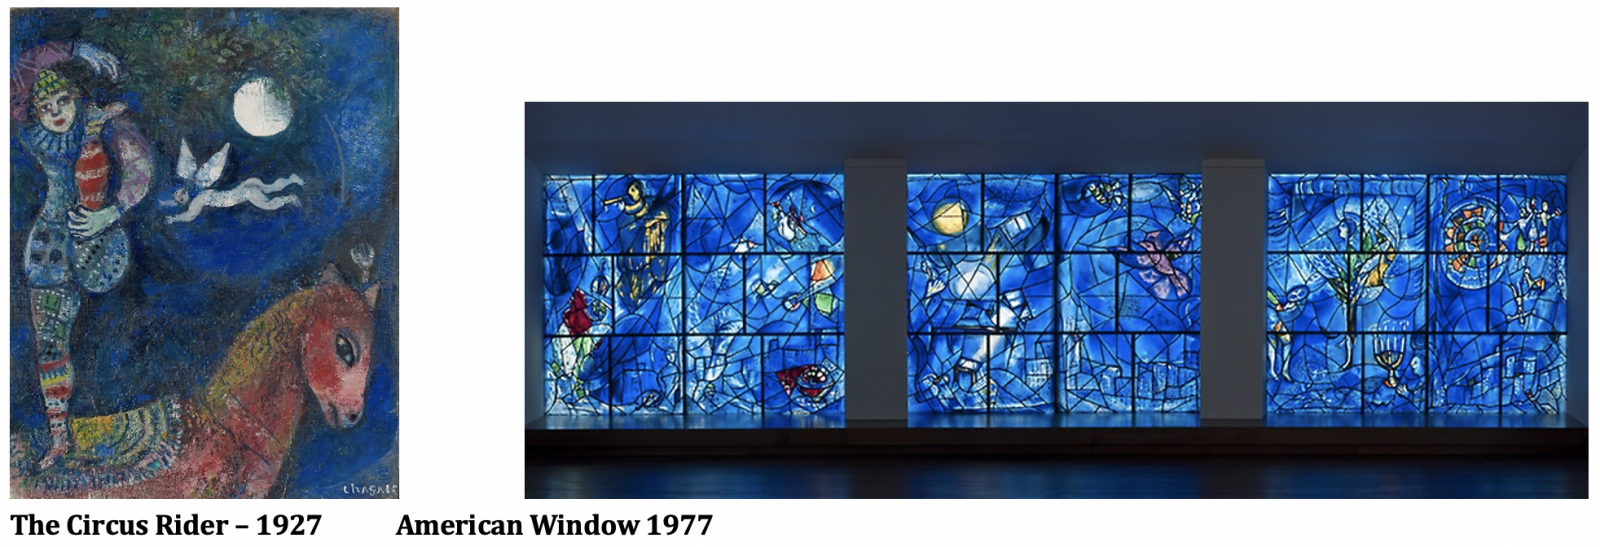
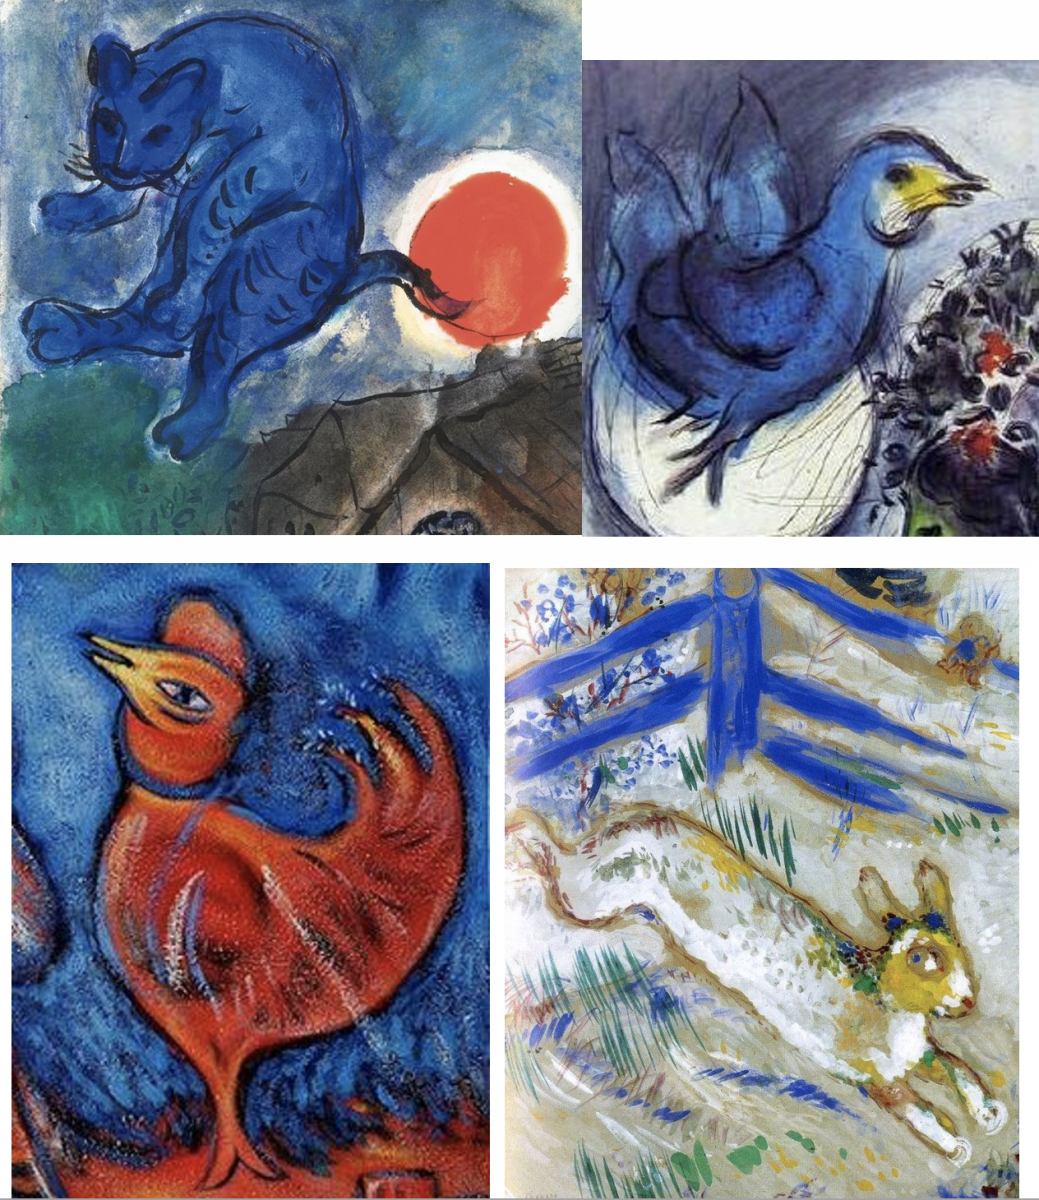
Marc Chagall ~1887-1985 was a French-Russian, Jewish artist known for painting on glass. Many of his paintings had a religious overtone as well as dream like scenes. He was best known for his use of vibrant color. He often used only two or three colors, often not toned down by white or shaded by black, to create his vibrant and vivid paintings. Later in his artistic career he carried this same colorful style into works of art using stained glass.
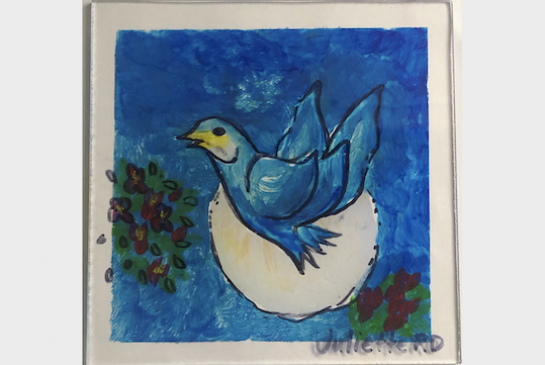
Chagall’s work often included dark outlines with lighter, bright colors inside. That is how we will work with the enamel on our acrylic. His work is a great example of the use of pure hues (few tints or shades) of high intensity.
Advance Preparation
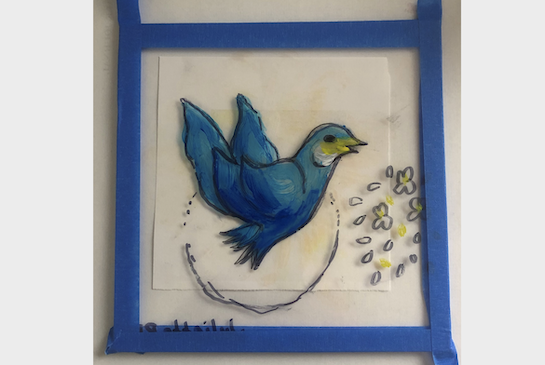
- Apply painters’ tape to all edges of the acrylic so that students have a place to hold onto while working. This will be removed when the piece is mostly dry.
- Create an example.
- Choose one or all of the animal images for the students to pick from (Animal templates (printable) included with lesson).
- Copy images for students to trace (can be provided Animal templates (printable) or any simple, easy to copy, line drawn images in black and white).
- Mix acrylic paint with acrylic medium to make it more transparent. Use 3 parts acrylic and 1 part acrylic medium.
- Each student will need newsprint on their desk, an image taped to their desk, access to acrylic colors, a paper towel & water, a paper plate as a pallet, a permanent black marker and a wet wipe.
Tips & Tricks
- Clear acrylic sheet can be purchased at Tap Plastics in Bellevue. Or if you ask for a donation, for a school art program, you may be able to get clear scraps in assorted sizes.
- Remember to paint to the edge of the tape, not over it, so there is someplace to hold onto.
Discussion Points
Look at some of Marc Chagall’s painted windows paying attention to:
- How Chagall’s animals are loose and playful (close-ups shown below).
- The contour lines around the figures & animals, these are the contour lines the students will follow with their permanent markers.
- Point out the details, these are the details they will add with their permanent markers.
- Find the focal points. Why are they focal points?
- Find highlights (brighter pops of color that draw your eye).
- How did Chagall paint his backgrounds? What textures did he create? How did Chagall use his brush to get those marks?
Reflection Point (Assessment of Learning Objectives)
Did the students paint on the ‘back’ of their acrylic? Did they start with the details, add highlights and then textures to the background?
Instructions for Lesson
- Set up space before students arrive with:
a) newsprint to protect the work surface
b) write the vocabulary words and definitions on the board
- Students should roll up their sleeves and tie back any hair that may fall to their desk. Acrylic paint is quite permanent, and we want to keep it off of their clothes.
- Students will choose an image to trace for their painting.
- Tape this image down to their desk so it can’t move around.
- Peel off the plastic wrap from the acrylic sheet. It should be on both sides then dust off and lay flat.
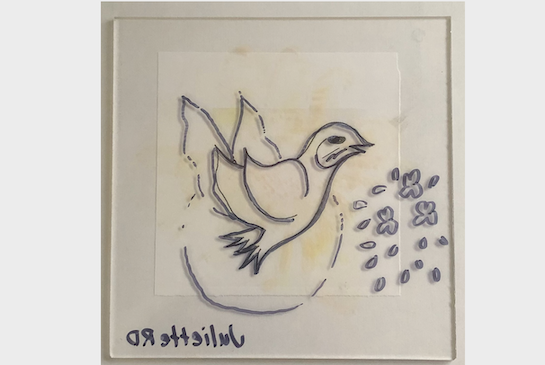
- Students should write their name on the bottom right hand corner of the acrylic sheet with a permanent marker. Then turn the sheet over so that their name appears backwards.
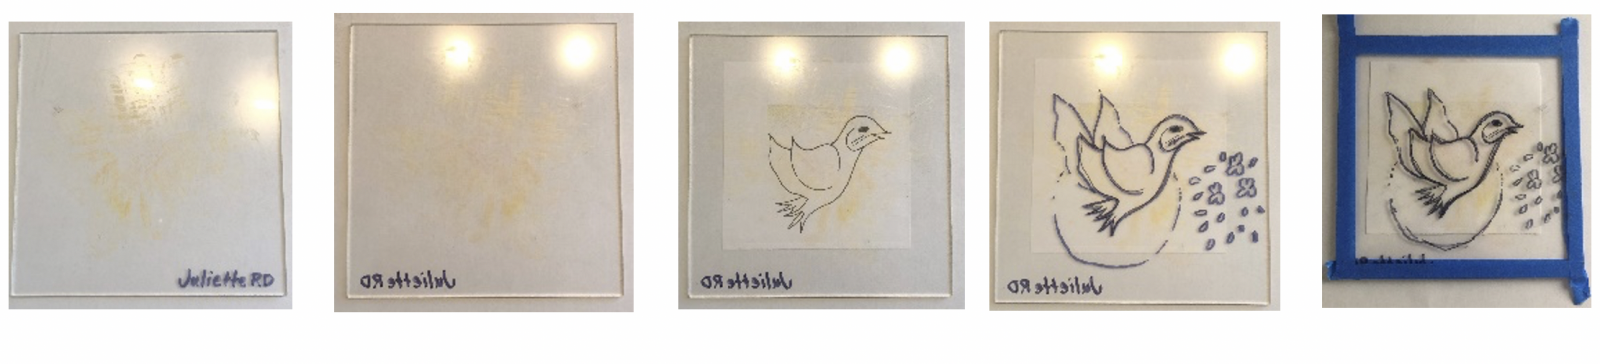
- Demonstrate tracing their contour lines with the permanent marker. This creates your foreground. When we work backwards, we put the details in first.
a) Trace the image with permanent marker including the details, like eyes, smiles, noses, whiskers or other details they want to include.
b) They don’t have to put in everything, this is where they can exercise creative choices, this is their piece.
- As the students are tracing their contour lines set up the paint and water.
- Have the students put down their pens to watch your demonstration. This will also let the marker dry before they come back to it with paint.
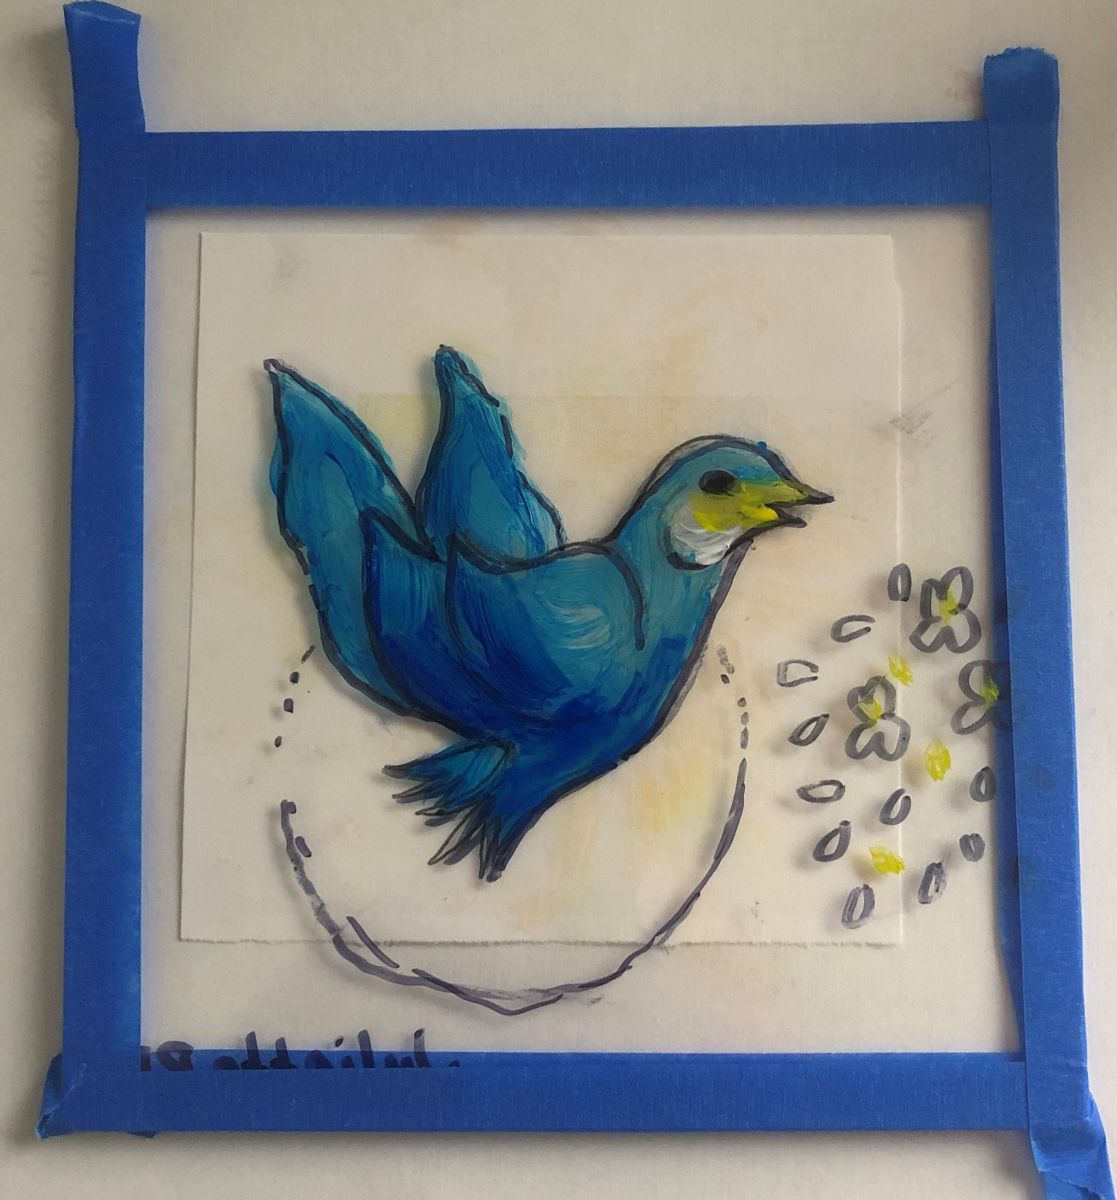
- Demonstrate how to put down a light coat of acrylic paint, so that it is somewhat transparent and dries faster.
a) Notice that the once you put a layer of paint down, going over it just moves it around. It needs to dry a touch before putting on another color or coat.
b) We want these to be somewhat transparent like Chagall’s painted windows.
- Demonstrate cleaning your brush in the water and dabbing it on a paper towel to get it ready for a new color.
- Demonstrate looking at your color image to find the focal points and highlights in color. What is light, what is dark?
a) Remind students that when painting in reverse the details go down first, that is the marker.
b) Then the mid ground, which are the colors in their colorful details and patterns in the animal they have chosen.
c) If there are focal points, bright areas that draw your eye, those should be painted now.
d) Next the colorful details in the background.
- Start in the center and work your way out to the edges but not over the tape.
- Once they have filled in their animal, check the front to see if the coverage is good, do they have color everywhere they want it?
- Get everyone’s attention and demonstrate looking at their colored image for the background colors and textures. How did Chagall use his brush to get those marks? They can practice on their plate. Their brush strokes will all show through with the thinned acrylic.
- Students can fill in the background with color and texture. Remembering to start with highlights and fine details.
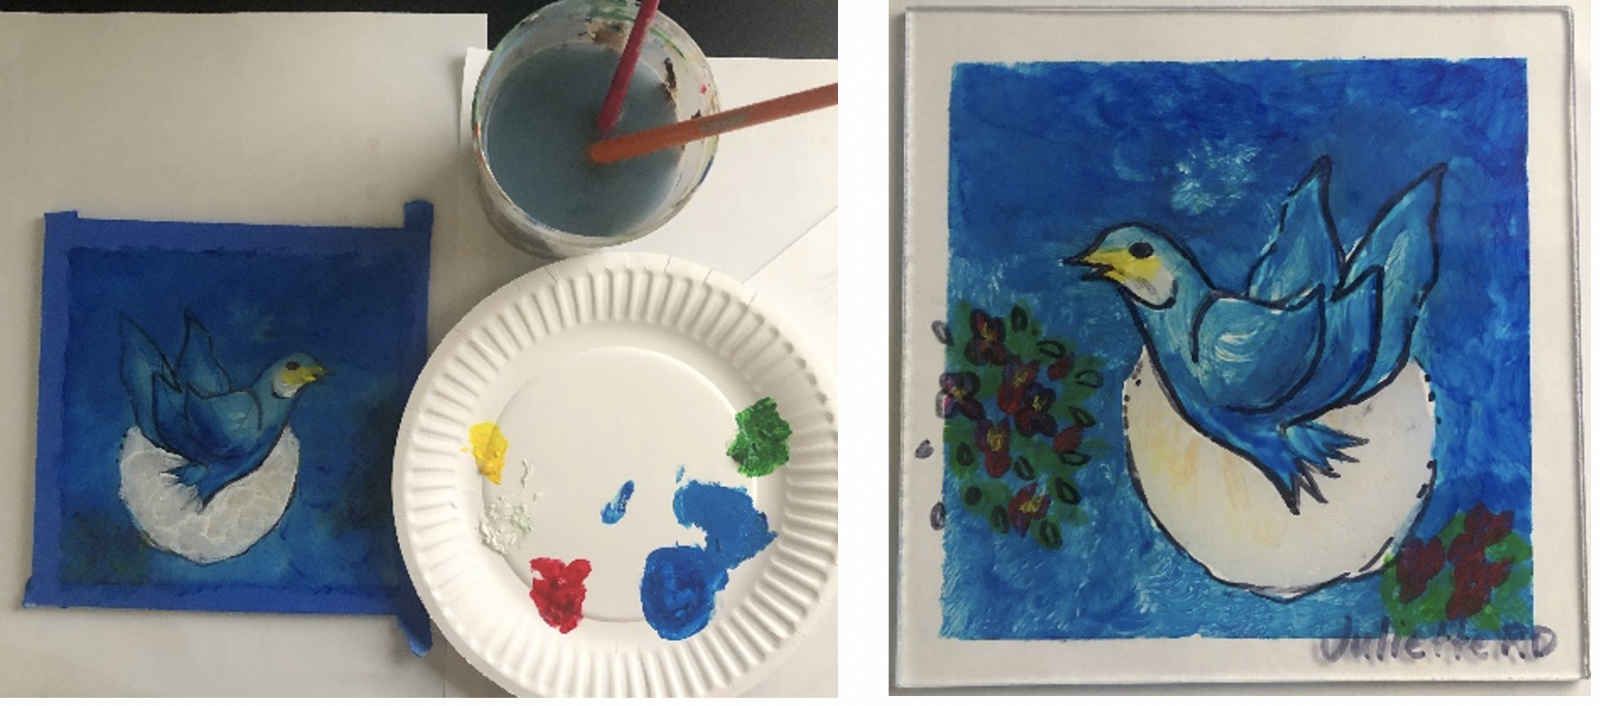
- Once the student is finished use the wet wipe to clean up the front of the acrylic sheet.
- Once the paint is no longer sticky remove the masking tape from the edges. This will create a clear boarder around their work.
- Let dry.
Examples of Chagall's Animals
References and Attributions
Lesson written by Juliette Ripley-Dunkelberger. Images from Art Institute of Chicago’s free library of images.
Notes for Educators
21st Century Thinking Skills
Visualizing, Comparing & Contrasting, Decision making, sequencing: Arranging things in an order. Reverse glass printing has a unique sequence. If one does not follow the sequencing pattern, the artwork will not look as desired.Predicting: Determining what will happen next. Cause and Effect: Recognizing actions and their reactions. For this artwork to turn out and be successful, children need to think ahead, plan, and execute in a determined and thoughtful order.
WA State Learning Standards
(VA:Cr2.1.4) a. Explore and invent art-making techniques and approaches.
(VA:Cr3.1.4) a. Revise artwork in progress on the basis of insights gained through peer discussion. (This artwork requires students refine their work as they create).
(VA:Re7.2.4) a. Analyze components in visual imagery that convey messages. (Students will respond to the artist Marc Chagall).
Arts Integration Opportunities
Writing: Have the students write an informatory or explanatory writing piece. The writing prompt can be: Write about the process of reverse glass painting. Because this art process is a unique way to paint, the writing will be a both an art assessment as well as an opportunity to extend into literacy.
Please note: These lesson plans are intended for non-profit use only. Use of these plans for commercial purposes should give attribution to the Issaquah Schools Foundation and be accompanied by a nominal donation at www.isfdn.org/donate. Thank you.
Donate Now