Line: the flat path of a dot through space used by artists to control the viewer’s eye movement; a long narrow mark or stroke made on or in a surface; a thin mark made by a pencil, pen, or brush. The repetition of lines (and/or shapes) is used to create texture, pattern, and gradations of value. The variety of directions and shapes that a line may have: vertical, horizontal, diagonal, curved, zigzag.
Pattern: the repetition of the elements of visual arts in an organized way; pattern and rhythm are both created through repetition.
Curved: a continual bend in a line.
Diagonal: slanted line, or lines that connect two opposite corners of a square.
Horizontal: a line that is parallel to the horizon.
Spiral: a line that gradually winds around and recedes from a central spot.
Vertical: the up-and-down orientation of a line.
Zigzag: a line which makesabrupt alternate right and left turns.
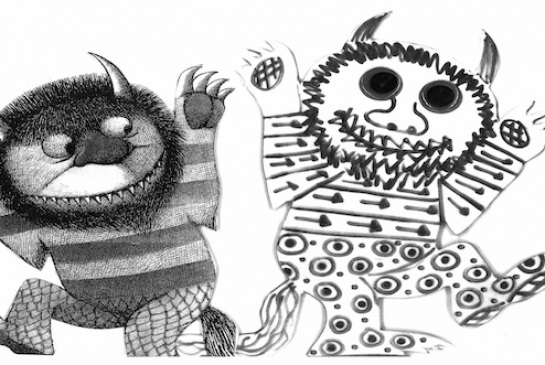
After reading Maurice Sendak’s book, Where the Wild Things Are, students will create a monster puppet. Students will observe how Maurice Sendak created his visual interpretation of what a monster could look like. He chose facial features and a basic human form with animal details then added human clothes or imaginary animal skin.
Make sure to have a copy of Where the Wild Things Are by Maurice Sendak for your lesson.
Print a pattern sheet for students to refer to.
Print a simple human emotions sheet.
Trace and cut a Wild Thing shape for each child. Draw a line to separate the pants from shirt and lines for cuff.
Read the story Where the Wild Things Areby Maurice Sendak.
Point out the design choices Maurice Sendak made.
Talk about how things like scales and stripes could add interest to the monsters.
Talk about using details to show emotion. The monsters could be happy, sad, shy, angry or any emotion. Refer to your emotion sheet for ideas.
Students will observe the design choices Maurice Sendak made when designing his monsters in Where the Wild Things Are.
Students will make design choices of color, pattern facial features to create their own monster and give them a back story.
Artists often try and tell a story with a work of art which is probably why people often say, “a picture paints a thousand words.”
Read Maurice Sendak’s book Where the Wild Things Are. Talk about what clues the pictures offer to describe what is happening: facial expressions, use of colors, lines and patterns. The students will create their own Wild Thing puppet. Each Wild Thing has its own personality and “story.” We add interest by incorporating at least 3 different patterns in our designs.
Lesson written by Rebecca Schwenk. Lesson inspired by Maurice Sendak’s book Where the Wild Things Are.
21st Century Thinking Skills
Thinking flexibly, persisting, taking responsible risks, observing, visualizing, sequencing, finding evidence, decision-making.
WA State Learning Standards
(VA:Cr1.1.K) a. Engage in exploration and imaginative play with materials.
(VA:Cr1.2.K) a. Engage collaboratively in creative art-making in response to an artistic problem.
(VA:Cr2.1.K) a. Through experimentation, build skills in various media and approaches to art-making
(VA:Cr2.2.K) a. Identify safe and non-toxic art materials, tools, and equipment
(VA:Re7.1.K) a. Identify uses of art within one’s personal environment.
(VA:Re8.1.K) a. Interpret art by identifying subject matter and describing relevant details.
(VA:Cn11.1.K) a. Identify a purpose of an artwork.
Please note: These lesson plans are intended for non-profit use only. Use of these plans for commercial purposes should give attribution to the Issaquah Schools Foundation and be accompanied by a nominal donation at www.isfdn.org/donate. Thank you.
Fueling Success for Every Student, Every School