Context (History and/or Artists)
Printmaking involves the creation of a master plate from which multiple images are made. The artist chooses a surface to be the plate. The 4 main types of printmaking are woodcuts, lithography (stone), serigraphy (stencil on fabric) and intaglio (metal). In this case it is a raised-relief surface that accepts ink onto the upper level similar to a stamp.
Advanced Preparation
Prepare trays or paper plates with 3-4 colors of paint on them (primaries, white, etc).
Tips & Tricks
- To make more colors available, students can share: some with primary, some with secondary paint.
- Don’t wash between stamping, use paper towels to wipe off excess paint on gadgets.
Discussion Points
- Explain that all prints begin with a ‘master’. Artists spend most of their time preparing it to produce multiple copies that can be printed quickly and inexpensively. In this way a work of art can be seen by more people and cost less money.
- Explain the basics of printmaking using an art stamp and stamp pad, pointing out that the uppermost parts of the stamp touch the inkpad to transfer the color to the paper, assisted with pressure. Handprints and fingerprints are another example of this process.
- Review basic geometric shapes and the concept of patterns. When talking about a shape, hold up a simple paper square and ask students what comes to mind. (House, box, block, baseball diamond, etc.) Repeat this with a rectangle, triangle and circle. The more ideas generated, the better.
- Show works of art or photos in which the imagery can be broken down to basic geometric shapes. Picasso, Braque, and Claude Manet all abstracted images to simpler geometric shapes.
Reflection Point (Assessment of Learning Objectives)
Students will:
- Consider shapes as components/building blocks of imagery.
- Create a picture using stamped shapes.
Instructions for Lesson
Set up by preparing the trays with paint and displaying the photos or art work you will be referring to. Write the definitions of elements and principals mentioned above on the whiteboard.
- After going through the discussion points, gather students around a table. Show them the way the stamp works: press it in the paint to get paint and then press it on a piece of paper. Ask them how the paint was able to come out in the same design that was on the stamp. (only the shape the edge made touched the ink). Repeat stamping to ‘build’ a new simple image.
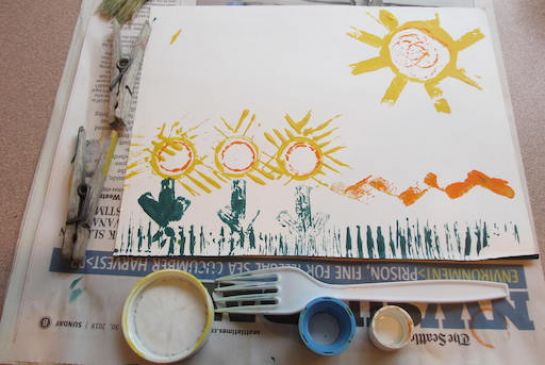
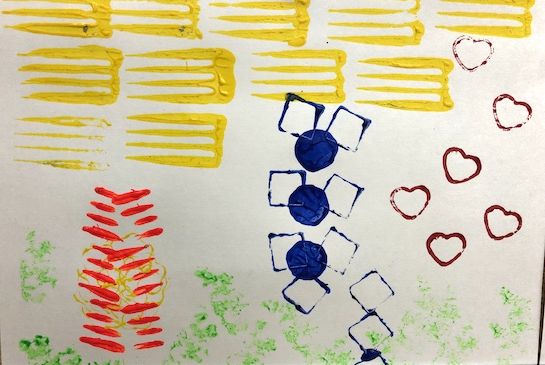
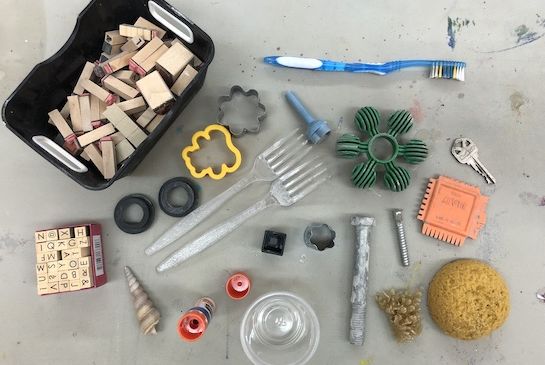
- Introduce the gadgets and the paint tray. Examine the ends of the gadgets to be colored and ask what the shapes are.
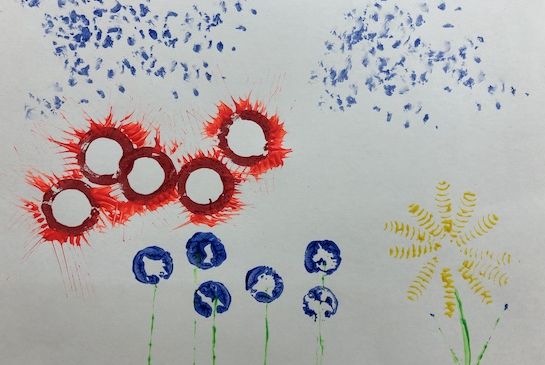
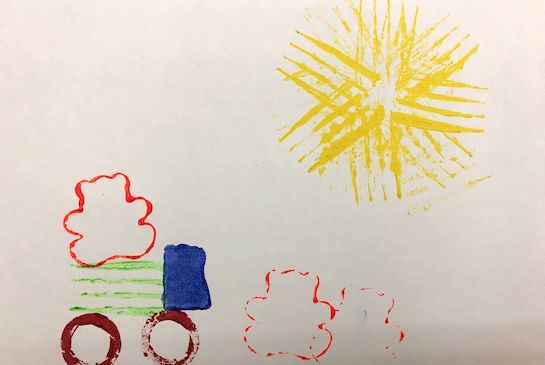
- Show how to stamp with it & make some simple images such as a sun or a line of mountains, or grass by repeating the shapes.
- Keep your images open-ended, make more than 1 on the same paper. Since this needs to be the students’ invention, there needs to be either no one subject to show them (which will only result in them copying you), or many subjects for them to choose from.
- Send them back to their desks and distribute the trays and gadgets. Let them experiment on scrap paper.
- Pass out the 9”x12” paper and ask them to ‘make a picture’. They are now to be allowed to make whatever comes to mind. If they finish quickly, give them more paper. This is about process, not product! Hopefully there will be a good picture made by each student. If any students ‘can’t’ build an image, don’t insist. Give them the option to make a ‘design’ (non-representational). This process will help them figure it out.
- Leave all work to dry overnight. If time permits, hold them up and talk about the shapes used and the new images made.
References and Attributions
Lesson written by Cynthia Moring.
Notes for Educators
21st Century Thinking Skills
Thinking flexibly, creating, innovating, taking responsible risks, reflecting, making connections, visualizing, problem solving, cause and effect, decision making, evaluating.
WA State Learning Standards
(VA:Cr1.1.K) a. Engage in exploration and imaginative play with materials.
(VA:Cr1.2.K) a. Engage collaboratively in creative art-making in response to an artistic problem.
(VA:Cr2.3.K) a. Create art that represents natural and constructed environments.
(VA:Cr3.1.K) a. Explain the process of making art while creating.
(VA:Re7.2.K) a. Describe what an image represents.
(VA:Re8.1.K) a. Interpret art by identifying subject matter and describing relevant details.
Please note: These lesson plans are intended for non-profit use only. Use of these plans for commercial purposes should give attribution to the Issaquah Schools Foundation and be accompanied by a nominal donation at www.isfdn.org/donate. Thank you.
Donate Now