Color: an element of visual art; the visible range of reflected light. Color has three properties: hue, value, and intensity.
Line: a long narrow mark or stroke made on or in a surface; a thin mark made by a pencil, pen, or brush. The repetition of lines (and/or shapes) is used to create texture, pattern, and gradations of value.
Shape: an element of visual arts; a two-dimensional (flat) area enclosed by a line.
Texture: an element of visual arts; the portrayal of the quality of a surface by using drawing techniques to create texture and patterns, such as stippling, hatching, cross hatching, scribbling, broken lines, and repeating lines and shapes; actual texture is how something feels when touched; visual texture (also called simulated texture) is how something appears to feel.
Collage: a way of making a work of art by gluing different objects, bits of paper, pictures, fabric, materials, and textures to a surface.
Background: the area of an artwork that appears farthest away on a picture plane, usually nearest the horizon.
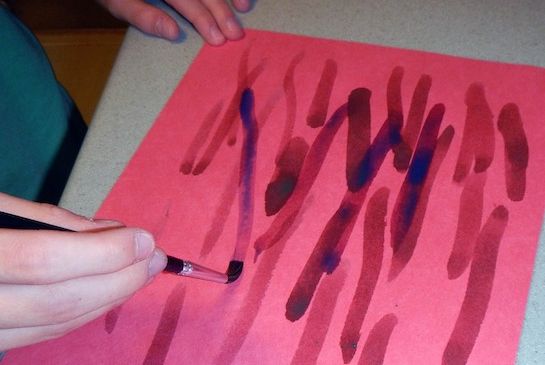
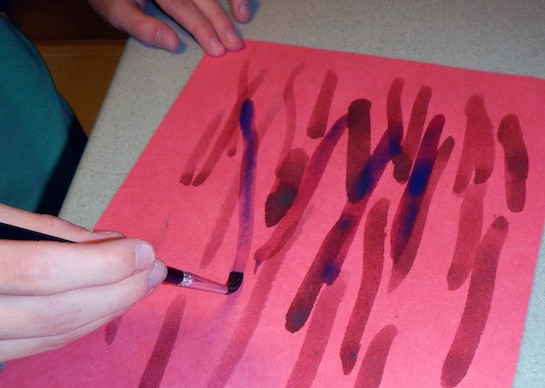
Streaking: creating long dashed lines.
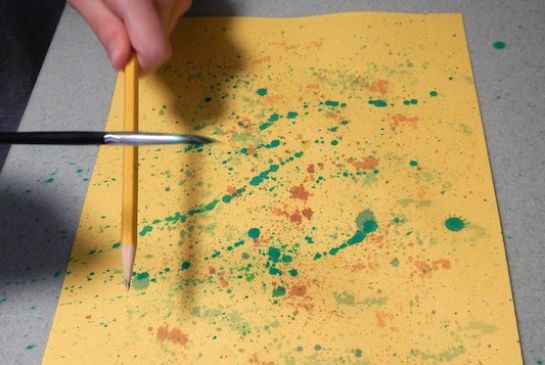
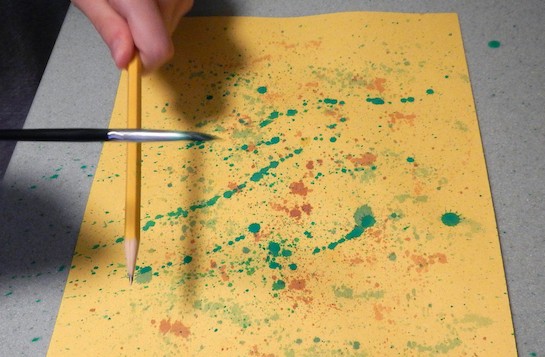
Splatter: a dotted or spotted random pattern created by flicking paint from a toothbrush or tapping paint brushes.
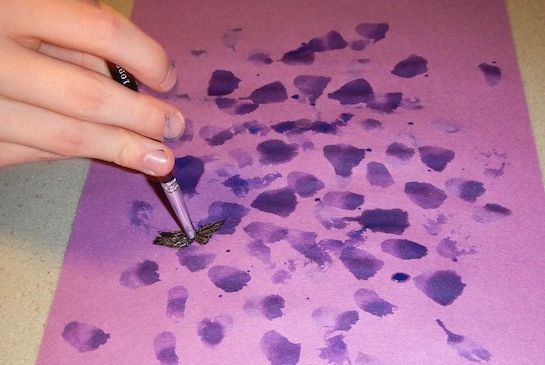
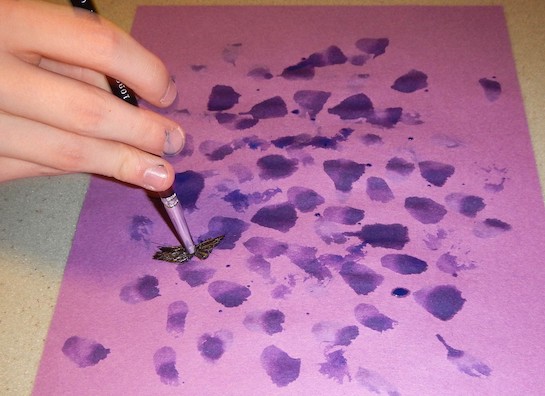
Dab: lightly touching the paper with the paint brush quickly to create a random blotched appearance.
Spiral line: a line that gradually winds around and recedes from a central spot.
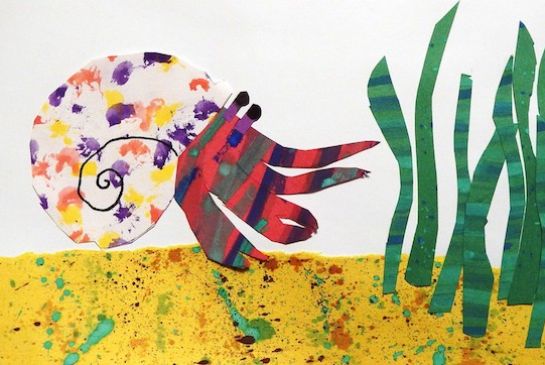
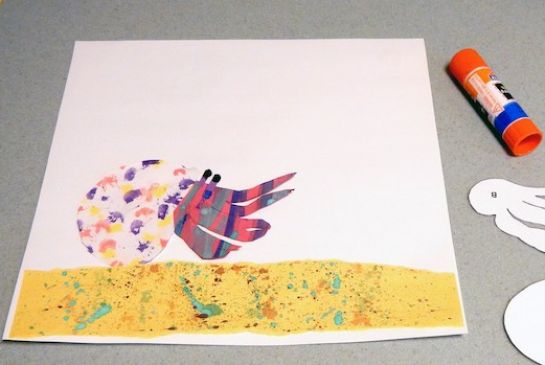
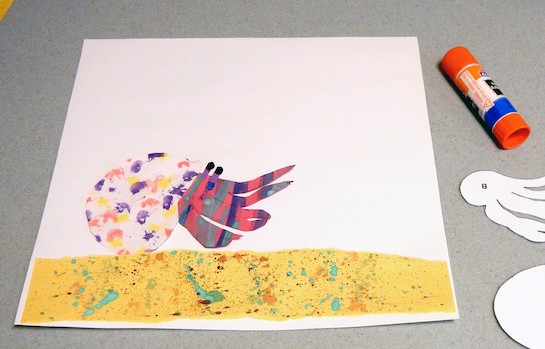
After reading A House For Hermit Crabby Eric Carle, create a new home for the hermit crab in the style of Eric Carle on paper.
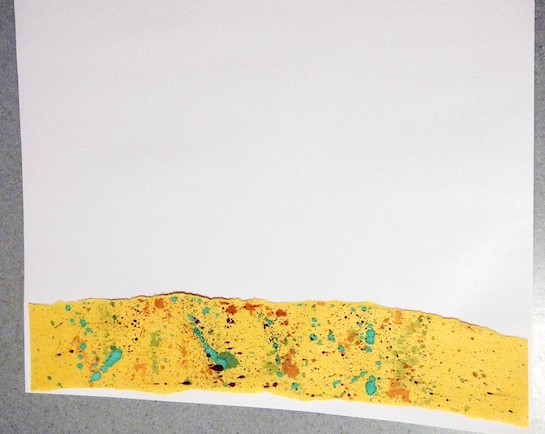
Read the story A House for Hermit Crab written and illustrated by Eric Carle. Talk to the students about how Eric Carle makes his pictures. Go back through the book looking at each page and talk about the pictures. What simple shapes (circle, square, rectangle, triangle) do they see in the starfish, sea urchin, coral, etc.? Identify the colors of the parts on the page. What color paper did Eric Carle use to make the paper to create the ocean floor? What colors did he splatter on it to make it look sandy? How did he tell the story using pictures? Do the pictures match the story?
Did the students use three painting techniques to create the papers?
Display the finished artwork. Compare and contrast how students used lines, shapes, and color in their design.
Can students tell a story about their artwork?
Visit 1: Painting Papers
There are many ways Eric Carle puts paint on paper: wet on wet, dry brush, stamp printing, spatter painting, textures brayers and crayon resist rubbings. This lesson will focus on 3 methods: splatter, dabbing and streaking. Take the students through each painting process all together, demonstrating one technique at a time.
Streaking
Red paper streaked with dark colors (greens and blues)
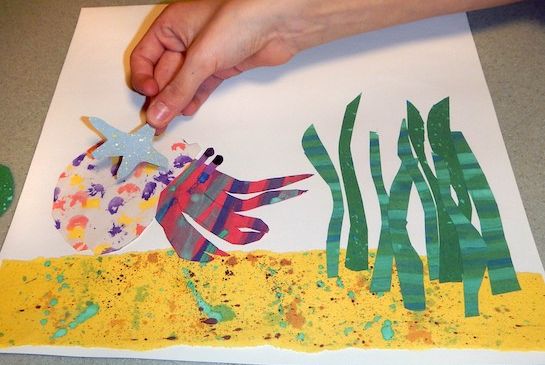
Green paper streaked with greens.
Splattering
Yellow paper splattered with greens and brown
Green paper splattered with greens and blues
Blue paper splattered with white and yellow
Purple paper splattered with black and blue
Dabbing
Light grey or white paper dabbed with yellow, red and purple
Purple paper dabbed with black and blue
Visit 2: Assembling the Collage

Carle, Eric. A House For Hermit Crab. Picture Book Studio, 1991. Print.Lesson by Donna Gelinas, Collage Eric Carle: A House for Hermit Crab. Lesson written by Rebecca Schwenk.
21st Century Thinking Skills
Visualizing, inferring, making connections, sequencing and determining main idea.
WA State Learning Standards
(VA:Cr1.1.K) a. Engage in exploration and imaginative play with materials.
(VA:Cr1.2.K) a. Engage collaboratively in creative art-making in response to an artistic problem.
(VA:Cr2.1.K) a. Through experimentation, build skills in various media and approaches to art-making.
(VA:Cr2.2.K) a. Identify safe and non-toxic art materials, tools, and equipment.
(VA:Cr2.3.K) a. Create art that represents natural and constructed environments
(VA:Re7.1.K) a. Identify uses of art within one’s personal environment.
(VA:Re7.2.K) a. Describe what an image represents
(VA:Re8.1.K) a. Interpret art by identifying subject matter and describing relevant details.
(VA:Cn11.1.K) a. Identify a purpose of an artwork.
Arts Integration Opportunities
Writing: have students create a title and story to go with their artwork.
Please note: These lesson plans are intended for non-profit use only. Use of these plans for commercial purposes should give attribution to the Issaquah Schools Foundation and be accompanied by a nominal donation at www.isfdn.org/donate. Thank you.
Fueling Success for Every Student, Every School