loading Skip to Main Content

Wet Felted Germs

Students will learn about the shapes of germs/bacteria and how to wet felt with wool to create “germs” and display them on a microscope “slide.” Recommended for 1st Graders.

Elements of Art

Shape: A flat figure created within joined lines.

Principles of Design

Proportion: Refers to the relative size of parts of a whole (elements within an object). We often think of proportions in terms of size relationships within the human body.
Scale: Scale is the size of an object as it relates to its usual physical size.

Additional Vocabulary

Bacteria: single celled microorganisms.
Binomial Nomenclature: system of naming in which two terms are used to denote a species of living organism.
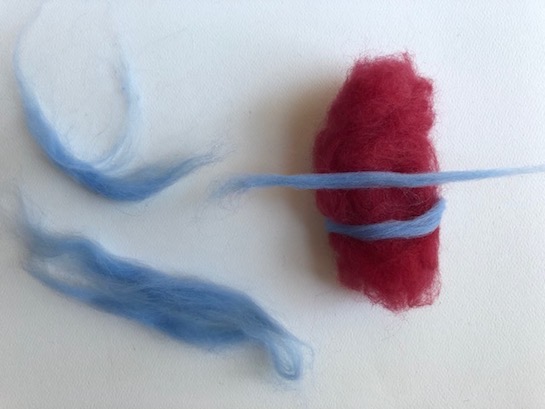
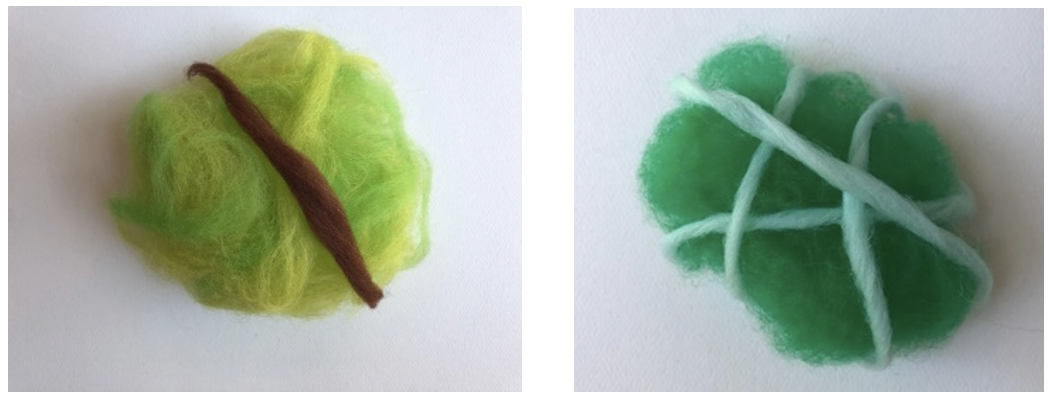
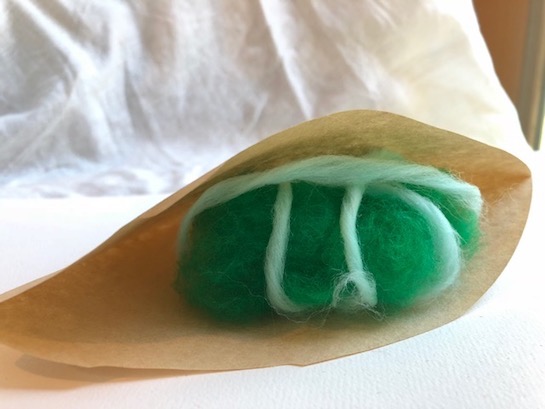
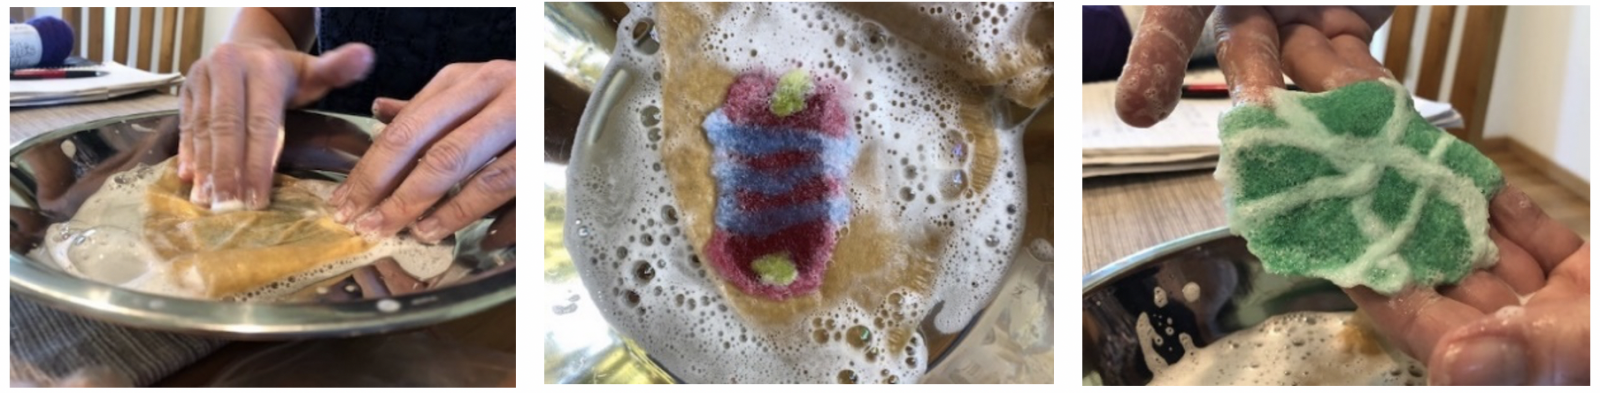
Felting: becoming permanently matted or entangled.
Friction: the resistance that one surface encounters when moving over another.
Sculpture: a three-dimensional form created by an artist.
Slide: a small flat rectangular piece of glass on which specimens can be put to look at under a microscope.
Textile: a type of cloth or woven fabric.
Wool: the fine, soft curly or wavy hair forming the coat of a sheep, goat, or similar animal which is used to make yarn and cloth.
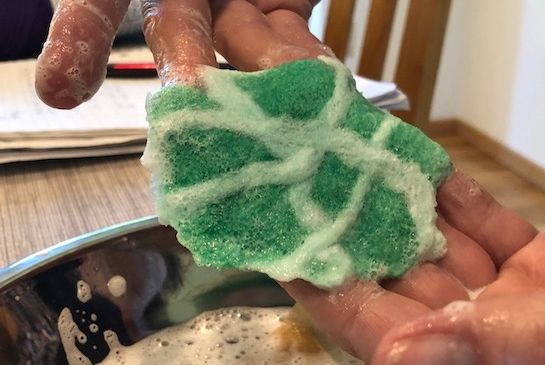
Wool Scales: the overlapping layers of wool at the microscopic level which open up when warm and wet and stick together very tightly.

Materials & Supplies

  • Wool Roving (various colors - .5 oz. per student)
  • Large coffee filters, 2 per student
  • Dish soap
  • Warm water (the warmer it is, the faster the felting will occur)
  • Pie pan, wash bin or plastic plates with lips to keep the water in – 1 per student
  • Squeeze bottles for warm water                
  • Clean fabric towels
  • Clear Acrylic Sheet (.08 thick pre-cut 4”x12” one per student) or clear plastic plates
  • Hot Glue Gun with Sticks or Clear Multipurpose Glue
  • Permanent Markers
  • Microscope
  • Slide (prepared slides with germs if possible)    

Context (History and/or Artists)

Textiles can refer to anything made of a soft, flexible material. Humans have been making textiles from available materials for over 30,000 years. Textiles have been felted, spun, netted, looped, knotted, pressed, knit, crocheted or woven to create cloth which then is made into baskets, blankets, rugs, clothing, homes, decorations, storage and tools. Learn more about the history of textiles in art on the Issaquah Schools Foundation Textiles Reference Page.

Lesson will enrich science germ/bacteria curriculum.
 

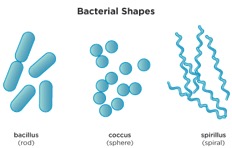
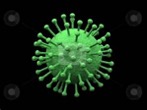
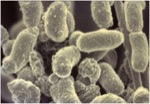
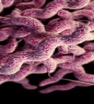
Examples of real germs below, as seen under a microscope. From left to right: Cold Virus (round), Gingivitis/Bad Breath (rod), and C. Coli/Diarrhea (spiral).


Advanced Preparation

This is a wet process.  So, work in an area where getting the floor wet won’t be a problem.
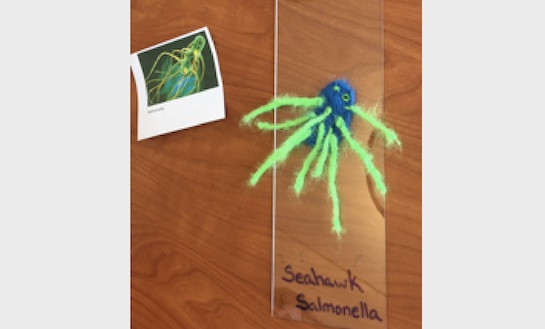
Purchase acrylic sheet at hardware store and have a store employee cut it into 4”x12” rectangles. This will be the “slide” for the felted germs. At most hardware stores, employees will cut acrylic at no additional cost.  Another option is to go to Tap Plastics in Bellevue, they will save scraps for you with advanced notice. If these options don’t work out then you can always just use clear round plastic plates and display the student’s “germs” on the plates like petri dishes. 
Show image of wool under microscope and show the “scales” that stick together when felting.
Check out the book Germs! Germs! Germs!  by Bobbie Katz from the library.

Tips & Tricks 

  • Divide up different colored wools in bags for each table to share.
  • Have a parent volunteer assist with the hot glue gun.
  • Holes (for hanging slides to display) can be carefully drilled into the corners of the acrylic slide prior to the lesson. After the lesson the slides can be tied together with fishing wire and crimps or similar connecting tools to display hanging together.  An inexpensive curtain rod can be mounted to support the slides.

Discussion Points

What do you know about germs?
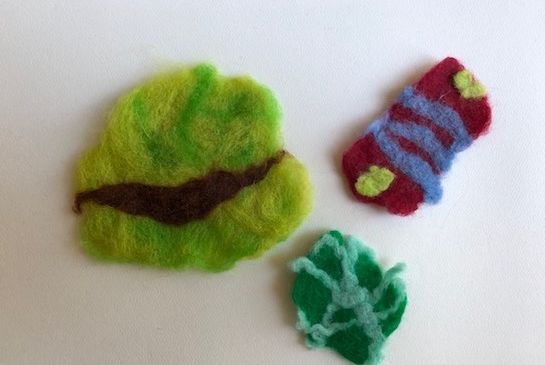
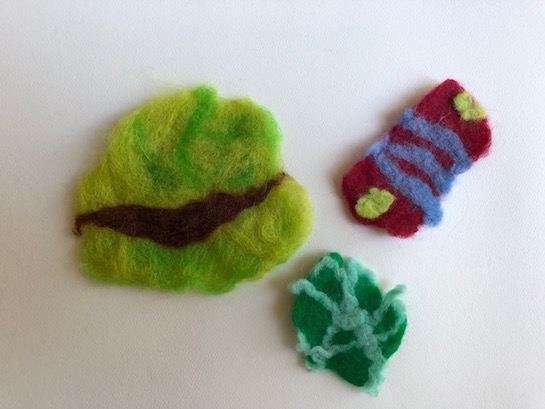
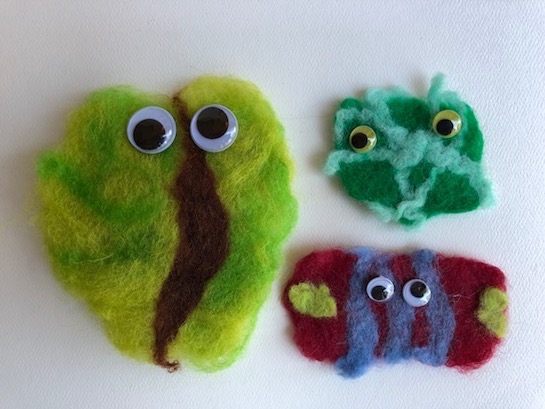
What are the shapes of germs?
Where did this amazing bag of brightly colored wool come from?

Reflection Point (Assessment of Learning Objectives)

Can the students say?
  -  I can name the different germ shapes. 
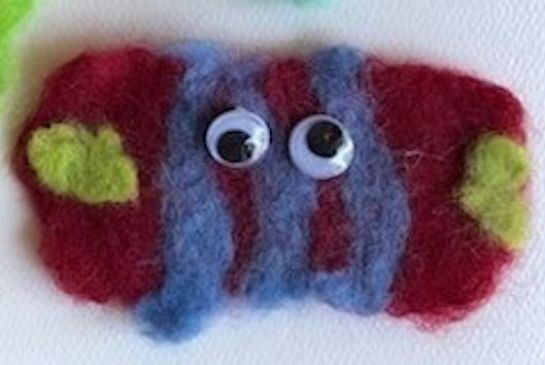
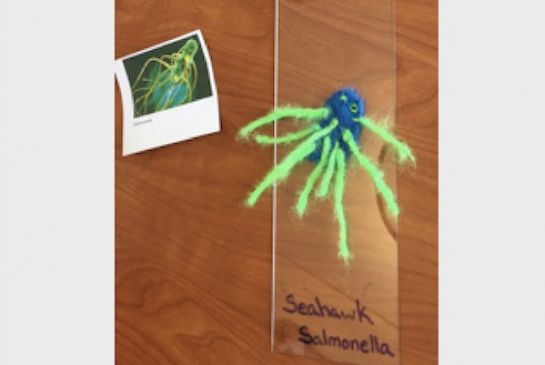
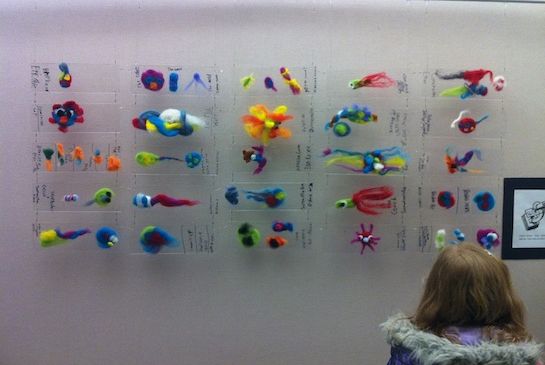
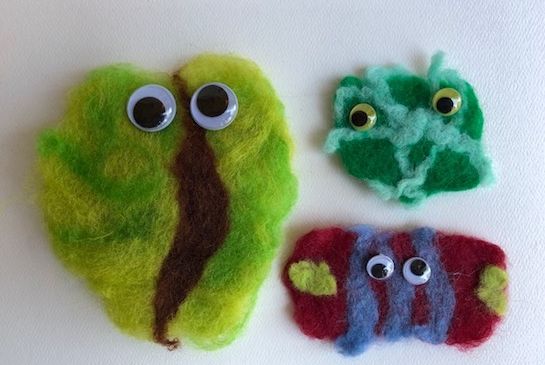
  -  I can create my own germ “slide” by using the felting technique. I can create wool germ sculptures and attach it to the slides.
  -  I can label my germ sculptures using Binomial Nomenclature.

Instructions for Lesson

  1. Observe images of the shapes of germs under a microscope and/or have pictures of enlarged germs on display. Discuss, list and chart several germs and their shapes: round, rod-shaped and spiral. Explain how the germs have no color and the microscope shines a colored light on the specimen for better viewing. 
  2. Notice the names of the germs, two parts that describe the germ or who discovered it.
  3. Observe the image of wool under a microscope.  Notice the “scales” which will open up when warm water and soap is added.  These will "lock" together to become felt.  
  4. Demonstrate how to make each of the shapes. These can be made loosely then added to the pile.
    a) Roll small bits in the palm of your hand to get balls.
    b) Lay down roving in a squiggly line to get spirals.
    c) Roll short logs to create rods.
    d) Colors for details (layered in desired configuration).
    e) Explain that wool shrinks as it felts so you want to make it slightly larger than you think you will need.
  5. Students choose wool colors they would like to use for their germs and create 2-3 germs each a different shape.
  6. Have students create their germ body with details.
    a) Mound of base roving (size of orange).
    b) Remind students that they are creating a flat sheet of felt, so building up their layers unevenly will result in a piece of felt fabric with uneven thickness.
    wet felted shapes for germs
  7. Show students how to place their germ in their coffee filter.
  8. Place the coffee filter into the pie pan.
  9. Add small amounts of warm sudsy water onto the pile and get it all wet by massaging the water into the wool. 
  10. You have created a wet wool sandwich.  Now, keeping that sandwich together, rub the top coffee filter pressing down into the table. Pay attention to the edges.
  11. Make sure you put pressure on all parts of your sandwich at some time, rather than rubbing it in the same places over and over, as the friction is the main catalyst for felting.
    wet felting process
  12. As the students are rubbing their germs have them come up with ideas for naming their germ.
  13. Every now and then, open your sandwich top and peek at how your felt is doing. If it is solid felt it is done; if it is still loose in places, just cover it back up and keep rubbing in those places.
  14.  If the water starts to get chilly, warm it up with some hot water. You need to keep it warm because this keeps the wool scales opened up, allowing it to tangle/felt faster and easier. 
  15. You also want to keep your sandwich wet and soapy throughout the process (a squeeze bottle with hot soapy water helps).
  16. Once they are happy with their felted work, it should be rinsed in cool water to help stop the felting process.  Then place it between two towels and press it dry.  It can take some time for heavy felt to completely dry out, on the order of a day or two.
  17. Students can name their germs using ‘Binomial nomenclature’ – a name with two parts that describes the germs or who discovered it.  The germ names can be scientific or fictional.
  18. When germs are complete, assist students to hot glue eyes on their germs and glue them onto their acrylic “slide.” 
       
  19. At one end of the slide the student will, with permanent marker, write their name and the name of their germs.

References and Attributions

Lesson by Elizabeth Jackson. Book: Germs! Germs! Germs! By Bobbie Katz

Notes for Educators

21st Century Thinking Skills
Observing, cause and effect, creating.
Students will compare and contrast the different shapes and sizes of the germ specimens.
Students will use visual observation, visualization and decision-making skills by observing germs and then creating their own representational germs made from the wool felting technique.

WA State Learning Standards
(VA:Cr1.1.1) a. Engage collaboratively in exploration and imaginative play with materials.
(VA:Cr1.1.4) Brainstorm multiple approaches to a creative art or design problem.
(VA:Cr1.2.1) a. Use observation and investigation in preparation for making a work of art
(VA:Cr1.2.4) a. Collaboratively set goals and create artwork that is meaningful and has purpose to the makers.
(VA:Cr2.1.1) a. Explore uses of materials and tools to create works of art or design.
(VA:Cr2.2.1) a. Demonstrate safe and proper procedures for using materials, tools, and equipment while making art.
(VA:Cr3.1.1) a. Use art vocabulary to describe choices while creating art.
(VA:Pr5.1.1) a. Ask and answer questions such as where, when, why, and how artwork should be prepared for presentation or preservation.
(VA:Re7.2.1) a. Compare images that represent the same subject.

Arts Integrations Opportunities
Science, Health
. This lesson directly connects to science curriculum.  Students will learn about microscopes, scientific observation, and germ shapes.  The teacher can teach more in-depth understanding of germs, where they come from and how they work as it relates to heath and the biology. 

Please note:  These lesson plans are intended for non-profit use only. Use of these plans for commercial purposes should give attribution to the Issaquah Schools Foundation and be accompanied by a nominal donation at www.isfdn.org/donate. Thank you.

Donate Now

Artistic Support Reference Materials

Loading...
Loading

Fueling Success for Every Student, Every School